> ## Documentation Index
> Fetch the complete documentation index at: https://docs.chkk.io/llms.txt
> Use this file to discover all available pages before exploring further.
# Custom Steps
> A brief description, use-case, and usage instructions of the Add/Edit/Delete Custom Steps feature
Chkk's **Add/Edit/Delete Custom Steps** feature lets users embed their organization's internal processes into any Upgrade Assessment, Upgrade Template, or Upgrade Plan. This ensures every upgrade—across one or multiple clusters—follows the same best practices, compliance checks, and change-management guidelines. Because these custom steps carry forward from the template to each new Upgrade Plan, your team can delegate tasks in parallel without recreating instructions. Plus, you can still tailor steps for specific clusters even after a plan is instantiated, making it easy to address unique requirements.
This flexible capability fosters the reuse of best practices, retains institutional knowledge, and standardizes workflows—allowing teams to align quickly on operational details and speed up upgrades across the environment.
## Usage
The provided steps also apply to Upgrade Assessments, Cluster Upgrade Plans, Project Upgrade Templates,
and Project Upgrade Plans.
Below are the instructions for **adding, editing, and deleting custom steps** in an Upgrade Template.
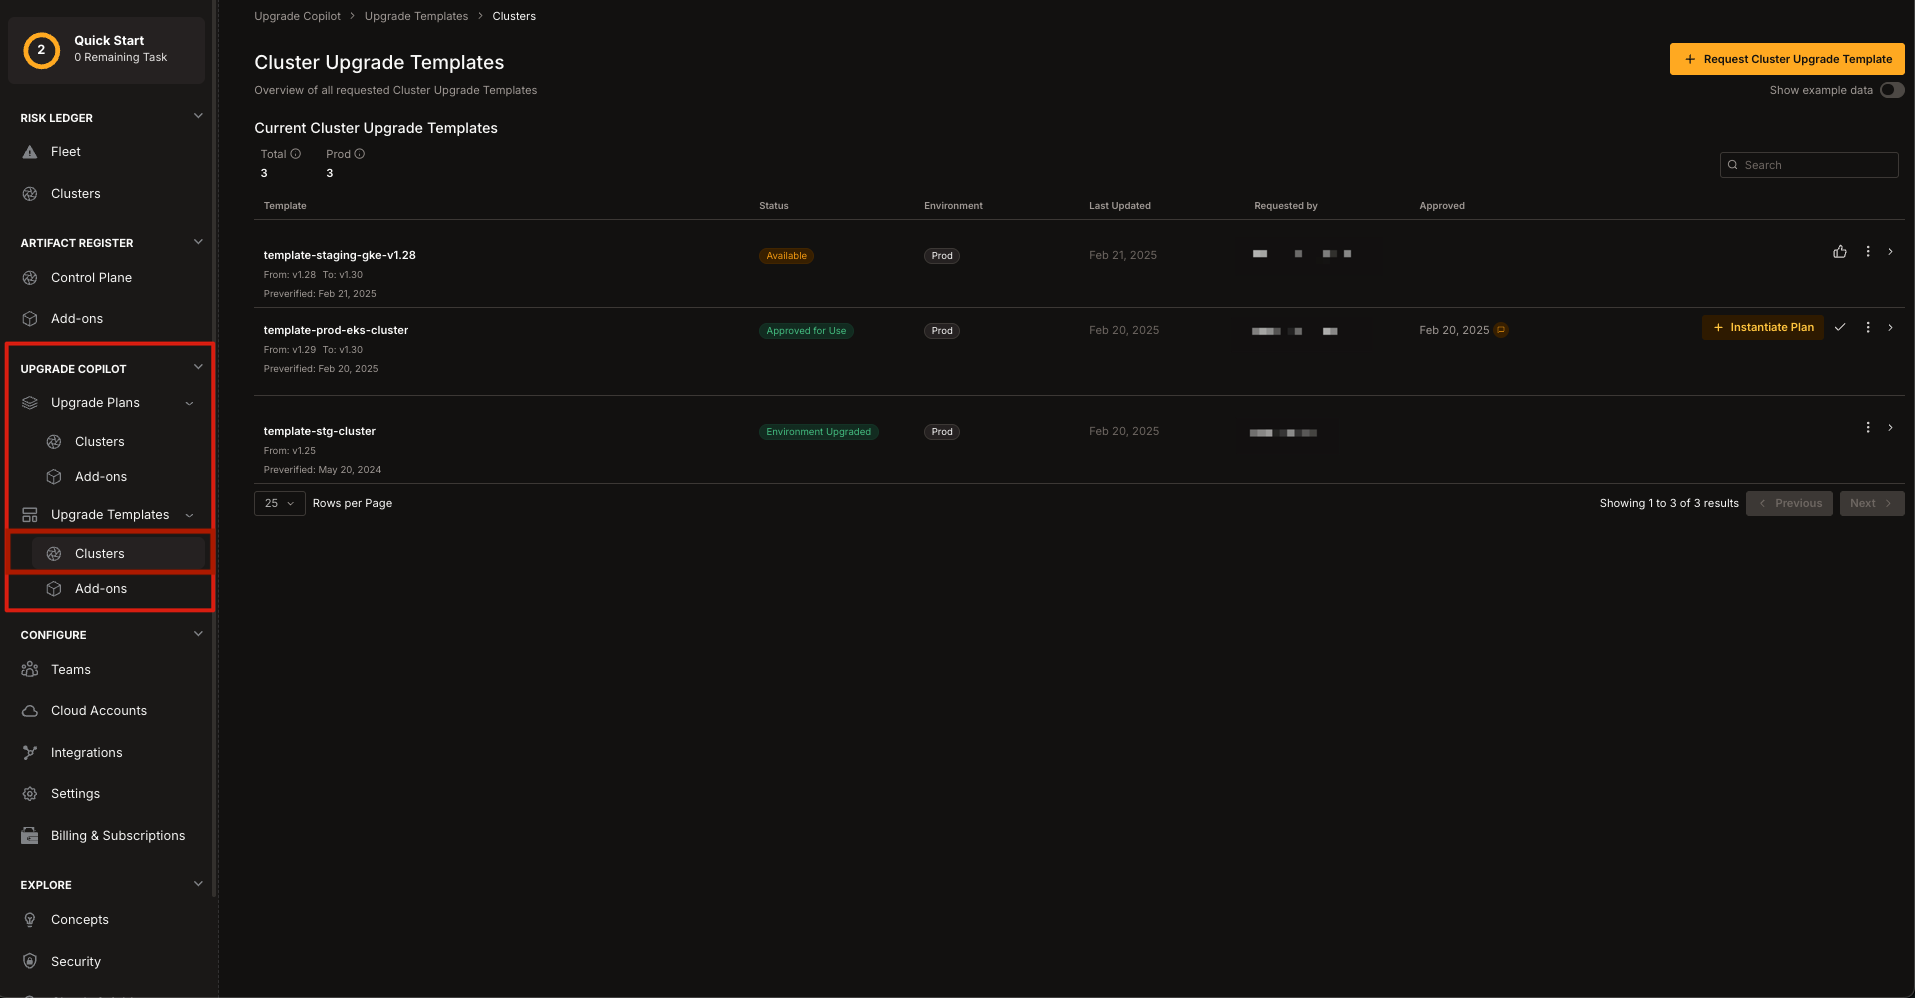
1. In the **Chkk Dashboard**, expand **Upgrade Copilot** on the left menu.
2. Click **Upgrade Templates** and then **Clusters**.
3. You will see a list of all existing **Cluster Upgrade Templates**.
 1. Select the desired **Cluster Upgrade Template**.
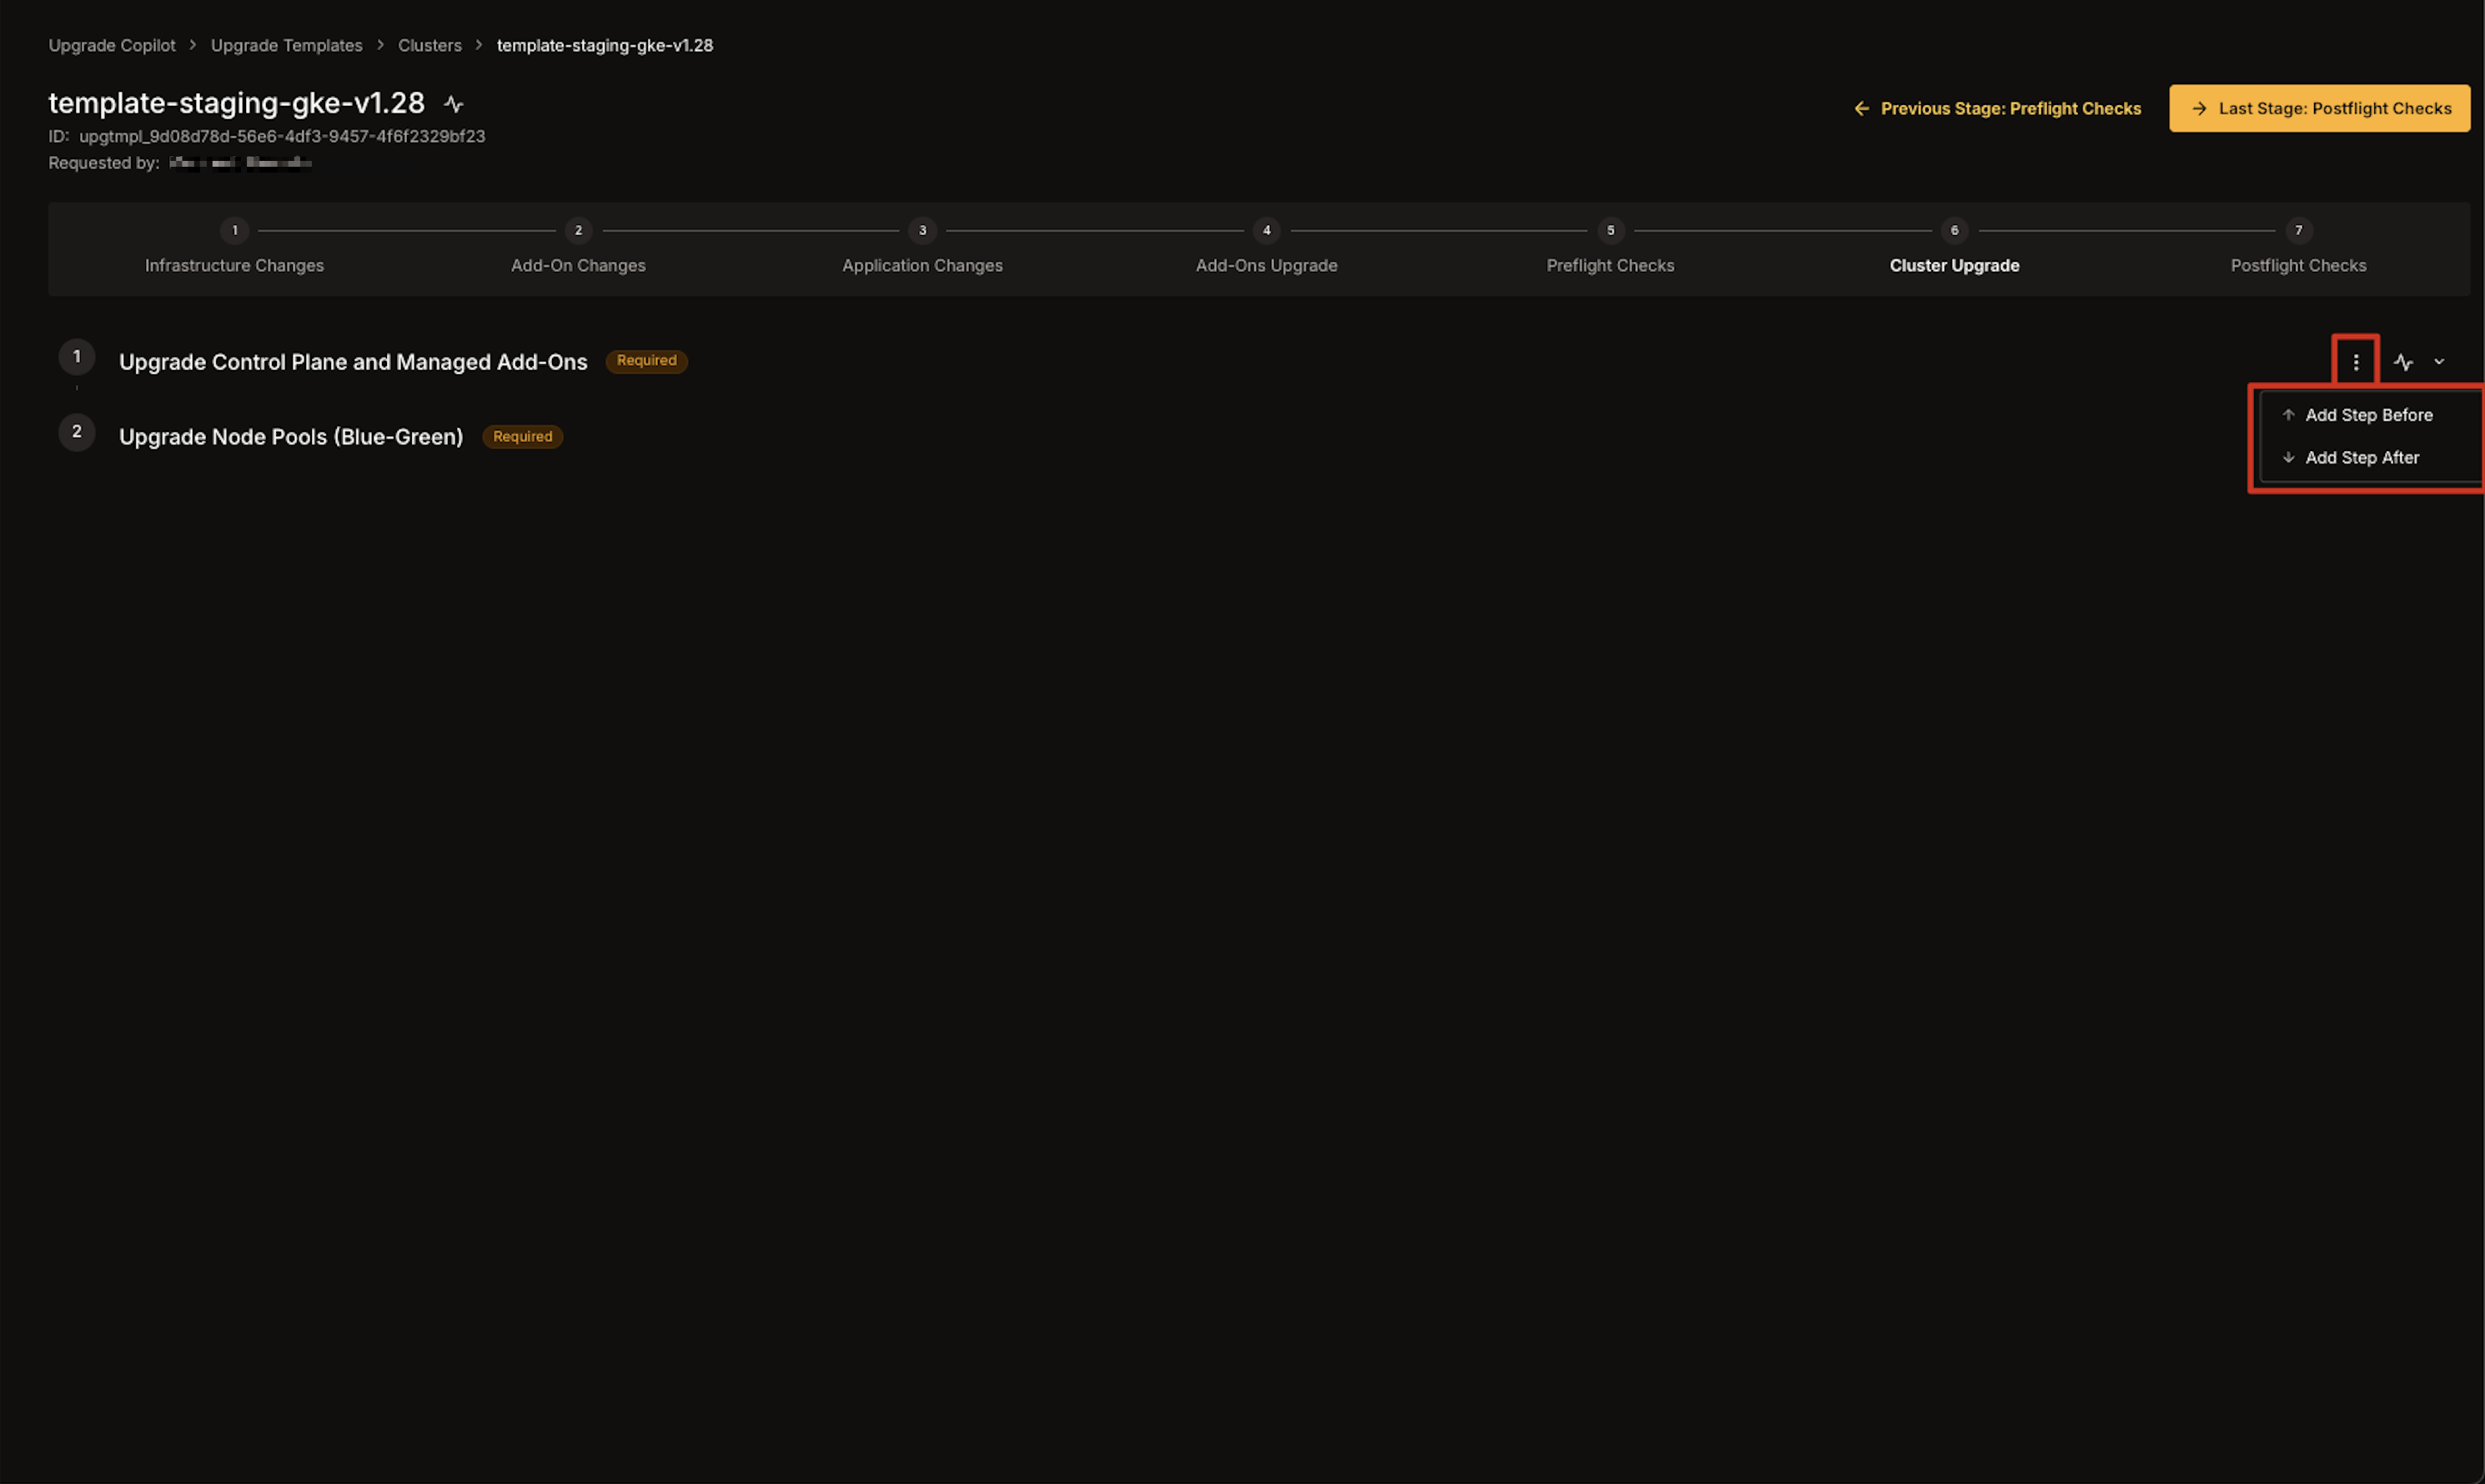
2. Select the **three dots** icon on the right of any step to either **Add a step Before** or **Add a step After** the currently selected step.\\
1. Select the desired **Cluster Upgrade Template**.
2. Select the **three dots** icon on the right of any step to either **Add a step Before** or **Add a step After** the currently selected step.\\
 3. A **modal** will appear where you can fill in:
* **Title**: The name of the custom step.
* **Badge**: A tag or label displayed next to the step.
* **Required**: Checkbox to mark the step as **required** or **optional**.
* **Write/Preview**: Use the Markdown editor and preview window to craft the step's content.\\
3. A **modal** will appear where you can fill in:
* **Title**: The name of the custom step.
* **Badge**: A tag or label displayed next to the step.
* **Required**: Checkbox to mark the step as **required** or **optional**.
* **Write/Preview**: Use the Markdown editor and preview window to craft the step's content.\\
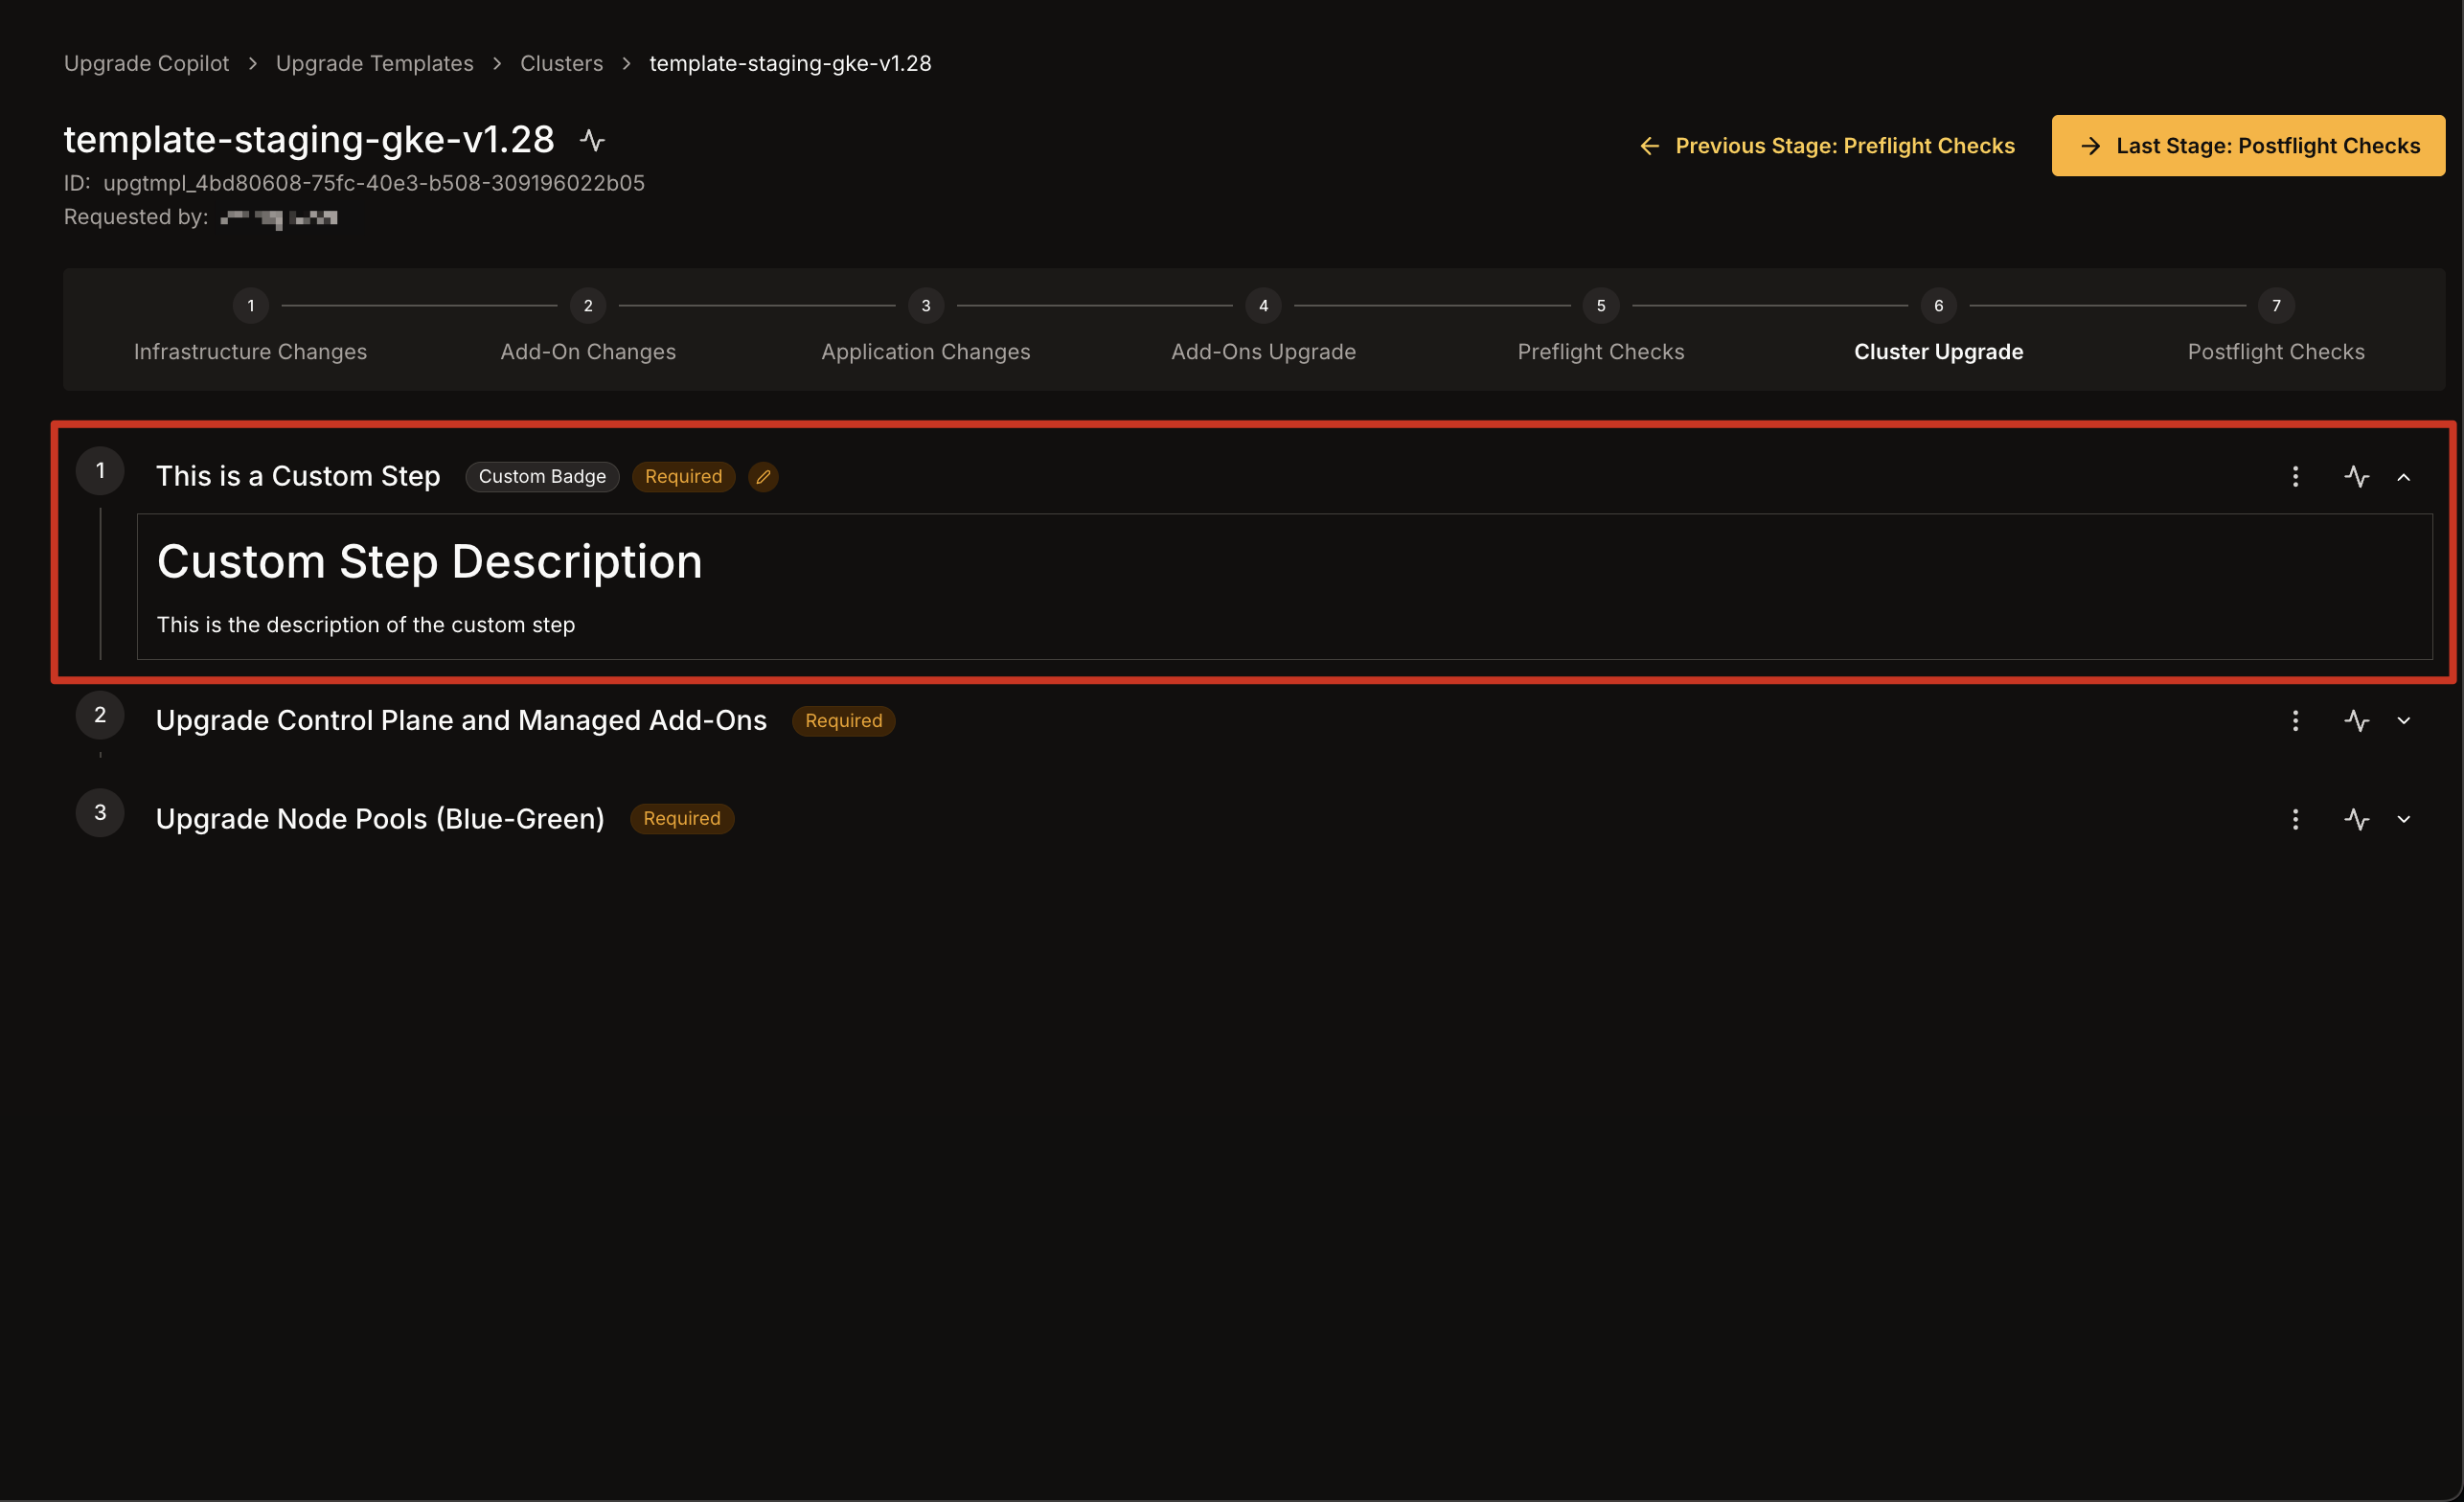
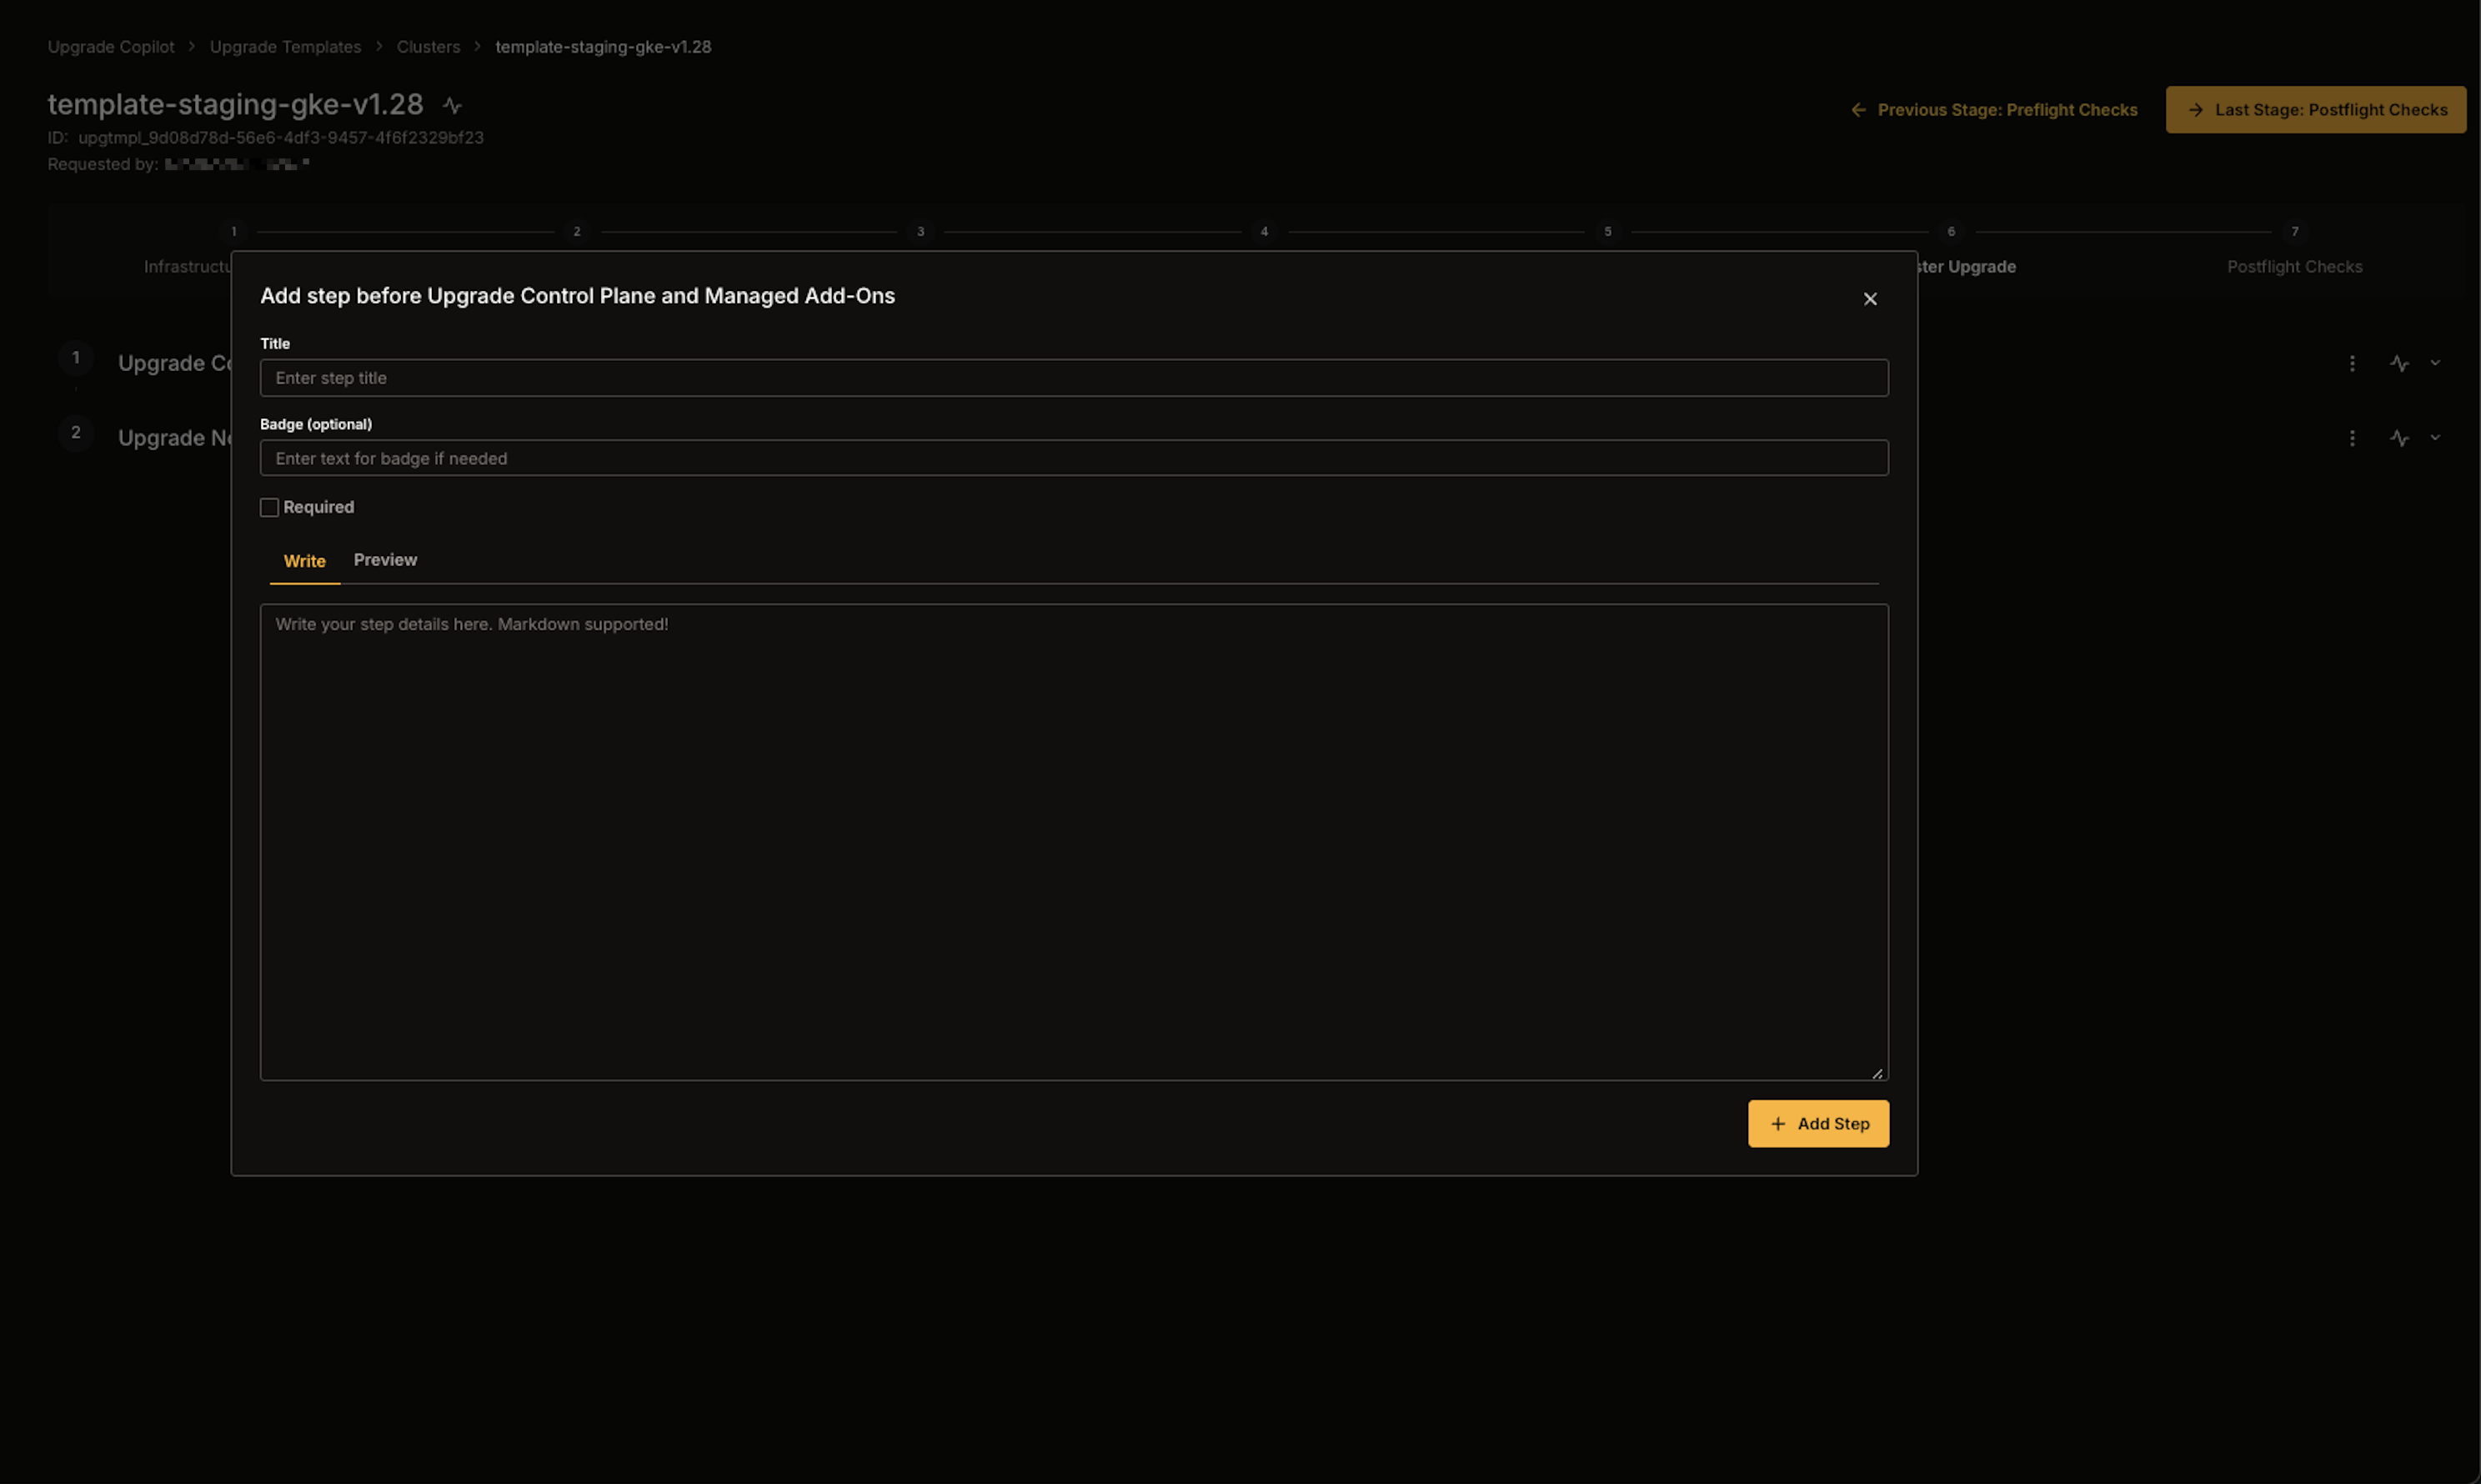 4. Click **Add Step** to confirm and insert the new custom step into the current stage.
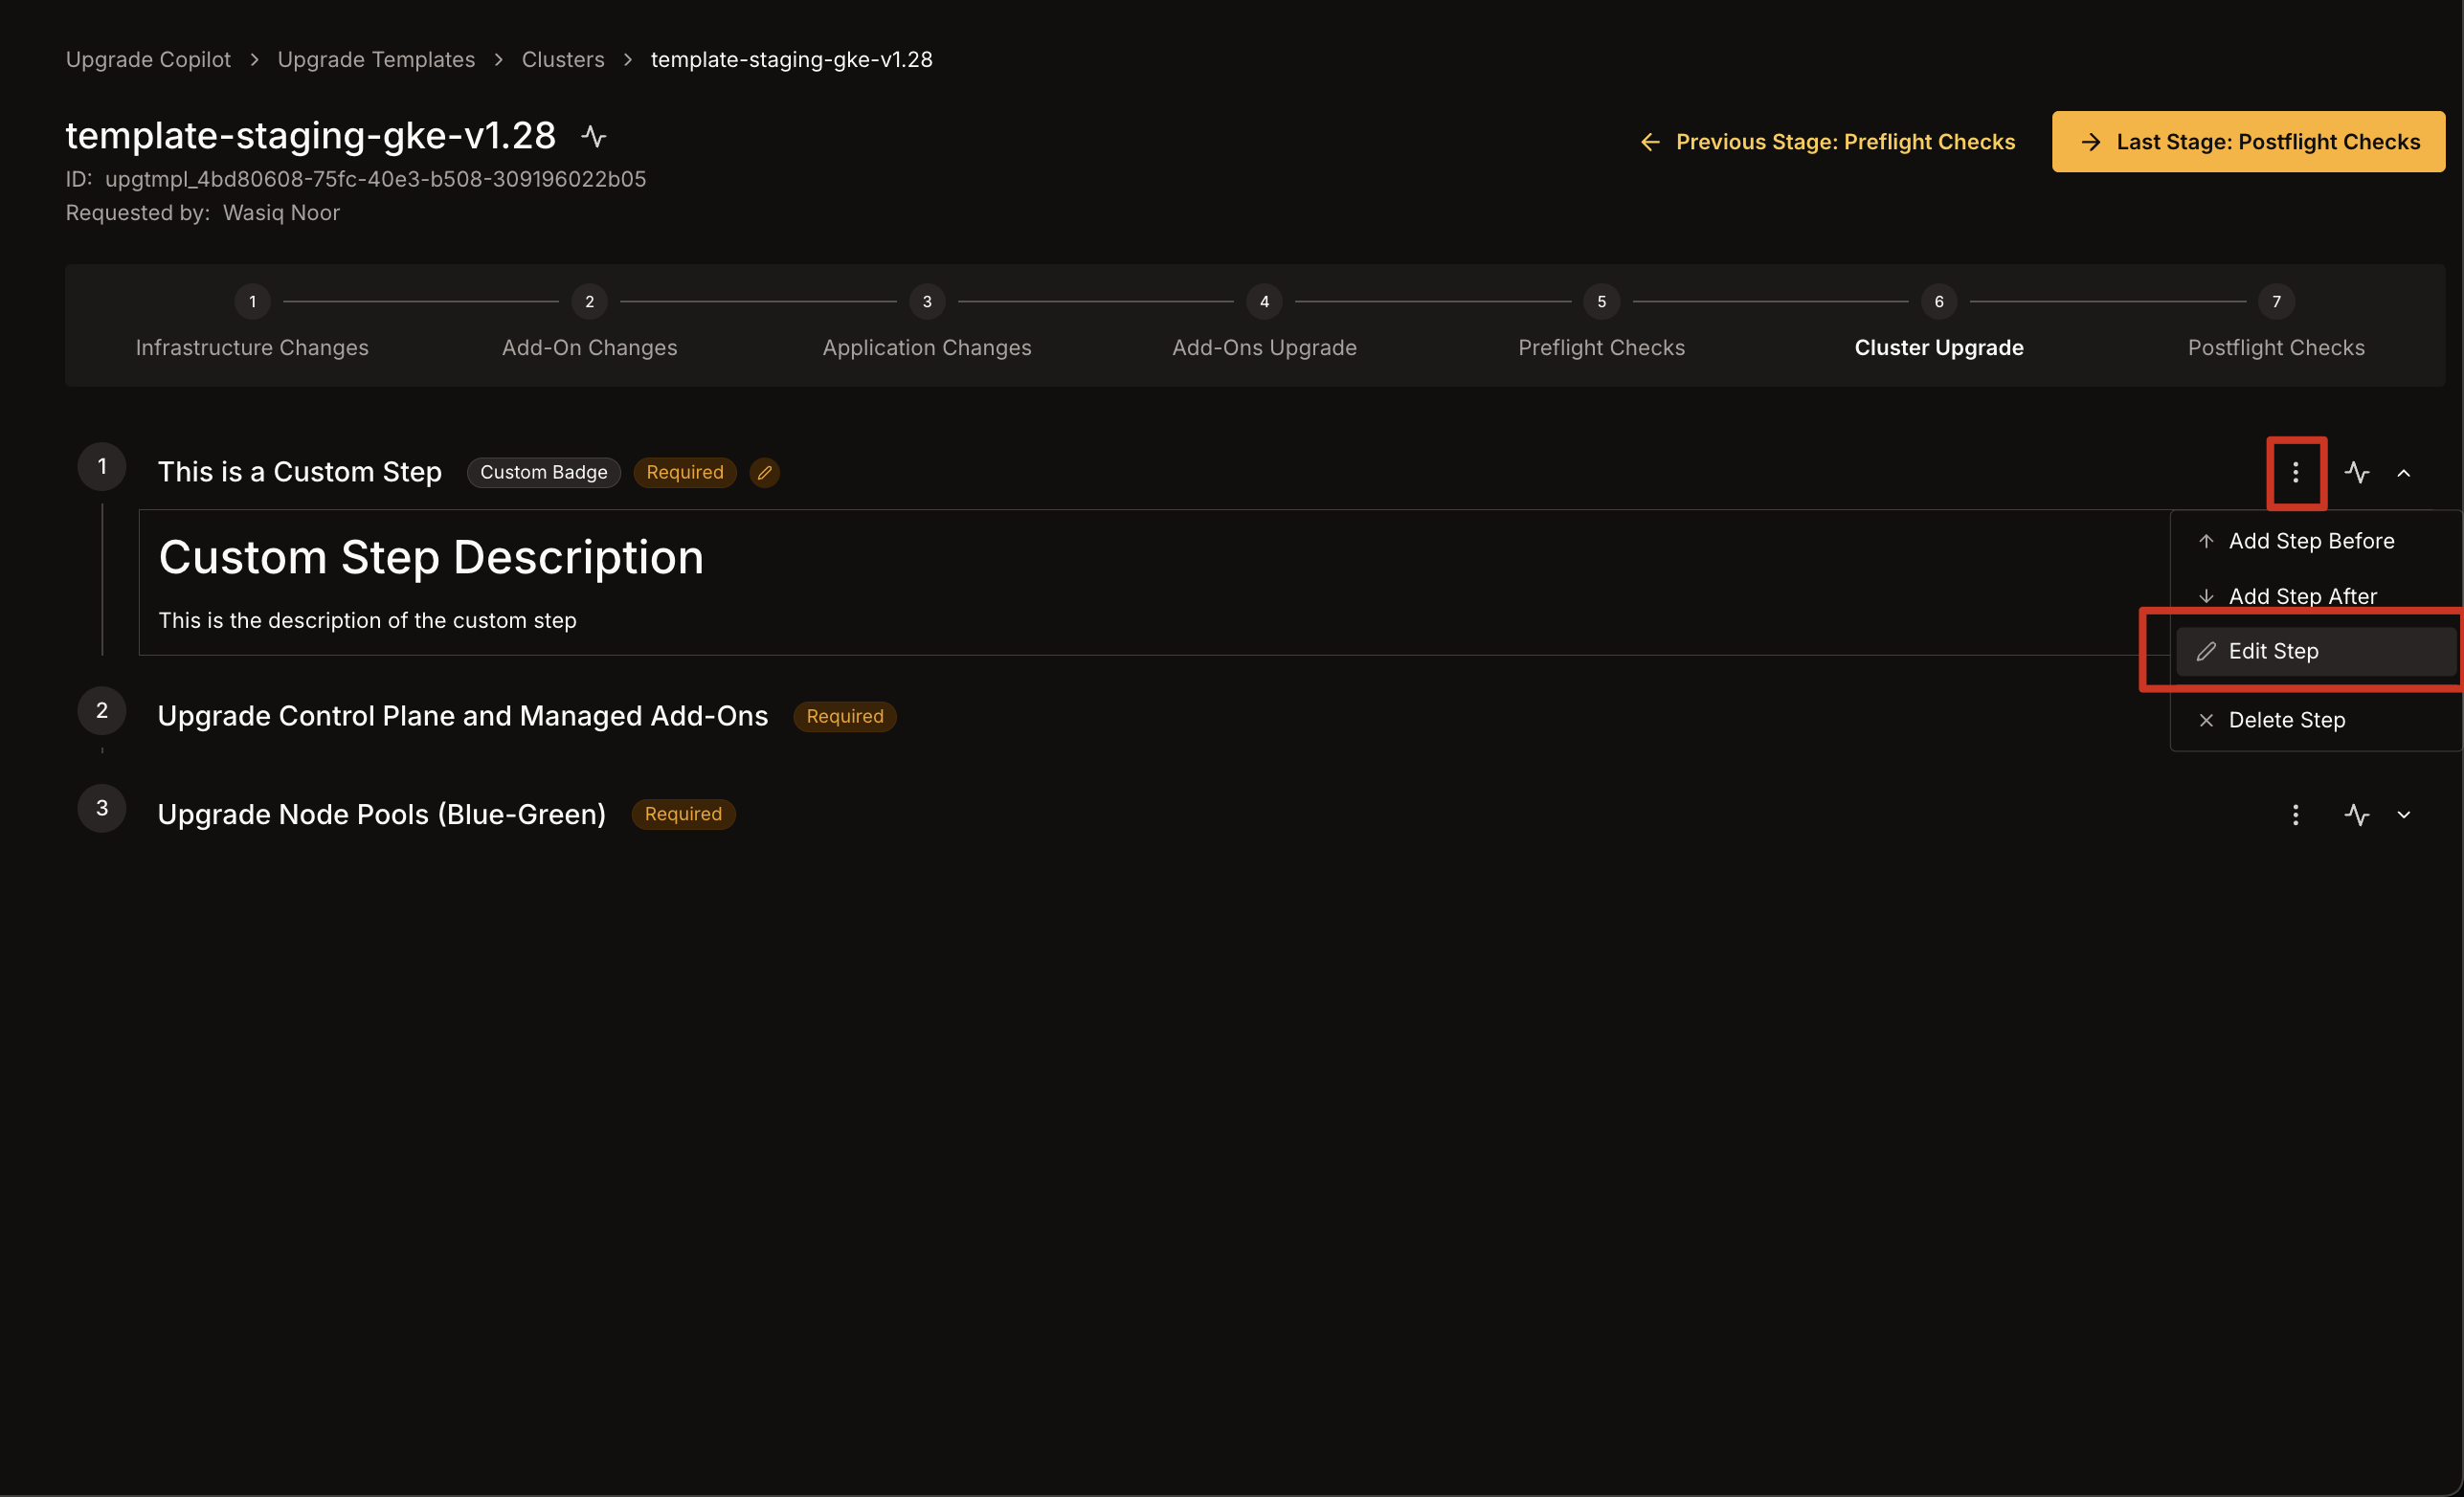
 1. Click the **three dots** icon on the right of the custom step you wish to modify.
* Select **Edit Step** from the dropdown.\\
1. Click the **three dots** icon on the right of the custom step you wish to modify.
* Select **Edit Step** from the dropdown.\\
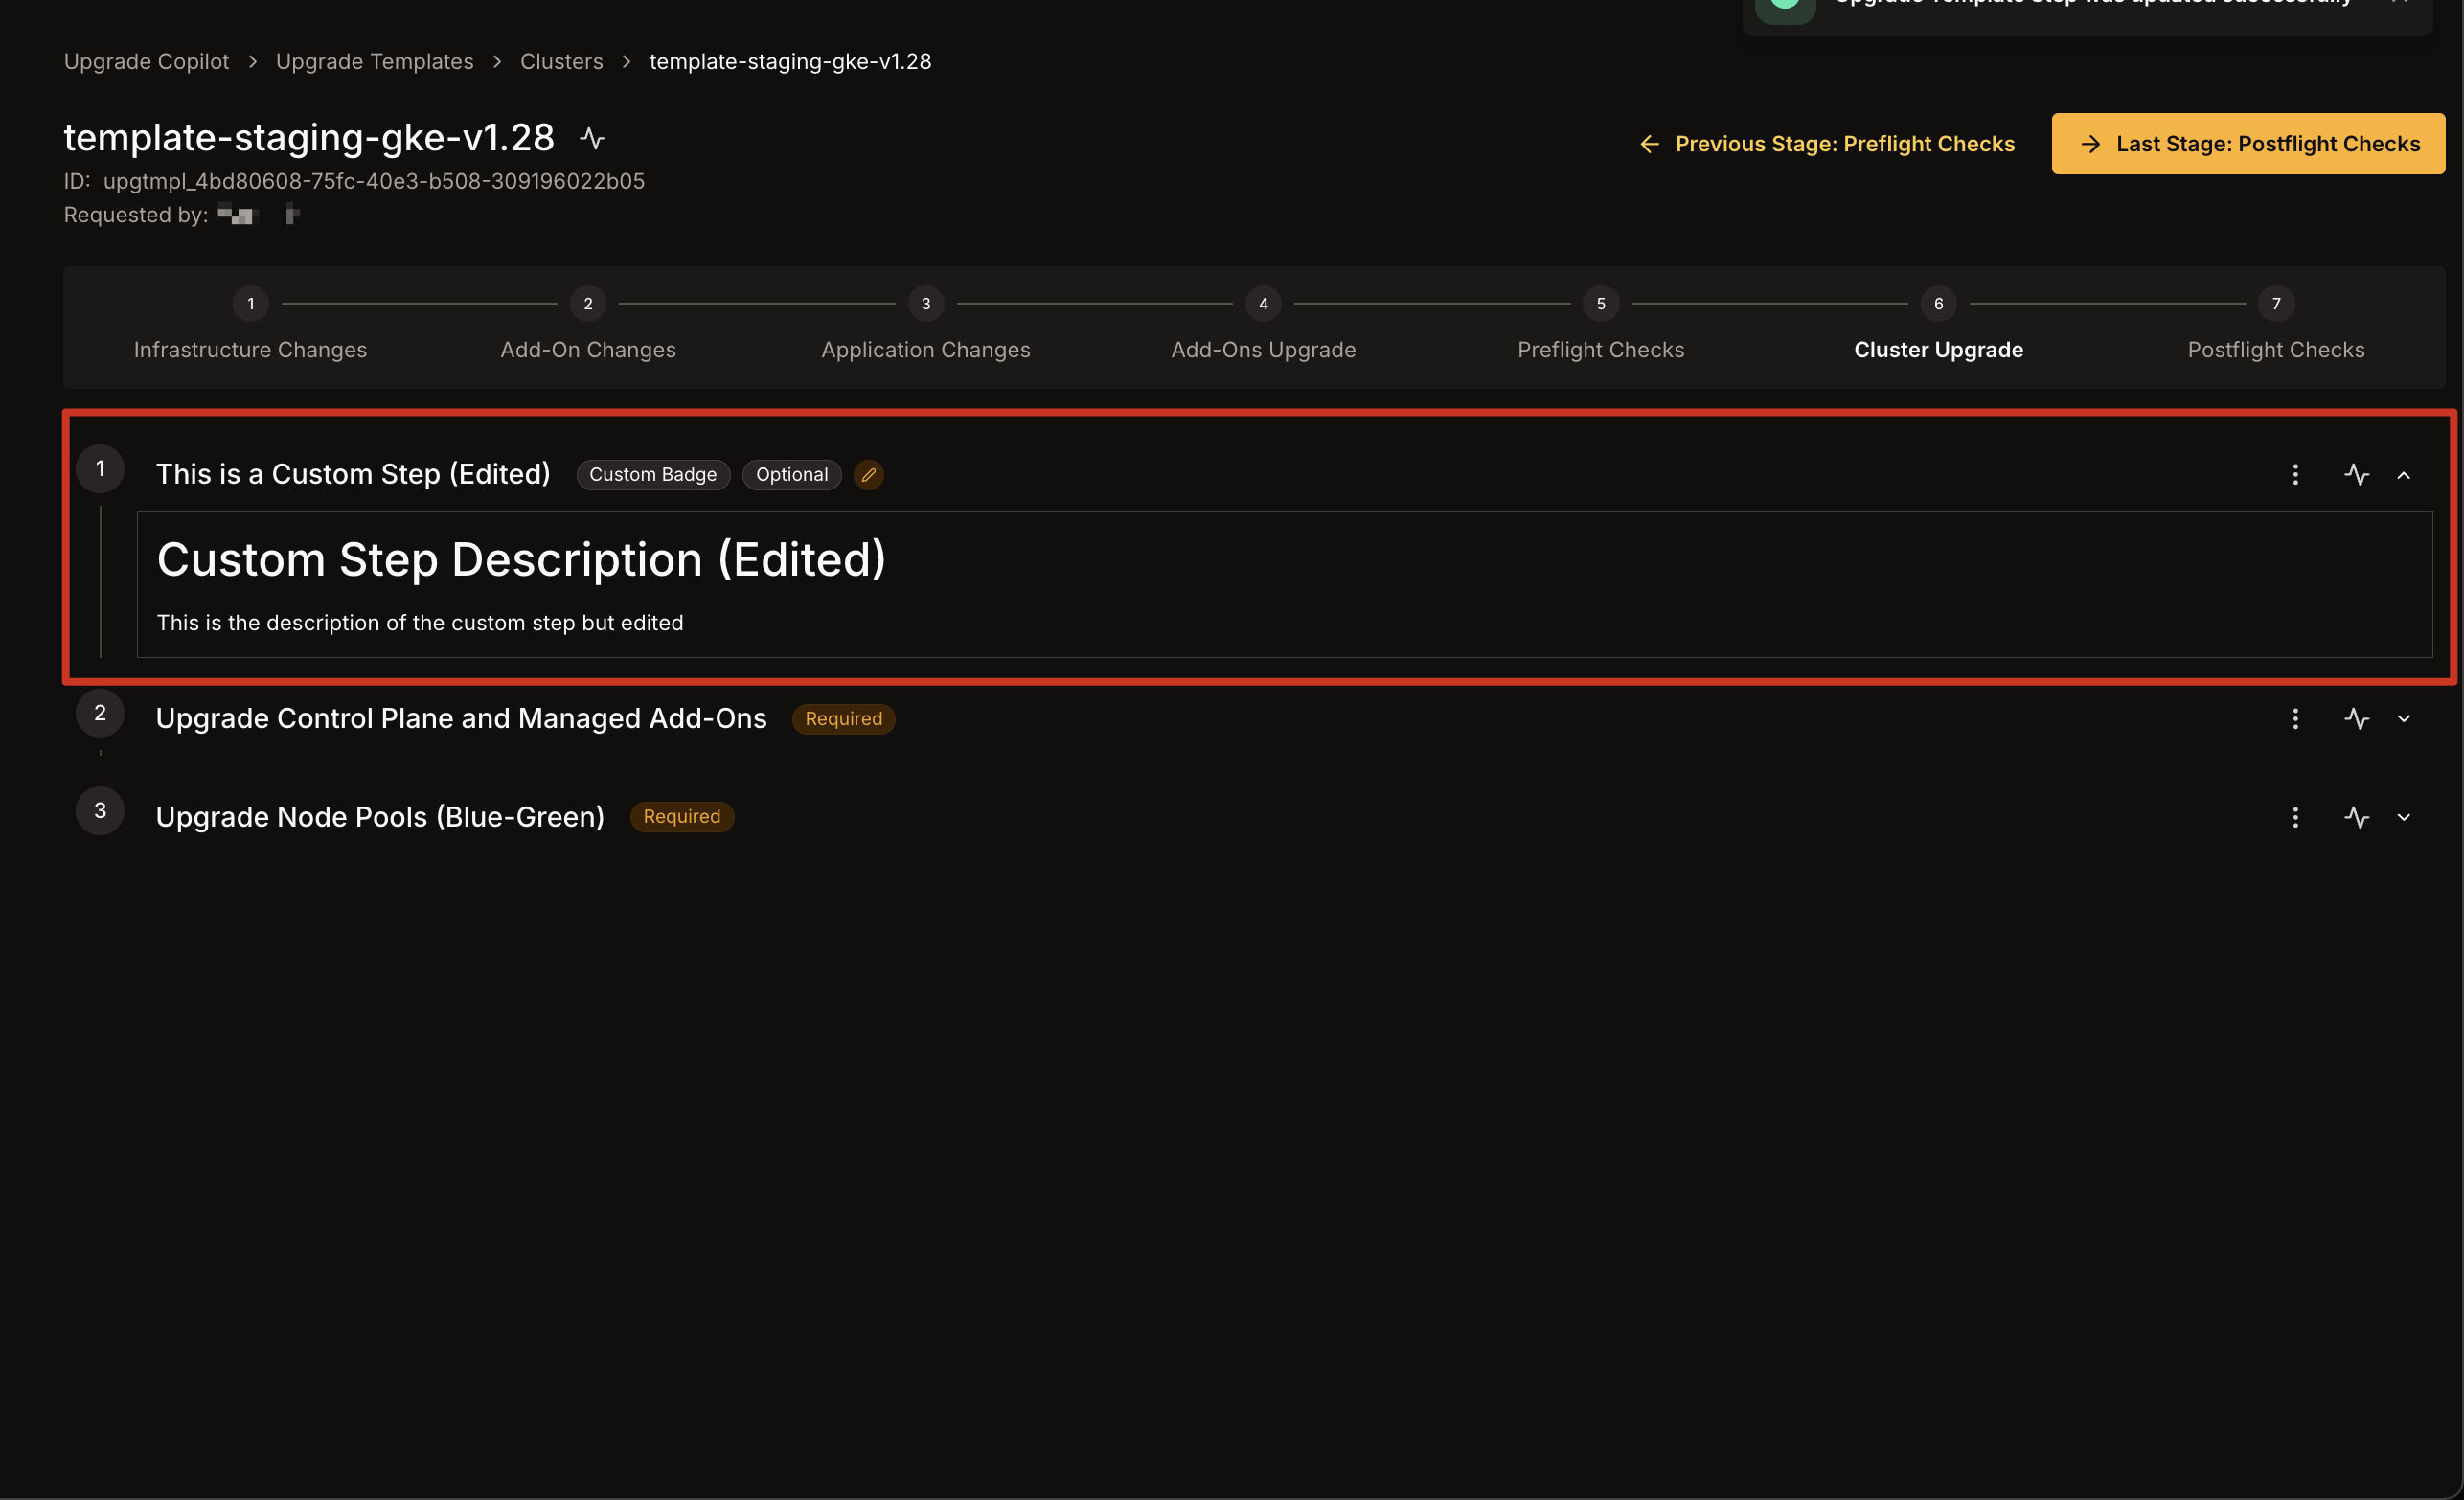
 2. A modal appears with the current details of the step (title, badge, etc.).
3. Make the necessary changes and click **Update Step** to save your edits.\\
2. A modal appears with the current details of the step (title, badge, etc.).
3. Make the necessary changes and click **Update Step** to save your edits.\\
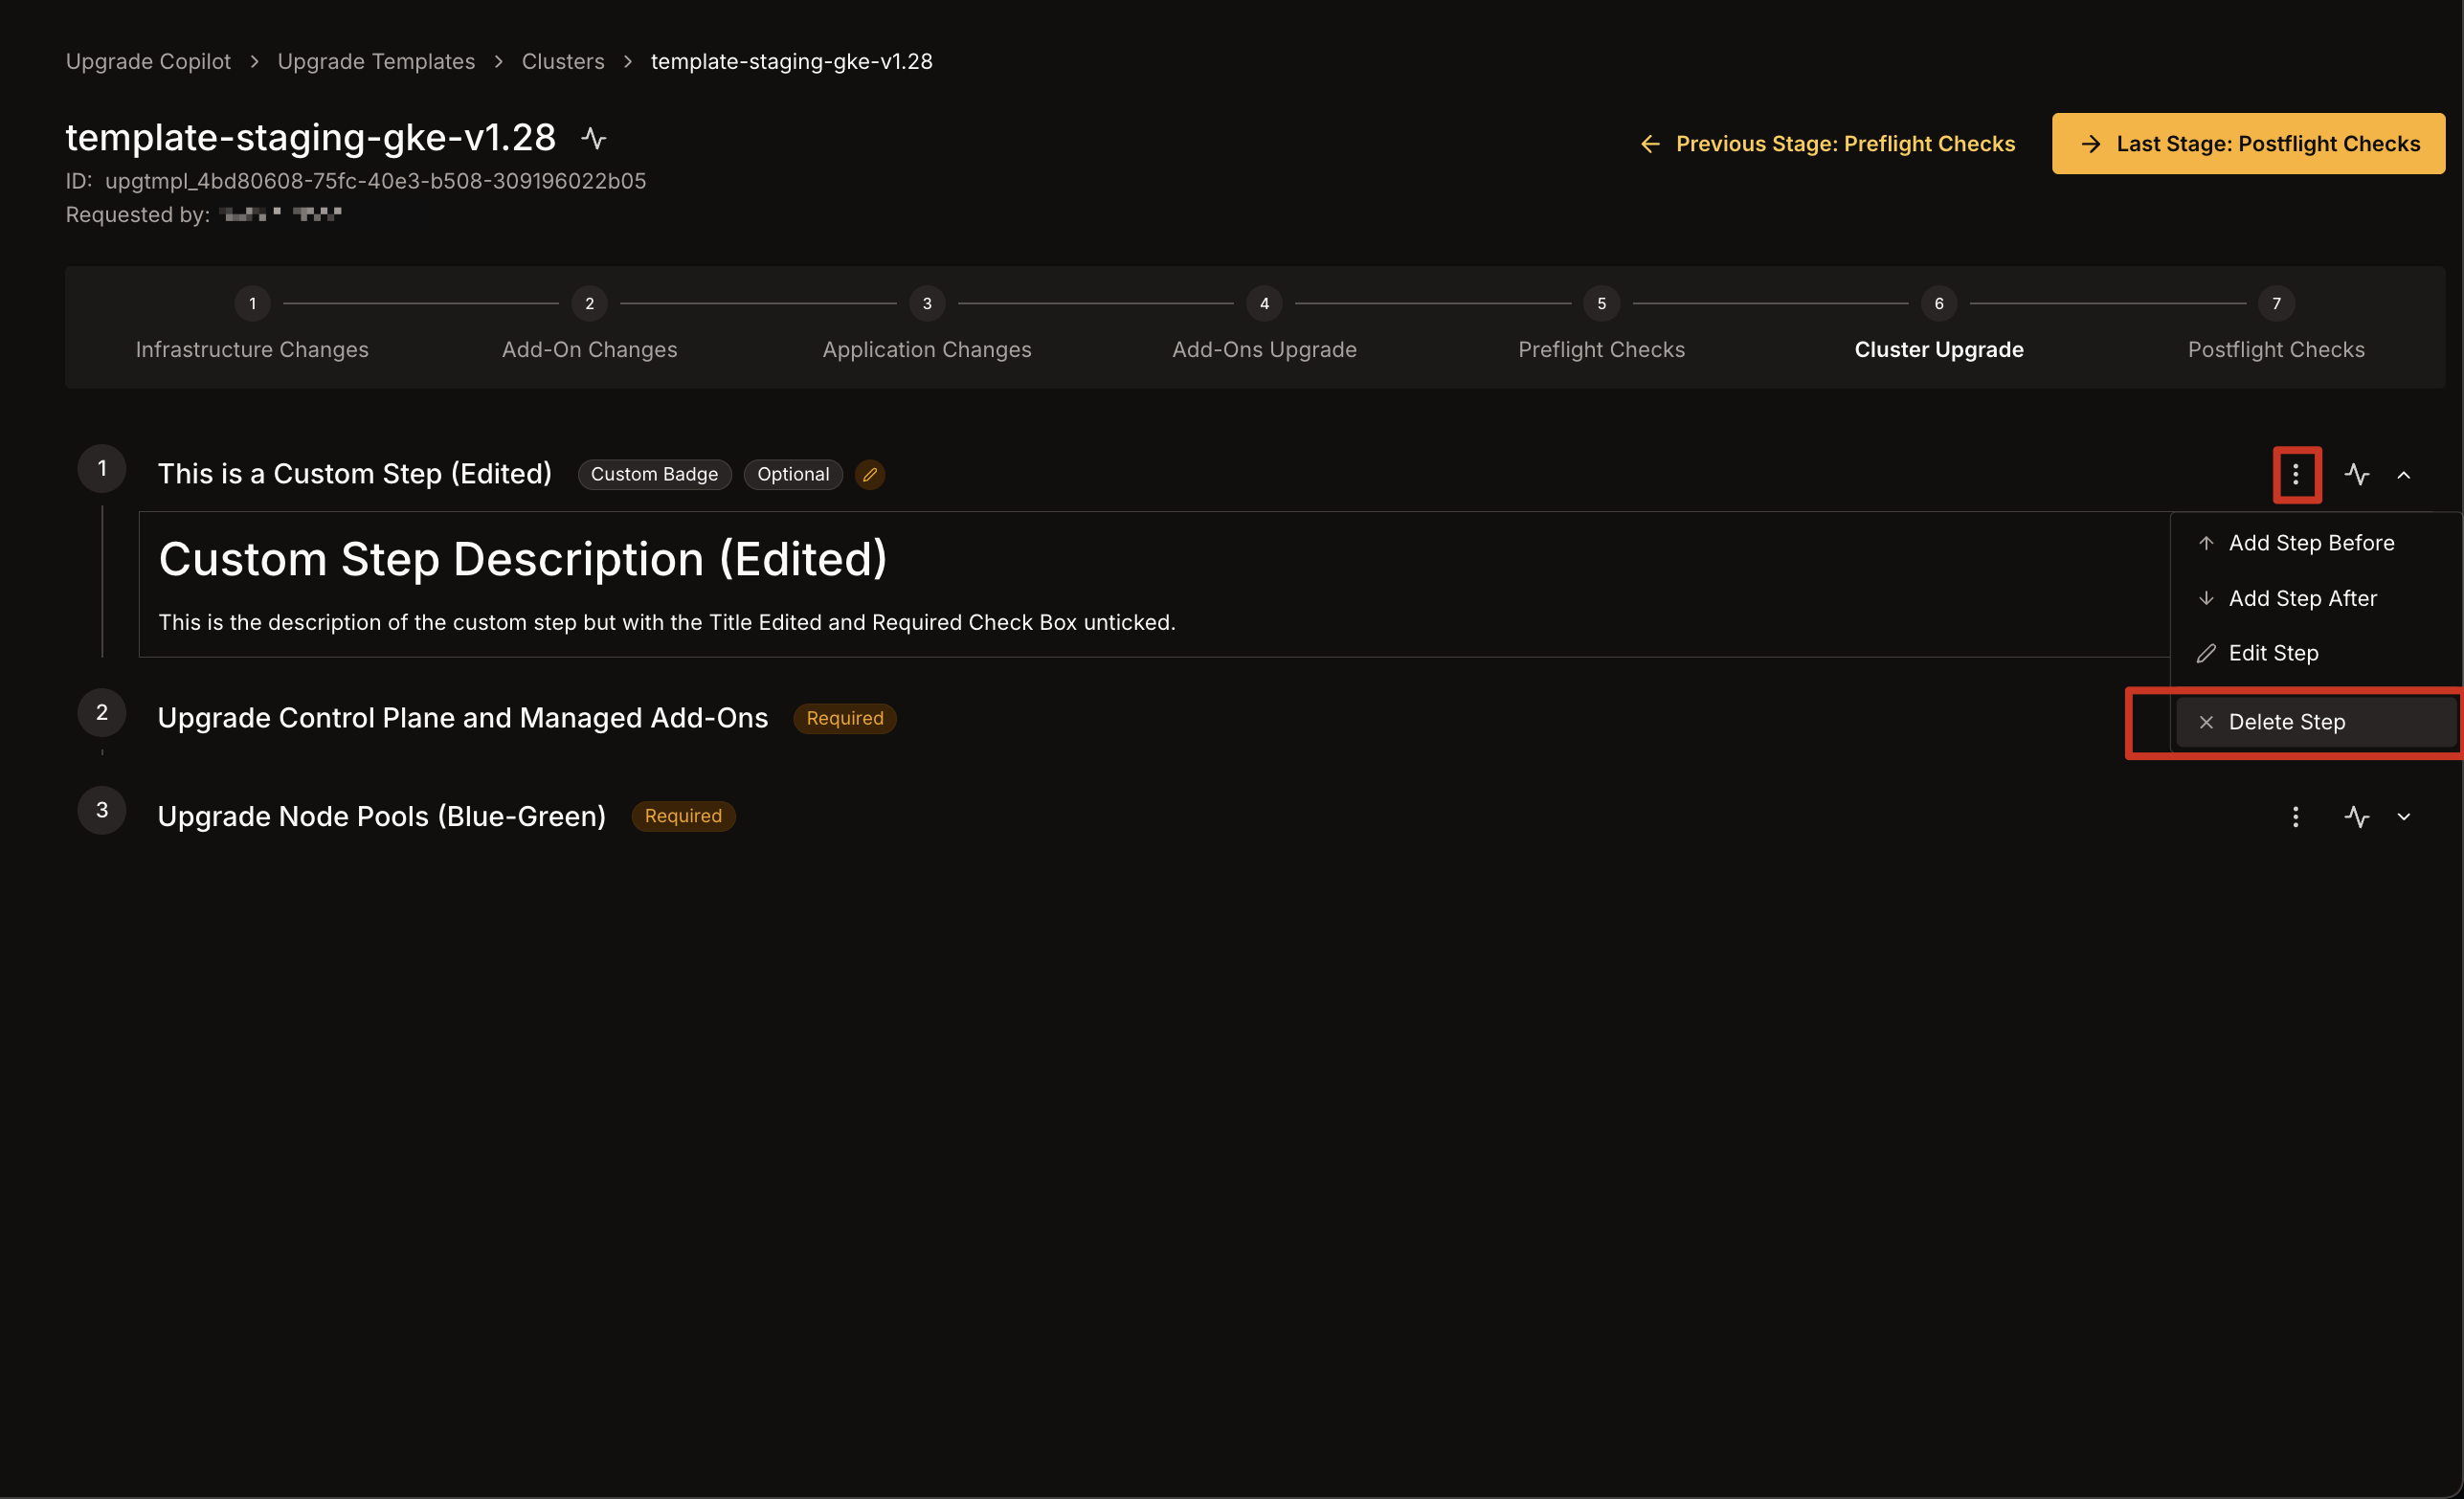
 1. Click the **three dots** icon on the right of the custom step you want to remove.
* Select **Delete Step** from the dropdown.\\
1. Click the **three dots** icon on the right of the custom step you want to remove.
* Select **Delete Step** from the dropdown.\\
 2. A confirmation modal will prompt you to confirm the deletion.
3. Click **Delete Step** to permanently remove the custom step from the selected stage.
2. A confirmation modal will prompt you to confirm the deletion.
3. Click **Delete Step** to permanently remove the custom step from the selected stage.