> ## Documentation Index
> Fetch the complete documentation index at: https://docs.chkk.io/llms.txt
> Use this file to discover all available pages before exploring further.
# Cloud Connector
> An overview of the Chkk Cloud Connector
## Overview
### What is a Chkk Cloud Connector?
**Chkk Cloud Connector** is a secure, read-only integration that fetches relevant resource data from your cloud environment and correlates it with your Kubernetes clusters. By focusing on resources that affect — or are affected by — your clusters (e.g., security groups, IAM roles, networking settings), the Connector facilitates a unified view of your infrastructure. This insight helps detect potential incompatibilities and misconfigurations early, resulting in a more stable and secure environment.
### Supported Cloud Service Providers
Chkk supports connecting to the following major CSPs:
* **AWS** (Amazon Web Services)
* **GCP** (Google Cloud Platform)
* **Azure** (Microsoft Azure)
## Permissions
Chkk Cloud Connector operates under the principle of least privilege, utilizing read-only credentials to access only the necessary metadata in your cloud environment. This restricted, non-intrusive access allows Chkk to accurately map your configurations and deliver tailored guidance for upgrades and operational best practices. By granting the minimal permissions required, you maintain a strong security posture while benefiting from insights that reflect the actual state of your environment.
All IAM policies and service accounts associated with the Chkk Cloud Connector remain under your direct control. You can modify, revoke, or remove these permissions at any time to align with your organization's security and compliance requirements.
## Setup Guide
This guide walks you through installing a Chkk Cloud Connector for **AWS**, **GCP**, or **Azure**.
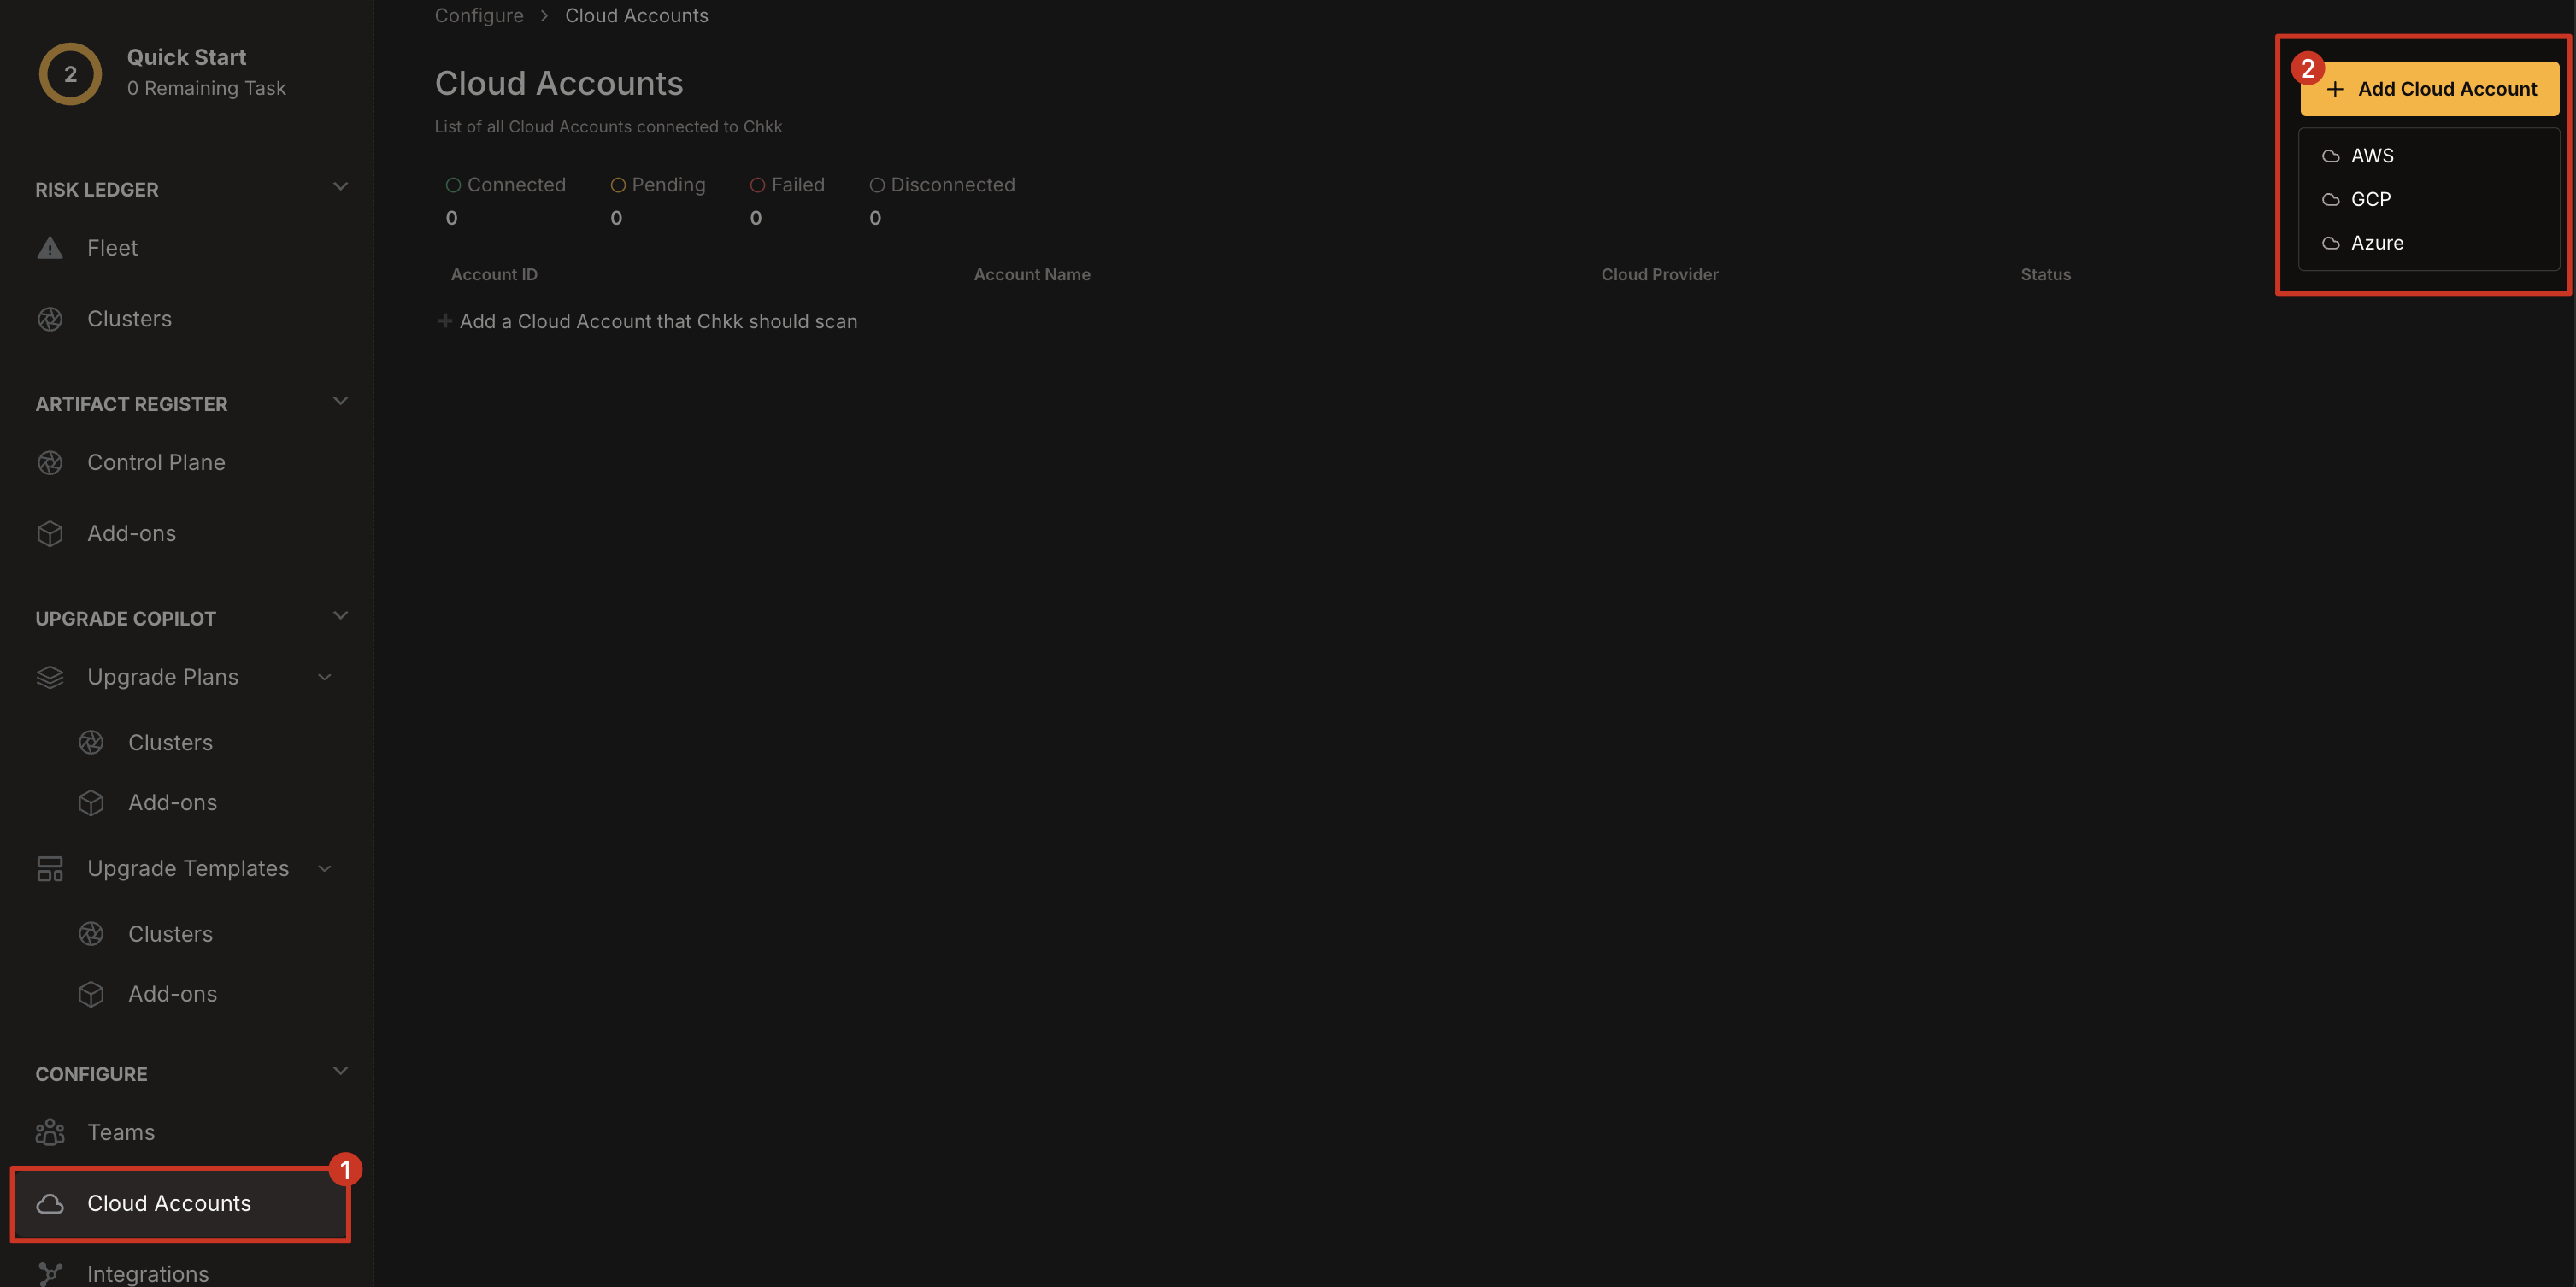
1. In the **left-hand column** of the **Chkk Dashboard**, expand **Configure** and click **Cloud Accounts**.
2. In the top-right corner, click **Add Cloud Account**.
3. From the dropdown, select **AWS**, **GCP**, or **Azure**.
 Once you've selected your provider, follow the relevant instructions in the tabs below to set up and verify the Cloud Connector.
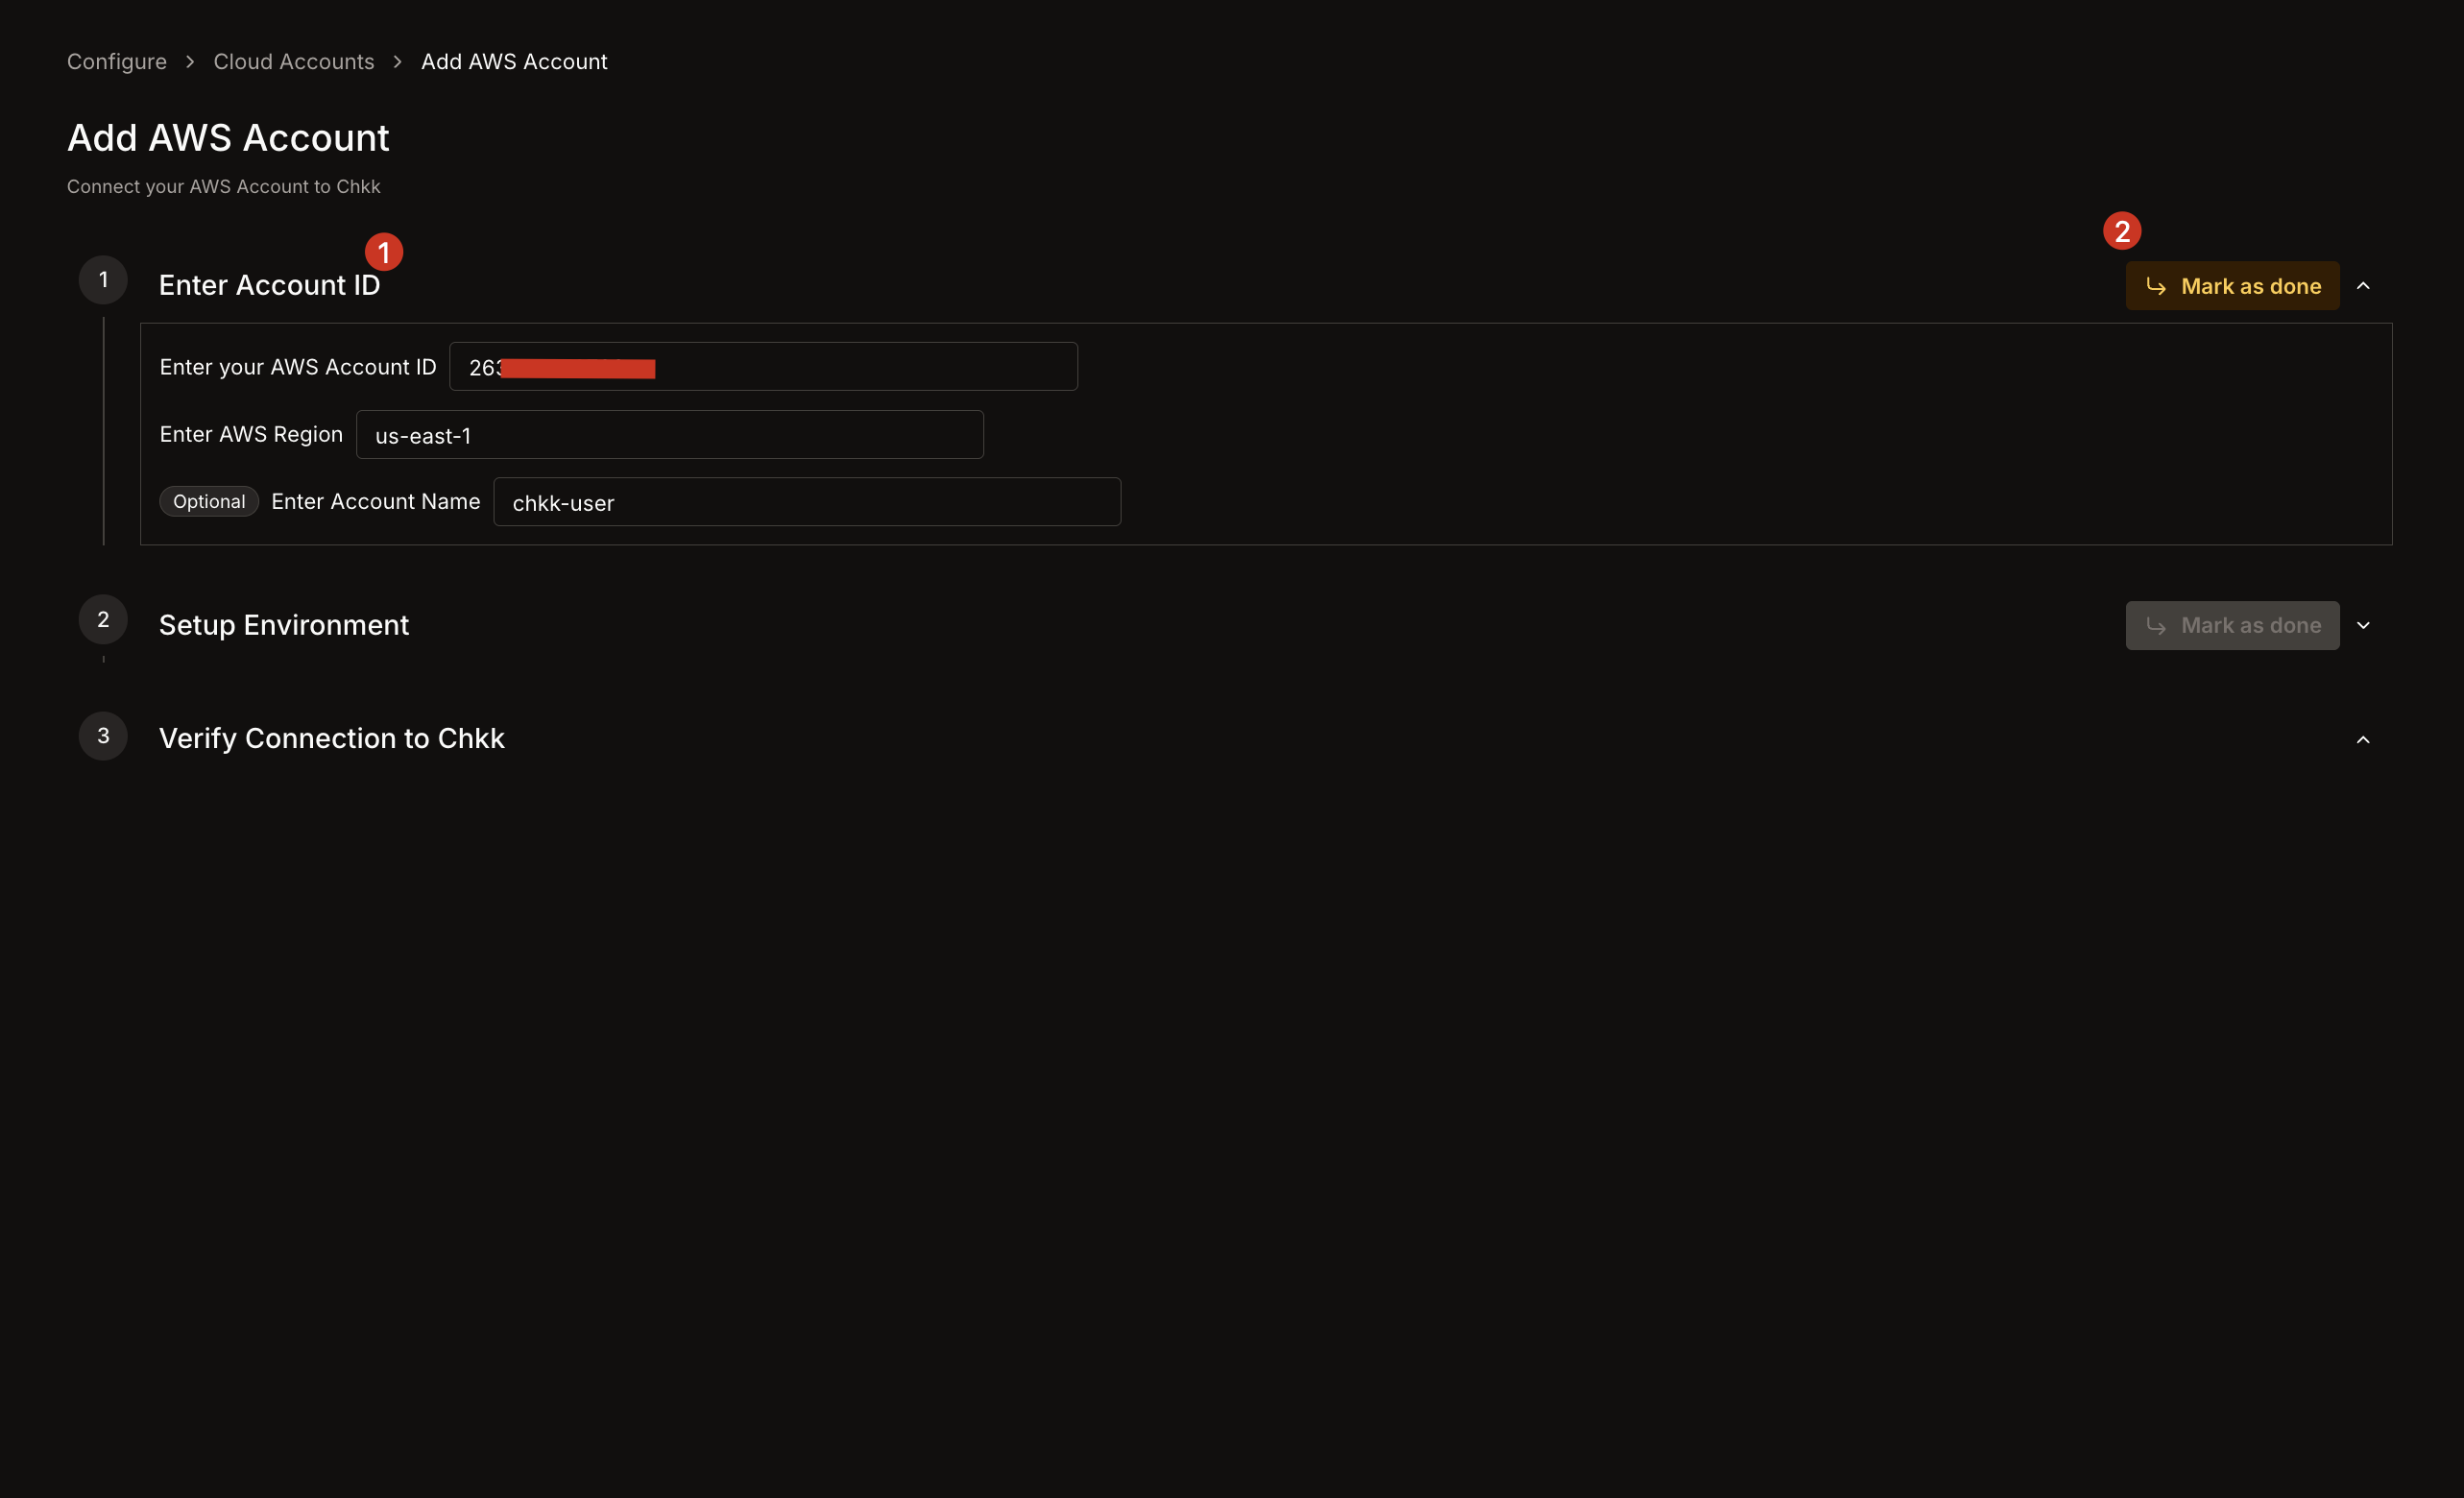
1. **AWS Account ID**: Provide the 12-digit AWS Account ID (e.g., `123456789012`).
2. **AWS Region**: Specify your primary region (e.g., `us-east-1`).
3. *(Optional)* **Account Name**: Provide a name to reference this AWS Account in the Chkk Dashboard. (e.g., `production-account`)
4. Click **Mark as done**.
Once you've selected your provider, follow the relevant instructions in the tabs below to set up and verify the Cloud Connector.
1. **AWS Account ID**: Provide the 12-digit AWS Account ID (e.g., `123456789012`).
2. **AWS Region**: Specify your primary region (e.g., `us-east-1`).
3. *(Optional)* **Account Name**: Provide a name to reference this AWS Account in the Chkk Dashboard. (e.g., `production-account`)
4. Click **Mark as done**.
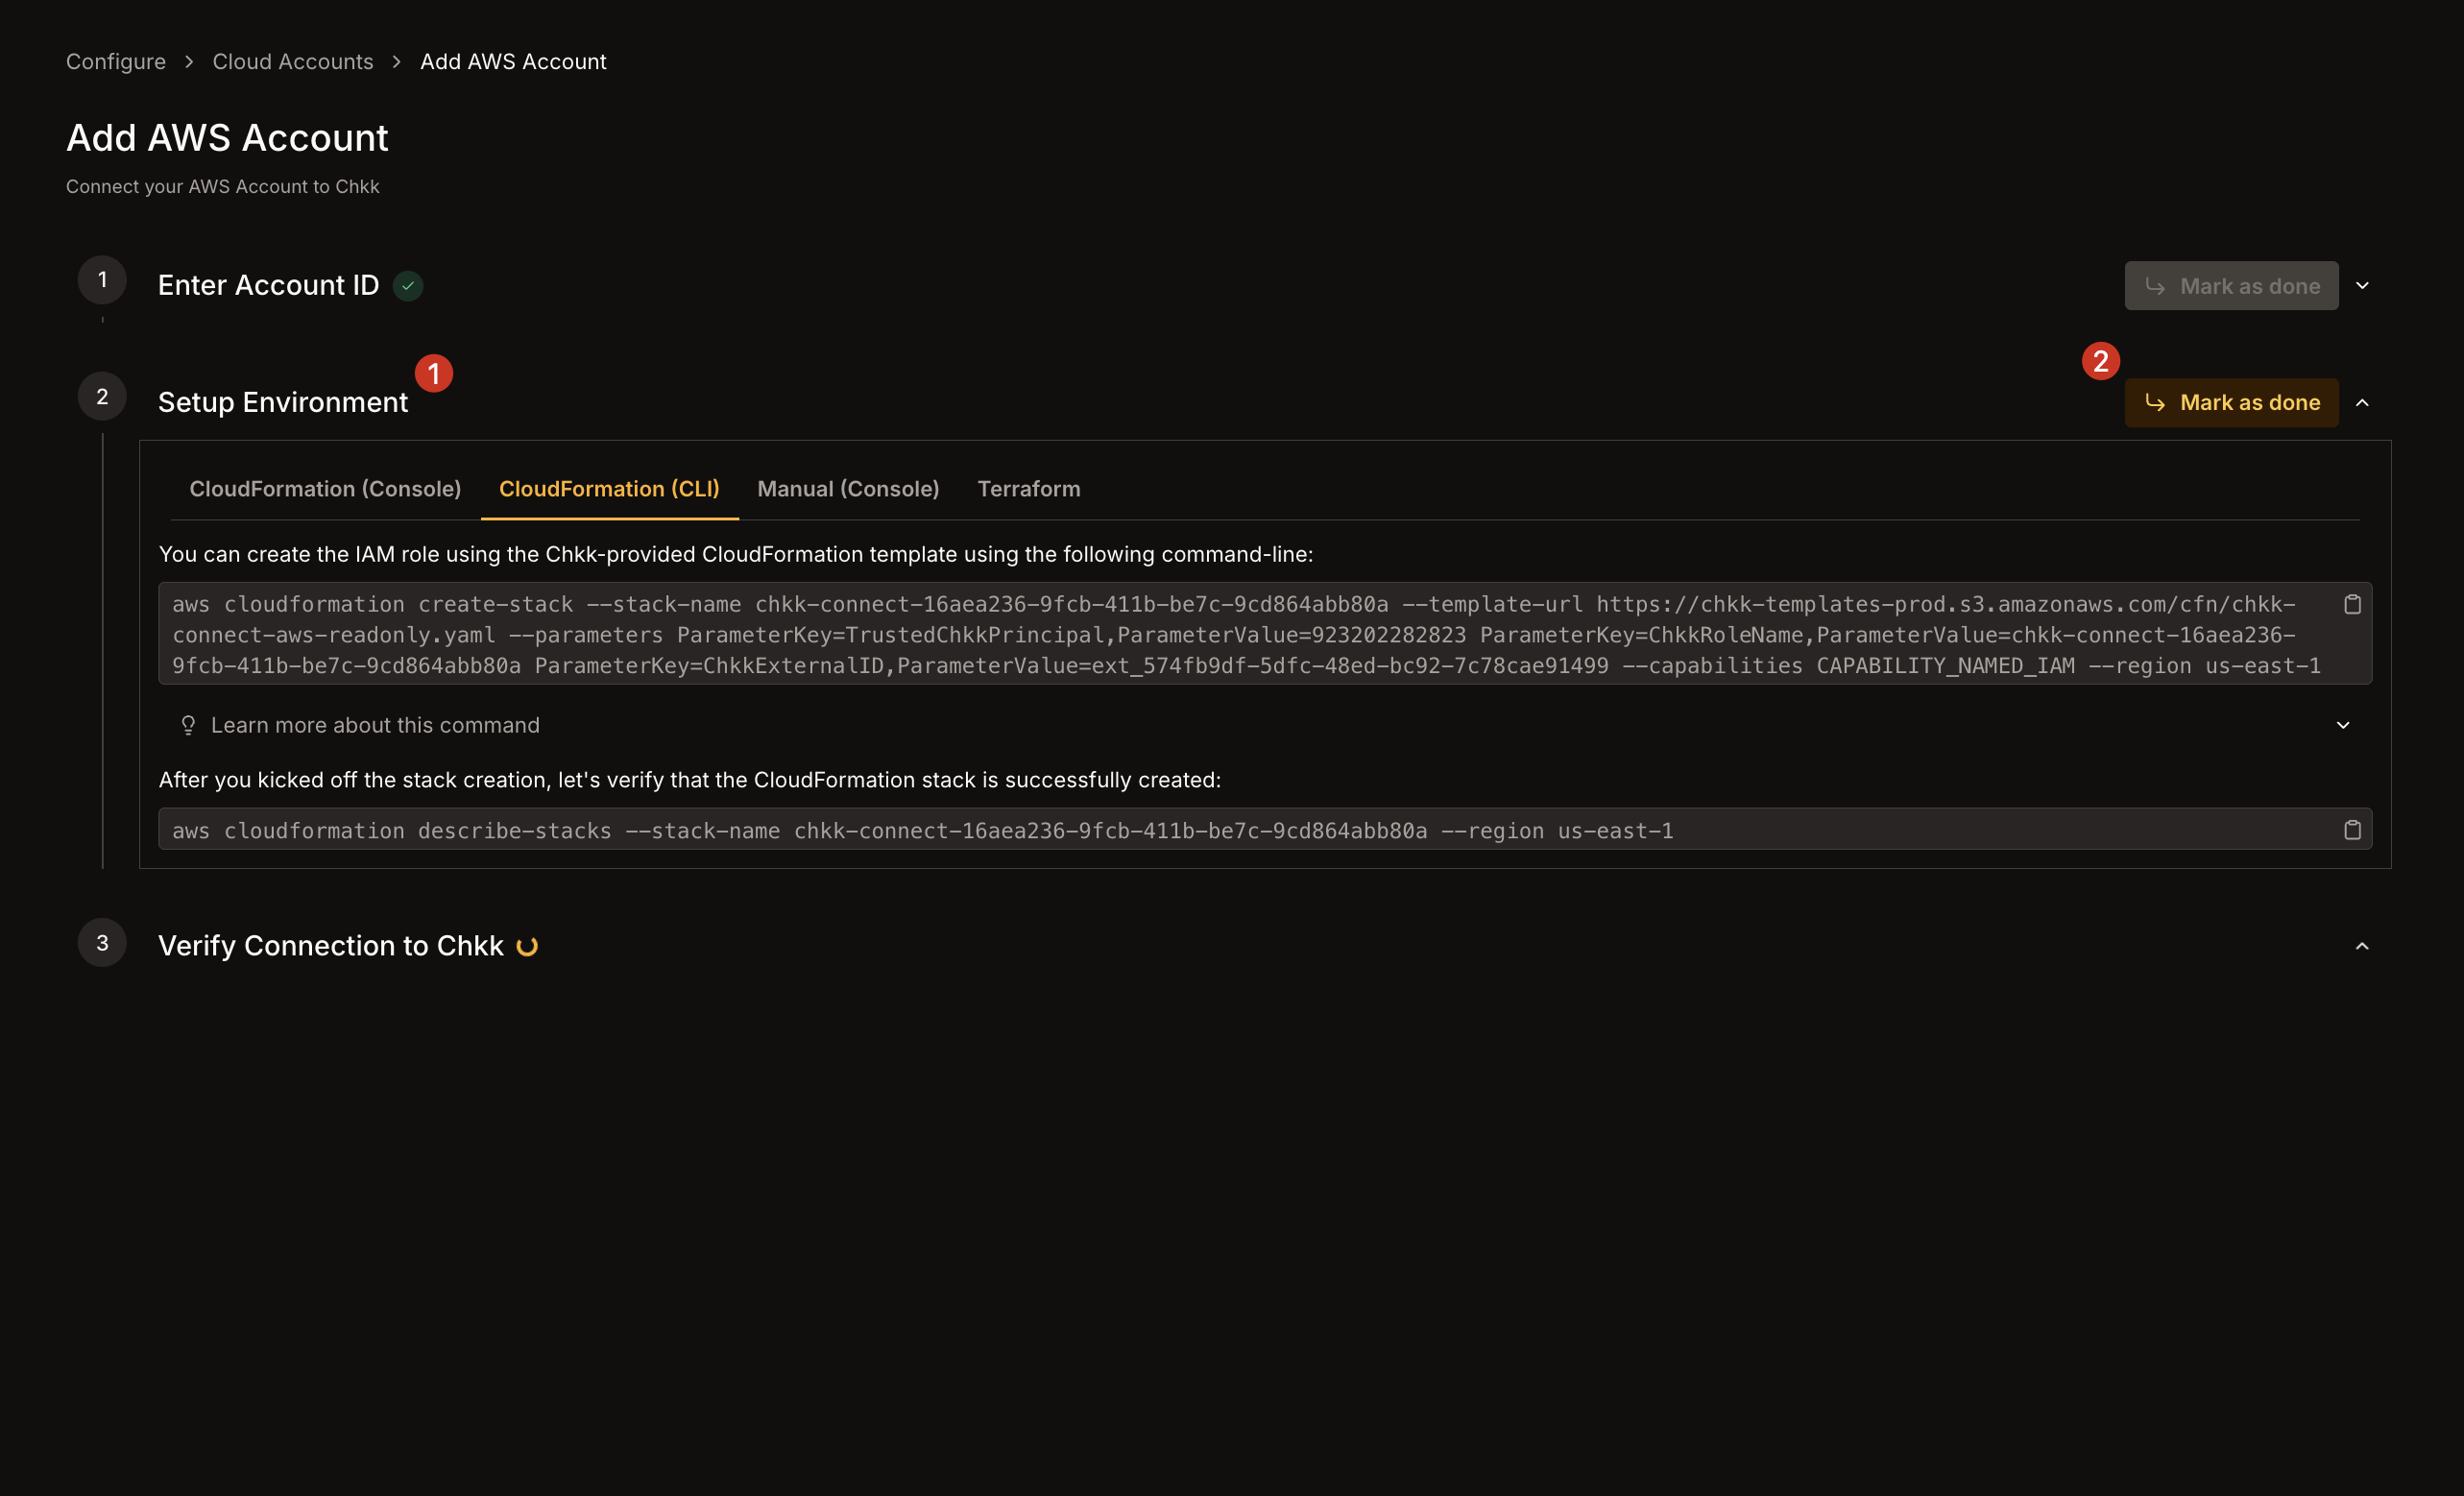
 1. In **Setup Environment**, choose how you want to create the **read-only IAM Role** (CloudFormation, Console, CLI, or Terraform).
2. Follow the steps mentioned under the selected method to set up the IAM Role in your AWS account.
3. Once set up, click **Mark as done**.
1. In **Setup Environment**, choose how you want to create the **read-only IAM Role** (CloudFormation, Console, CLI, or Terraform).
2. Follow the steps mentioned under the selected method to set up the IAM Role in your AWS account.
3. Once set up, click **Mark as done**.
 1. Wait until the IAM Role is fully created in AWS.
2. Chkk attempts to assume the newly created role to confirm connectivity.
3. Once the connection is verified, you'll see a success message on the Chkk Dashboard.
4. The **Redo** button allows you to retry the connection if needed.
1. Wait until the IAM Role is fully created in AWS.
2. Chkk attempts to assume the newly created role to confirm connectivity.
3. Once the connection is verified, you'll see a success message on the Chkk Dashboard.
4. The **Redo** button allows you to retry the connection if needed.
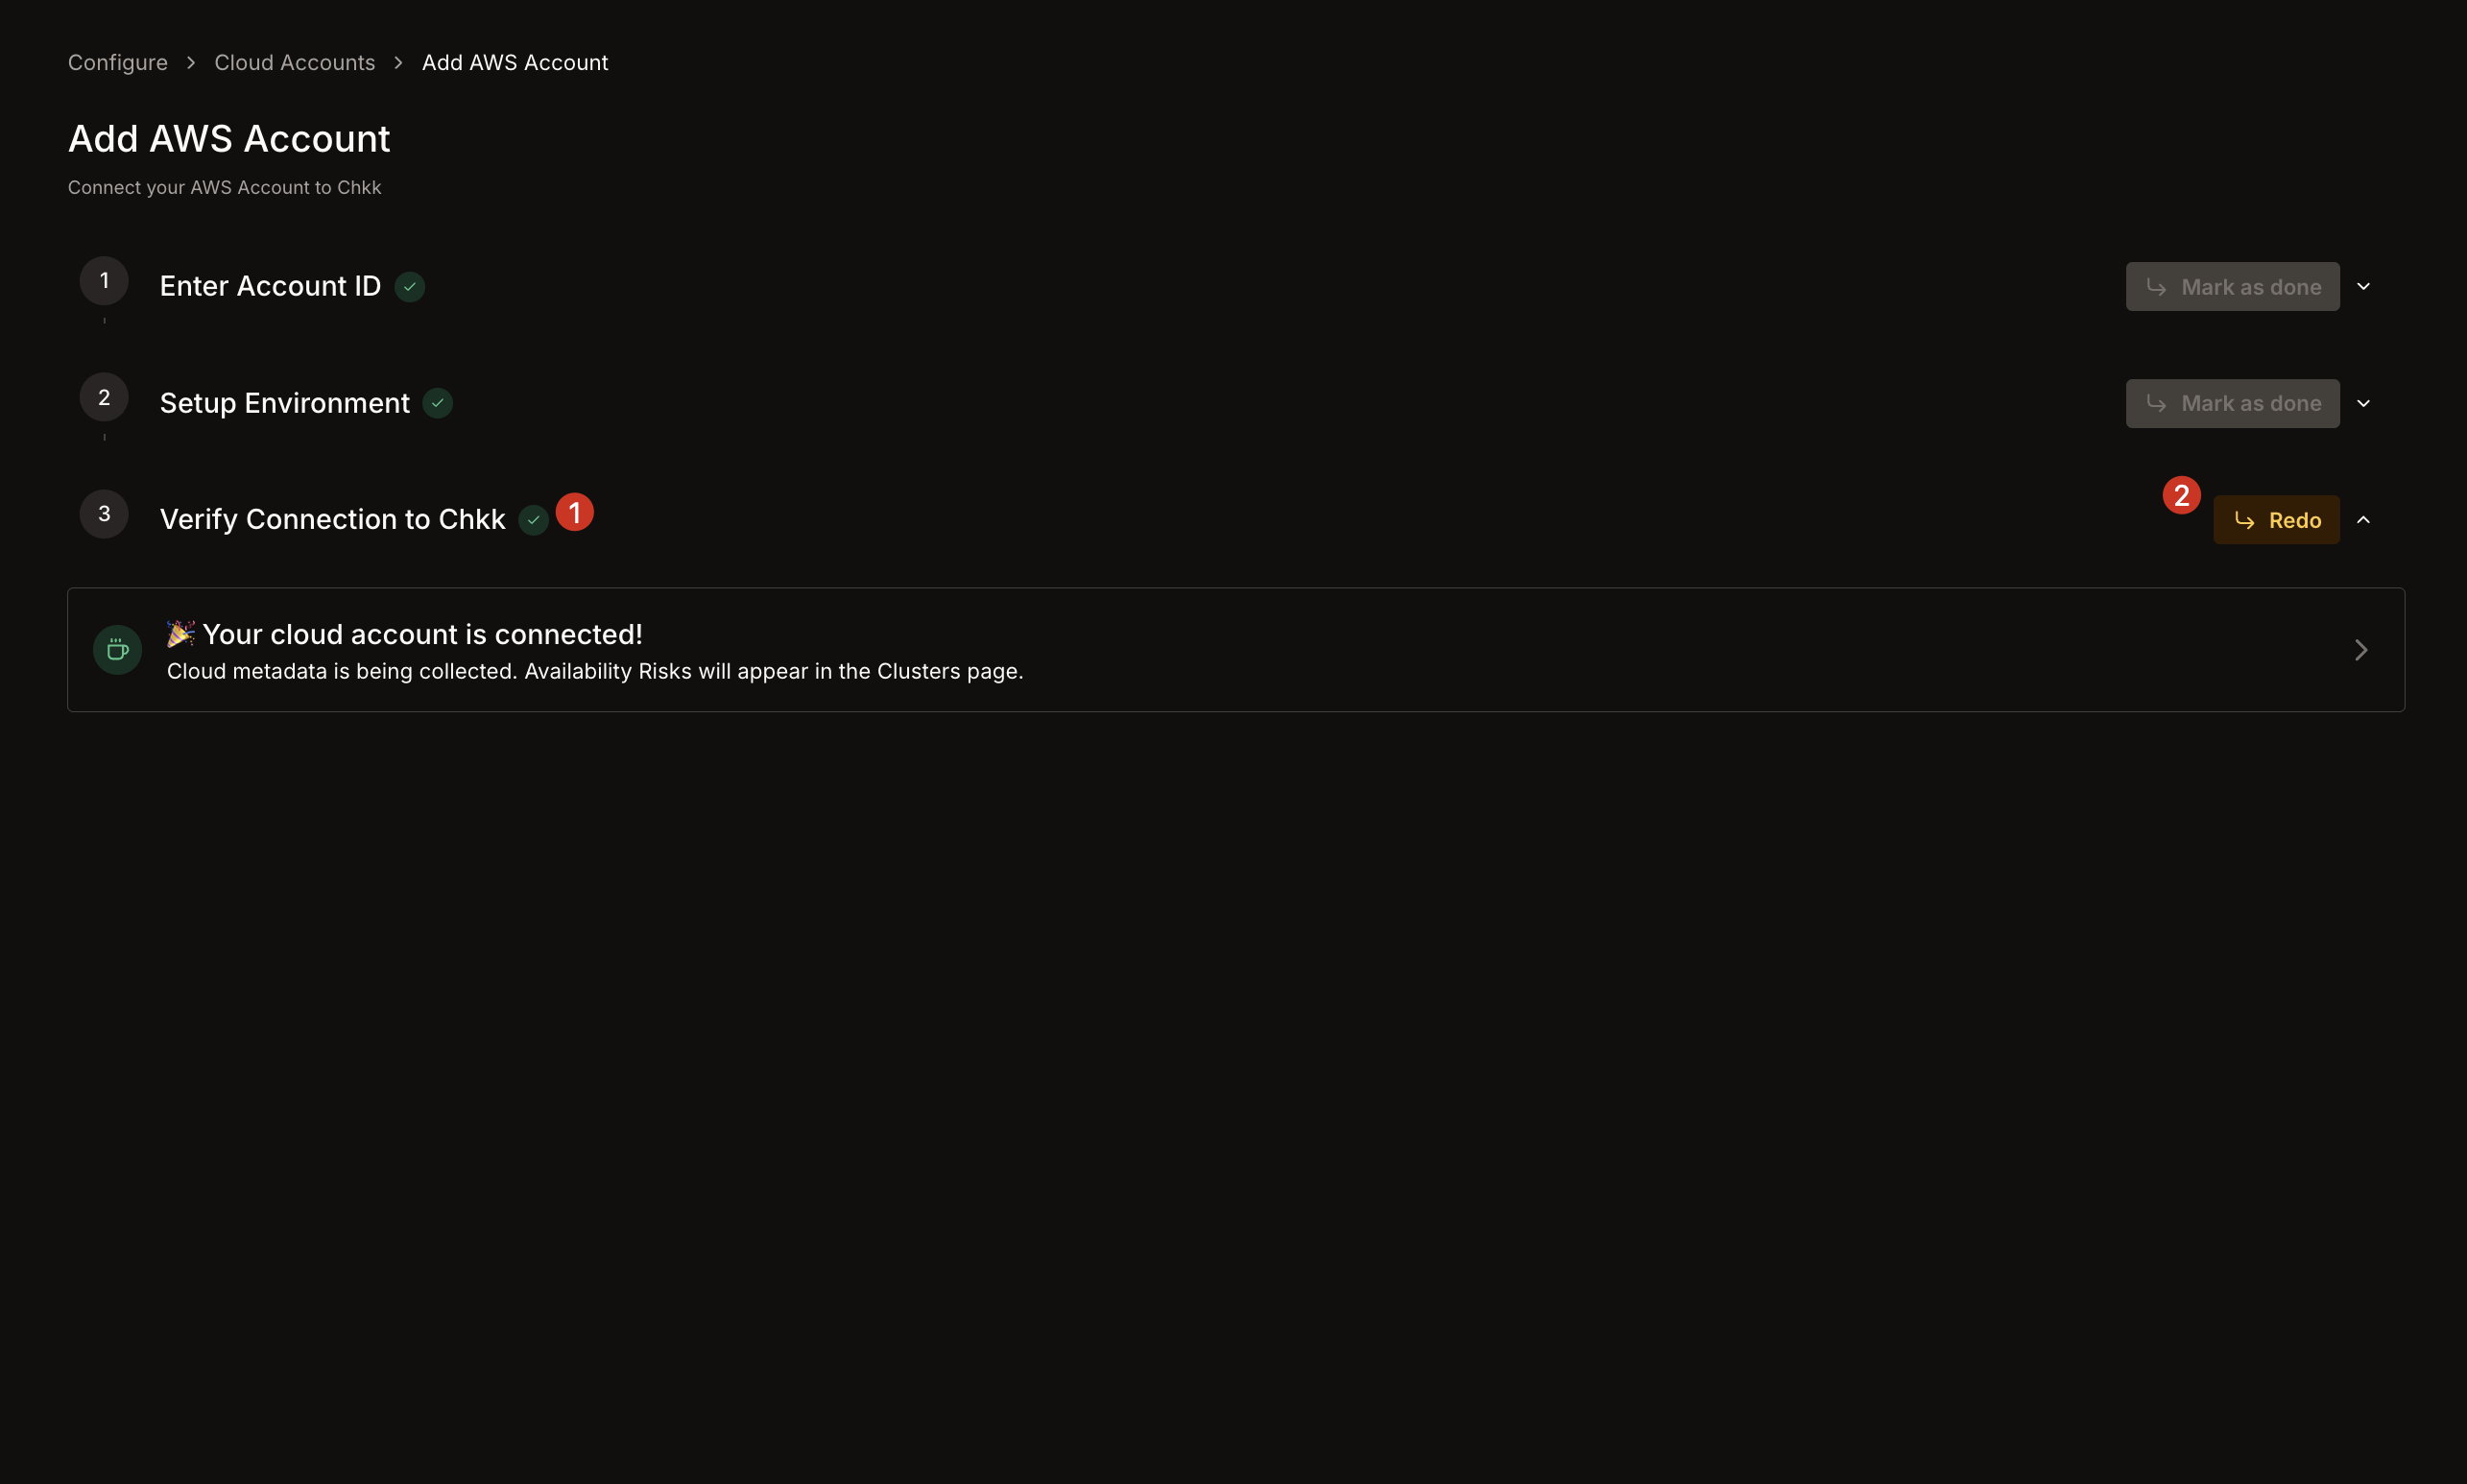 1. A success message indicates Chkk can now access your AWS account.
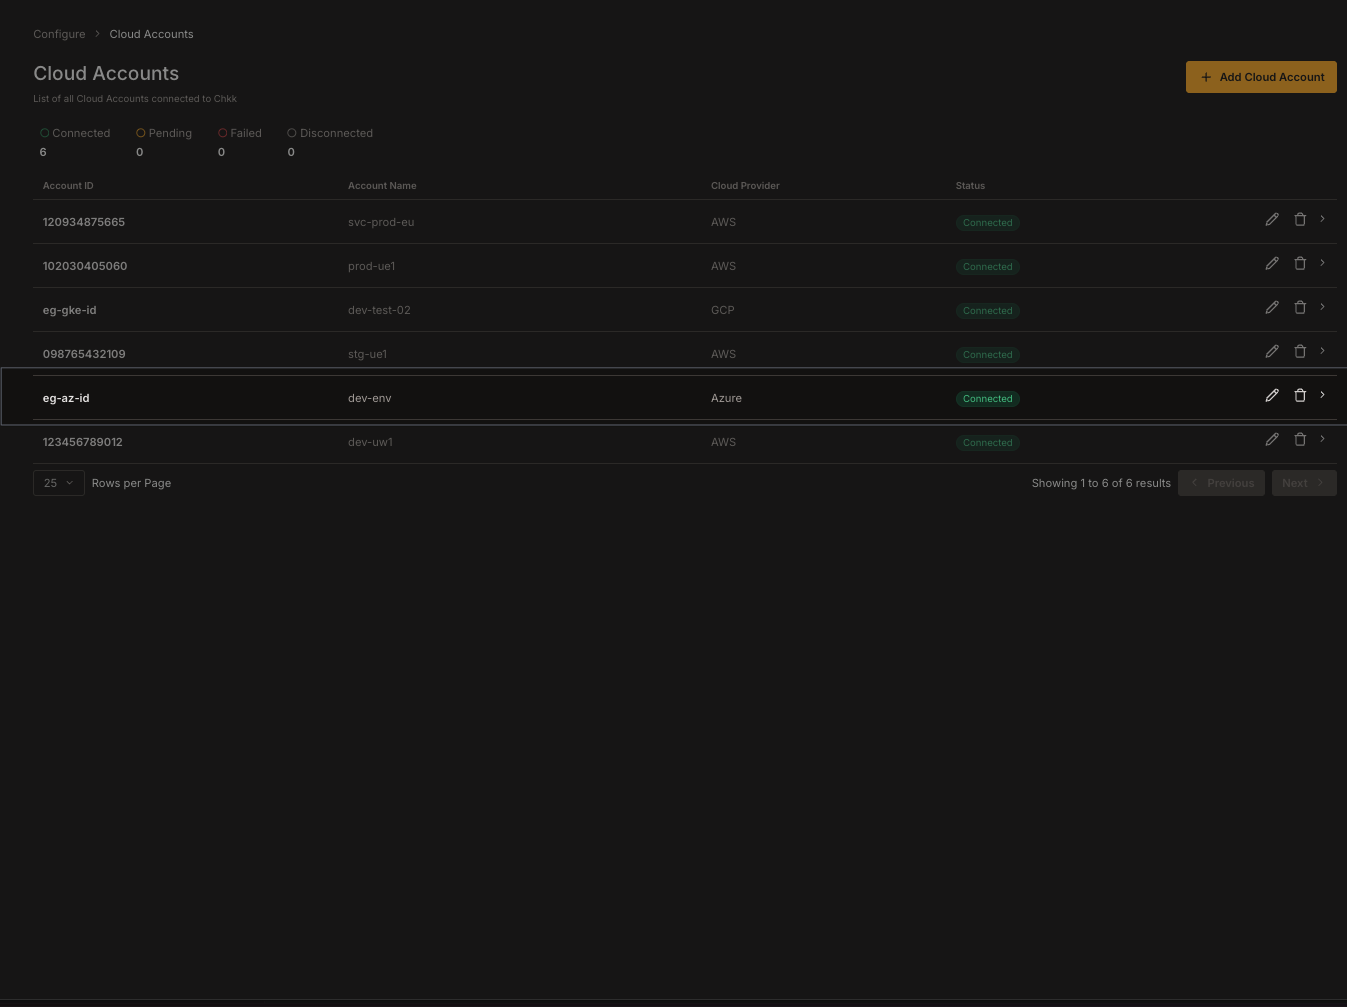
2. Your AWS account will appear in the **Cloud Accounts** list with **Connected** status in the **Configure -> Cloud Accounts** view.
1. A success message indicates Chkk can now access your AWS account.
2. Your AWS account will appear in the **Cloud Accounts** list with **Connected** status in the **Configure -> Cloud Accounts** view.
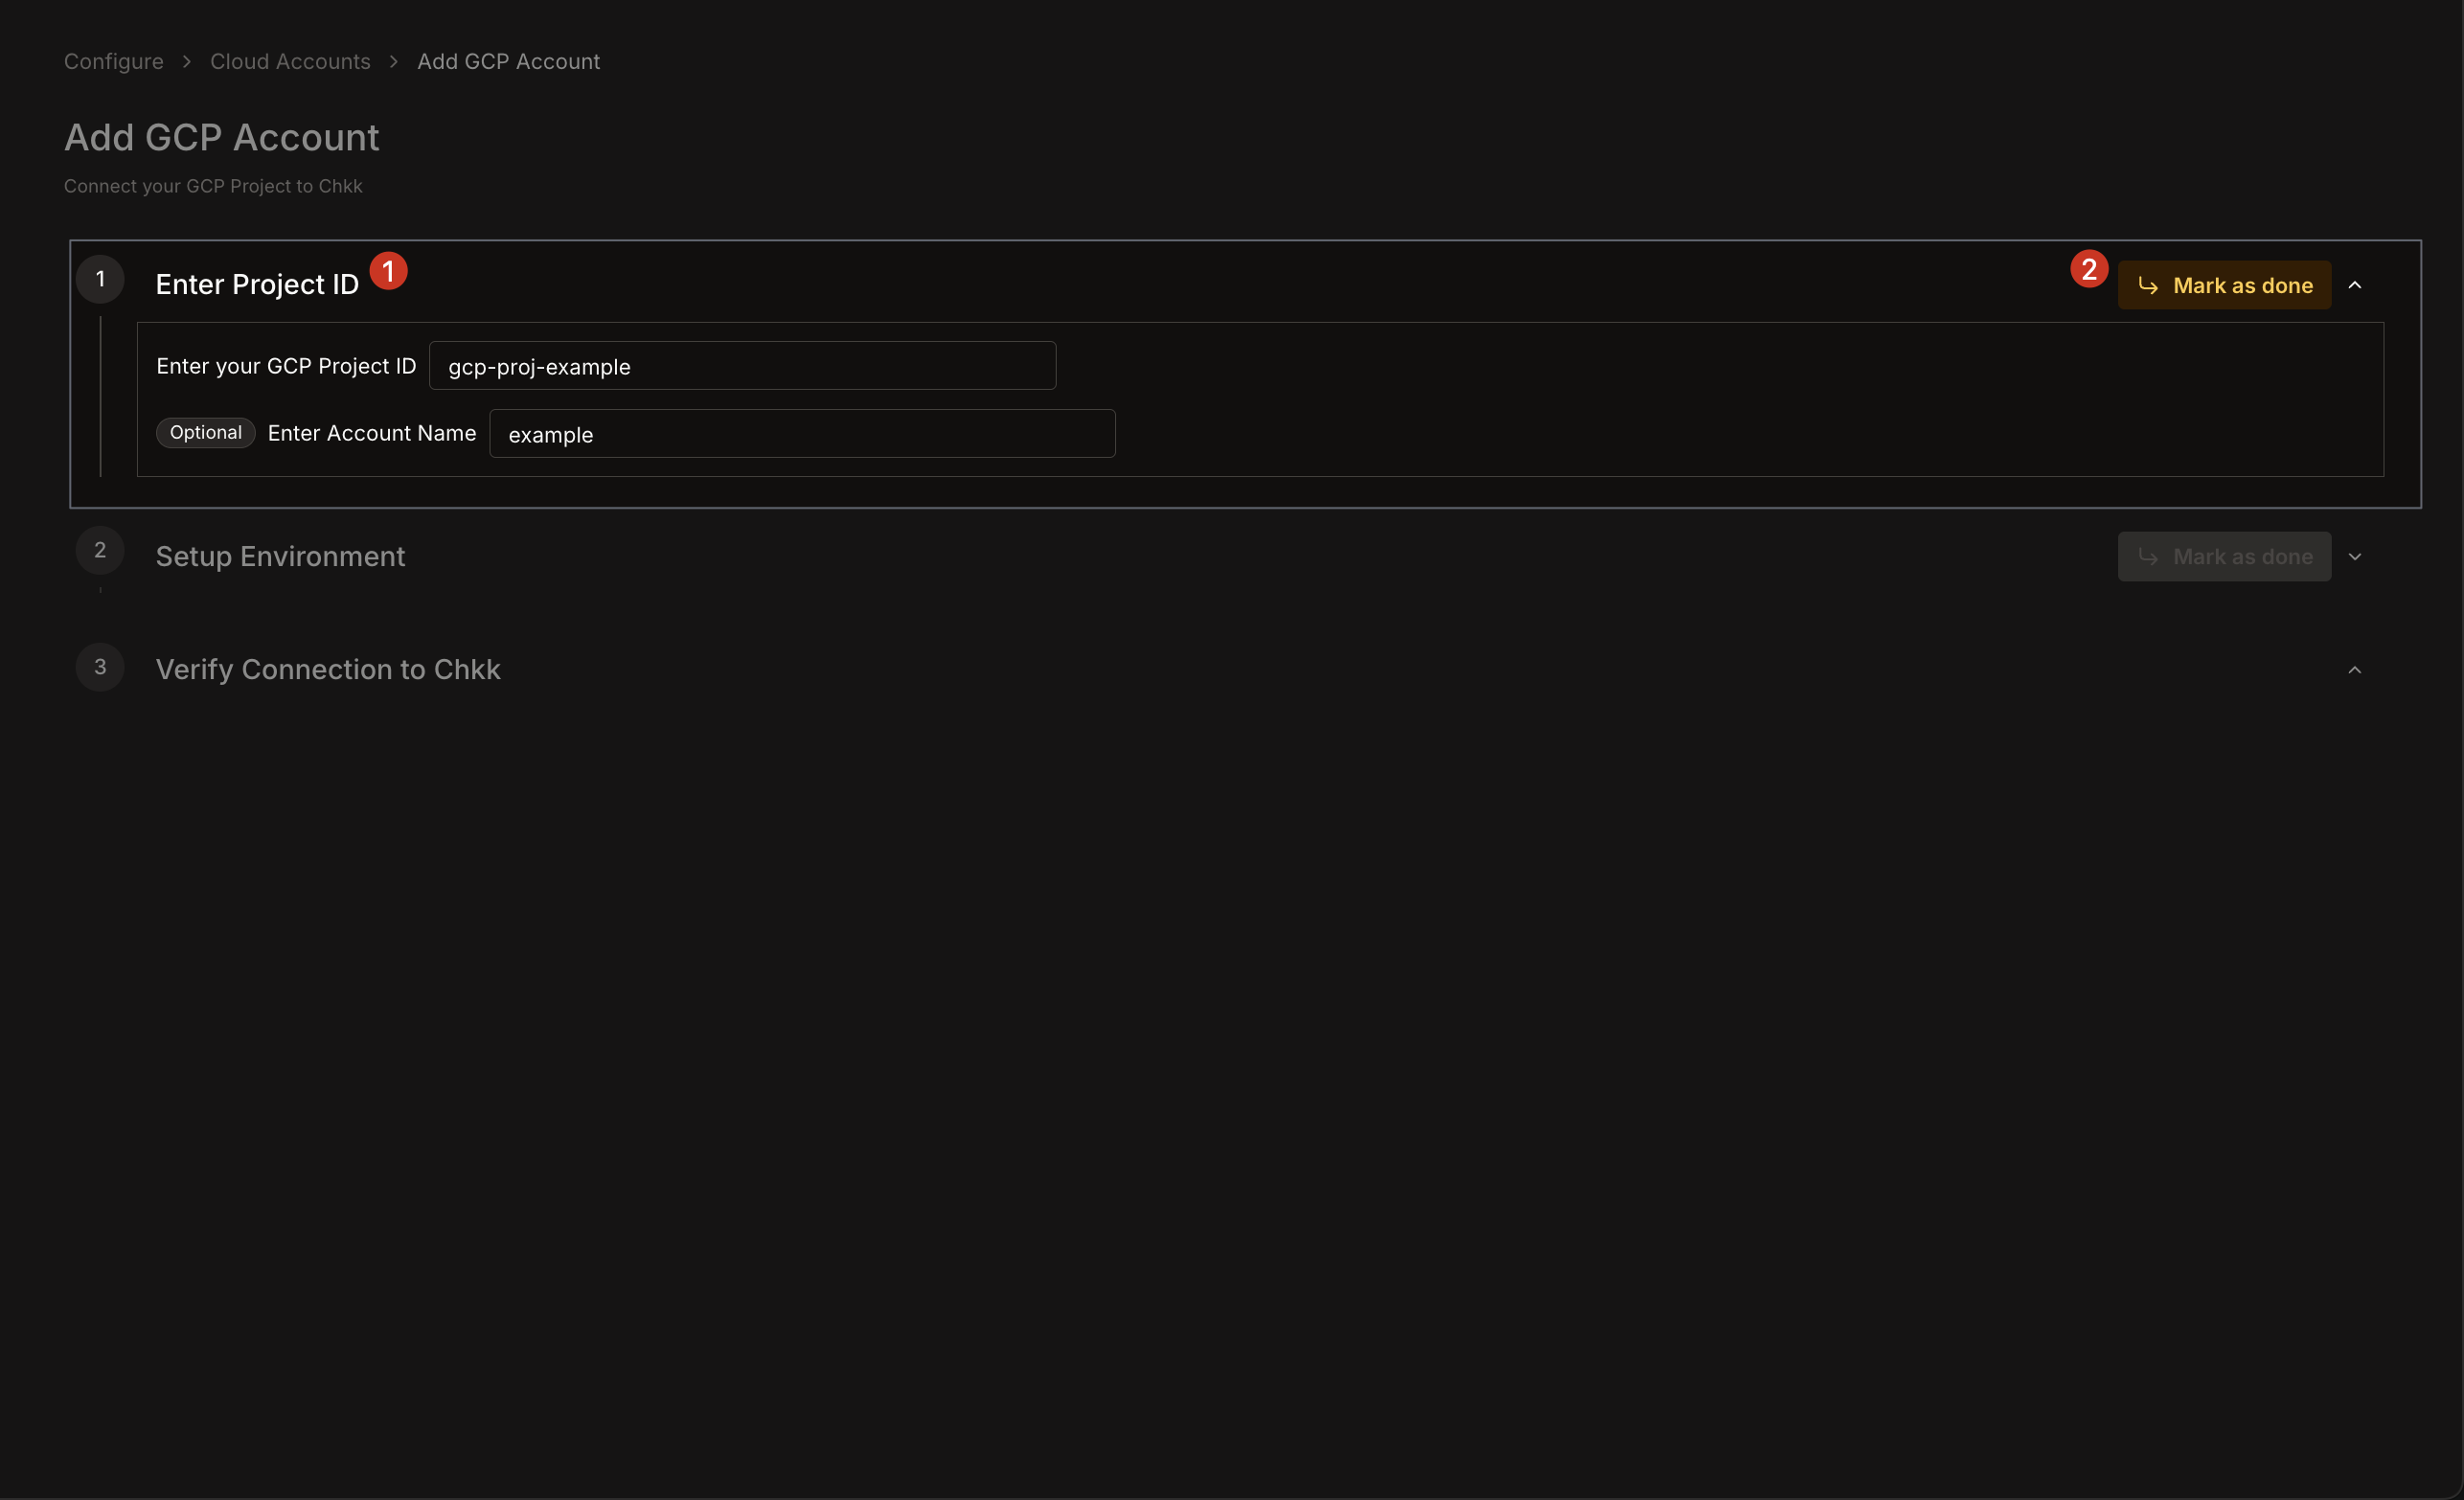
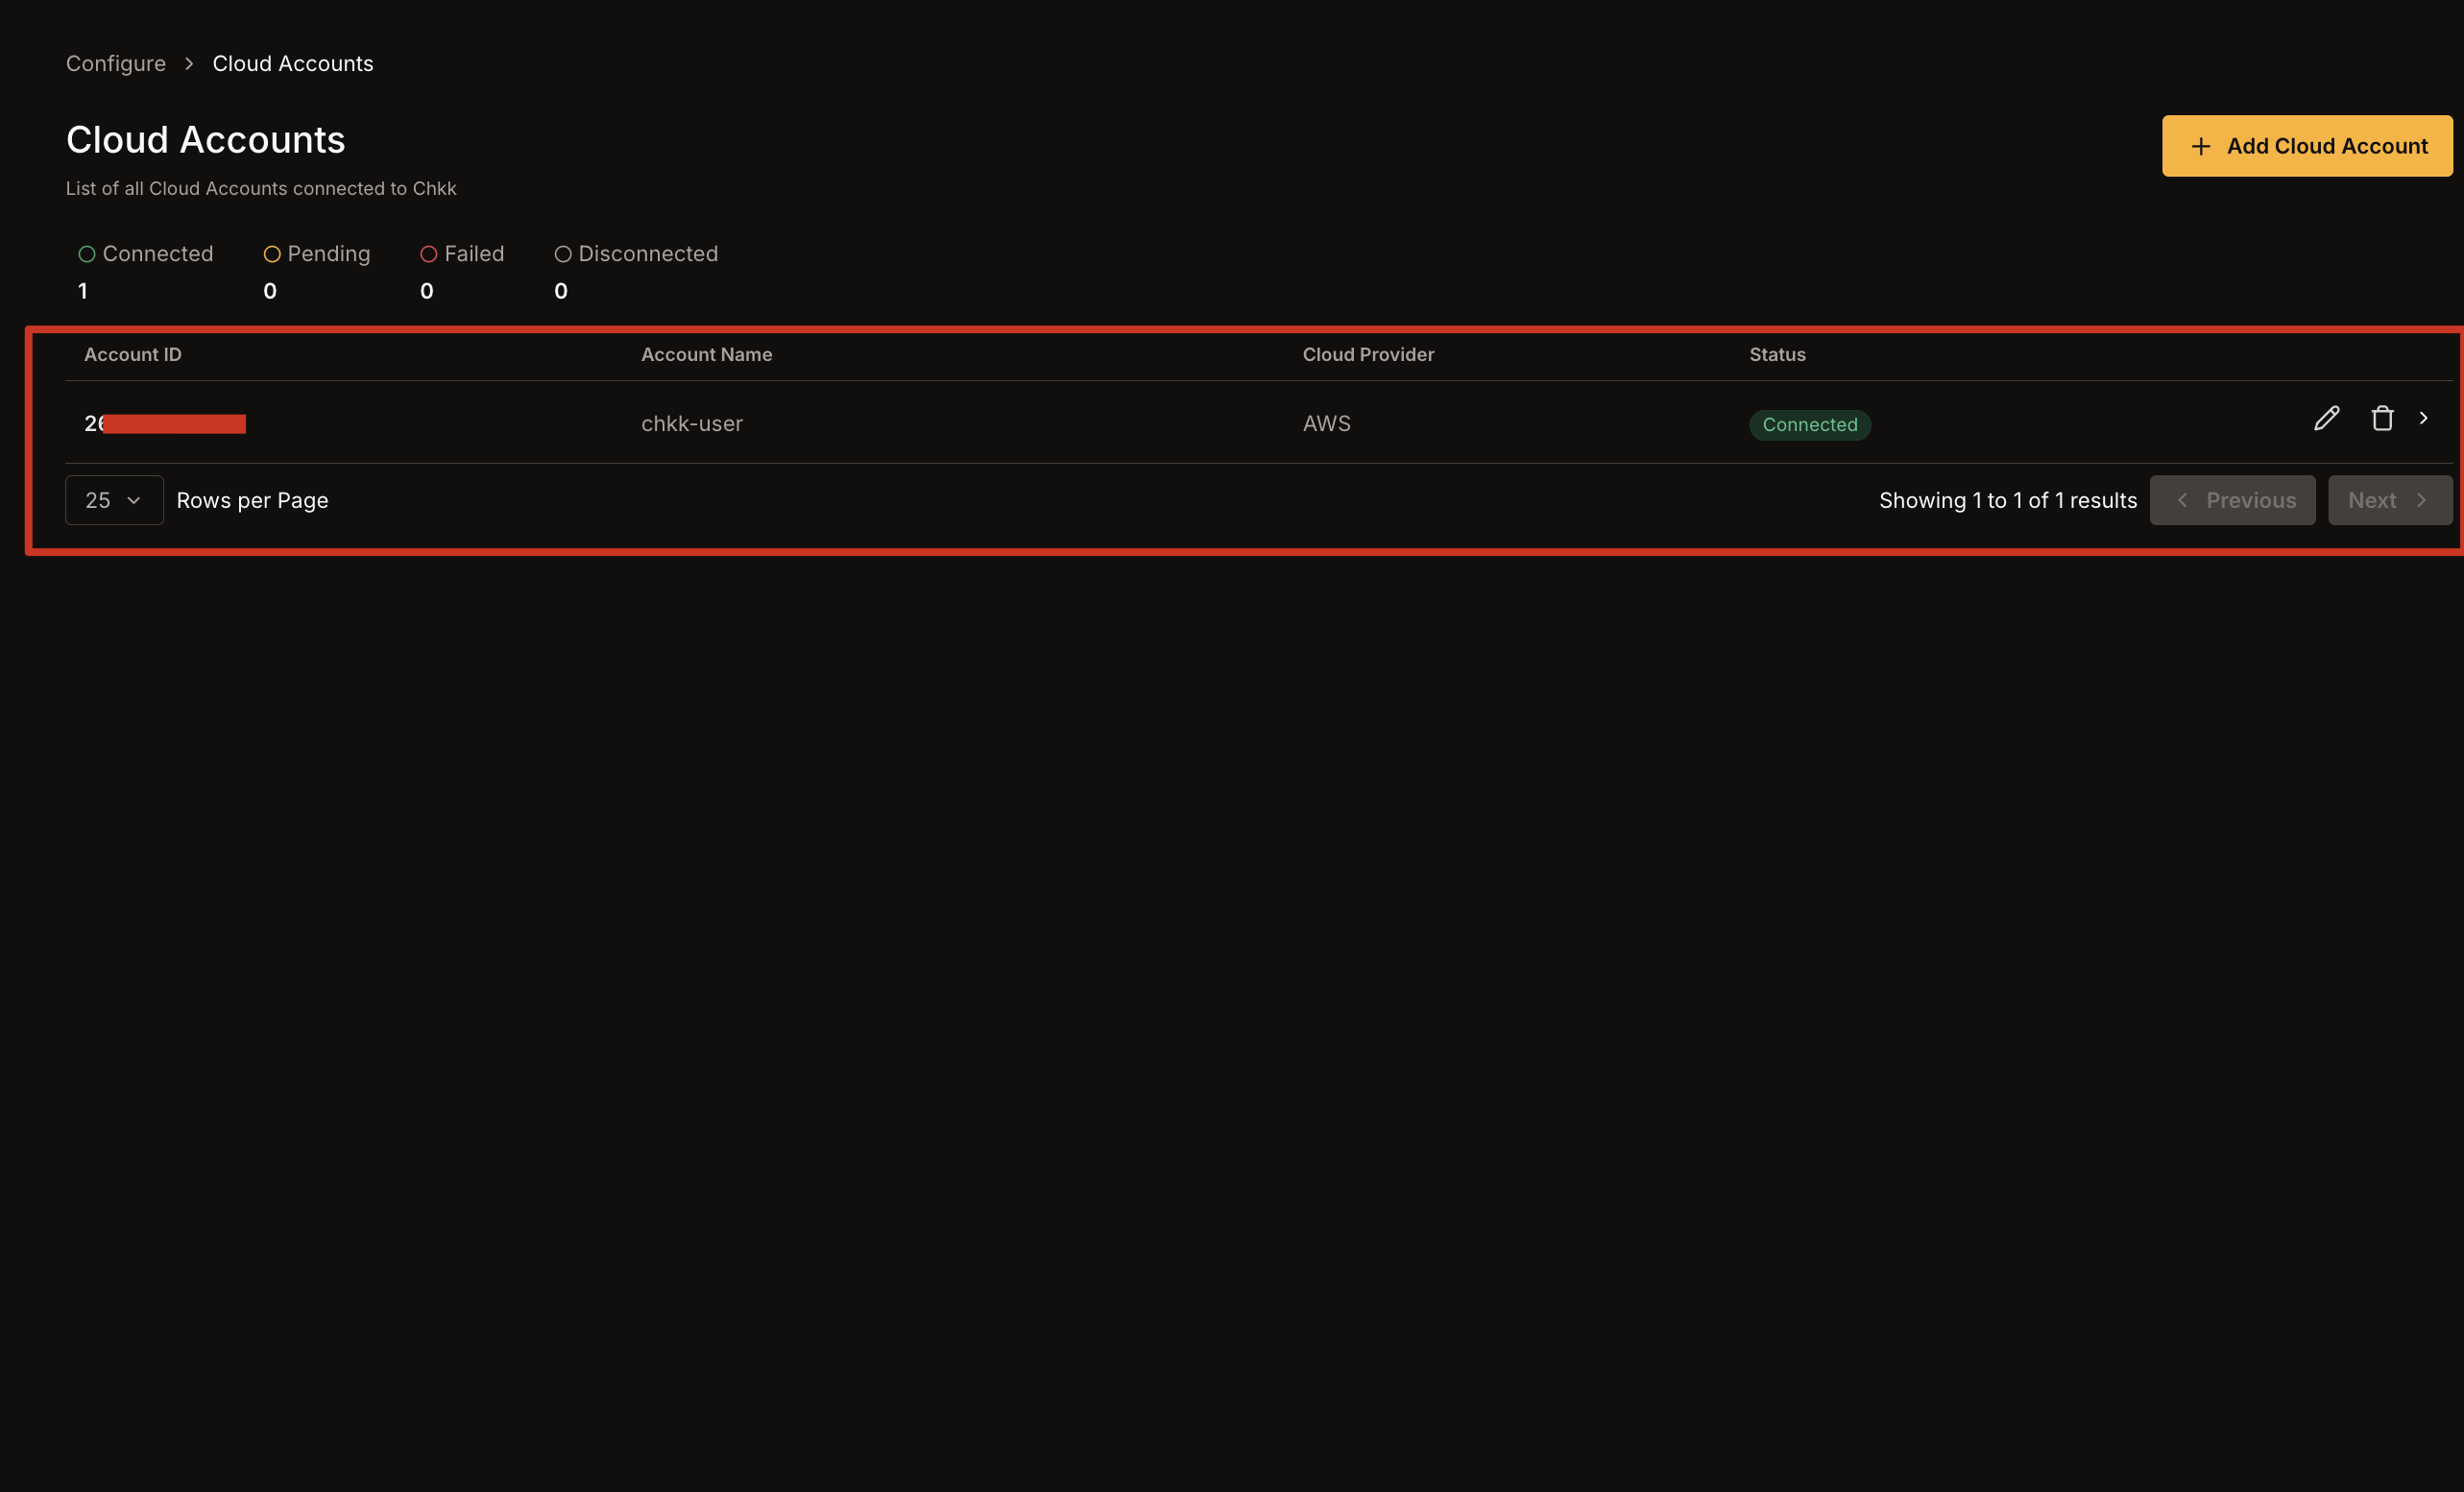 1. **GCP Project ID**: Provide the ID for the GCP project you want to connect (e.g., `gcp-proj-example`).
2. *(Optional)* **Account Name**: Provide a name to reference this project in the Chkk Dashboard (e.g., `staging-project`).
3. Click **Mark as done**.
1. **GCP Project ID**: Provide the ID for the GCP project you want to connect (e.g., `gcp-proj-example`).
2. *(Optional)* **Account Name**: Provide a name to reference this project in the Chkk Dashboard (e.g., `staging-project`).
3. Click **Mark as done**.
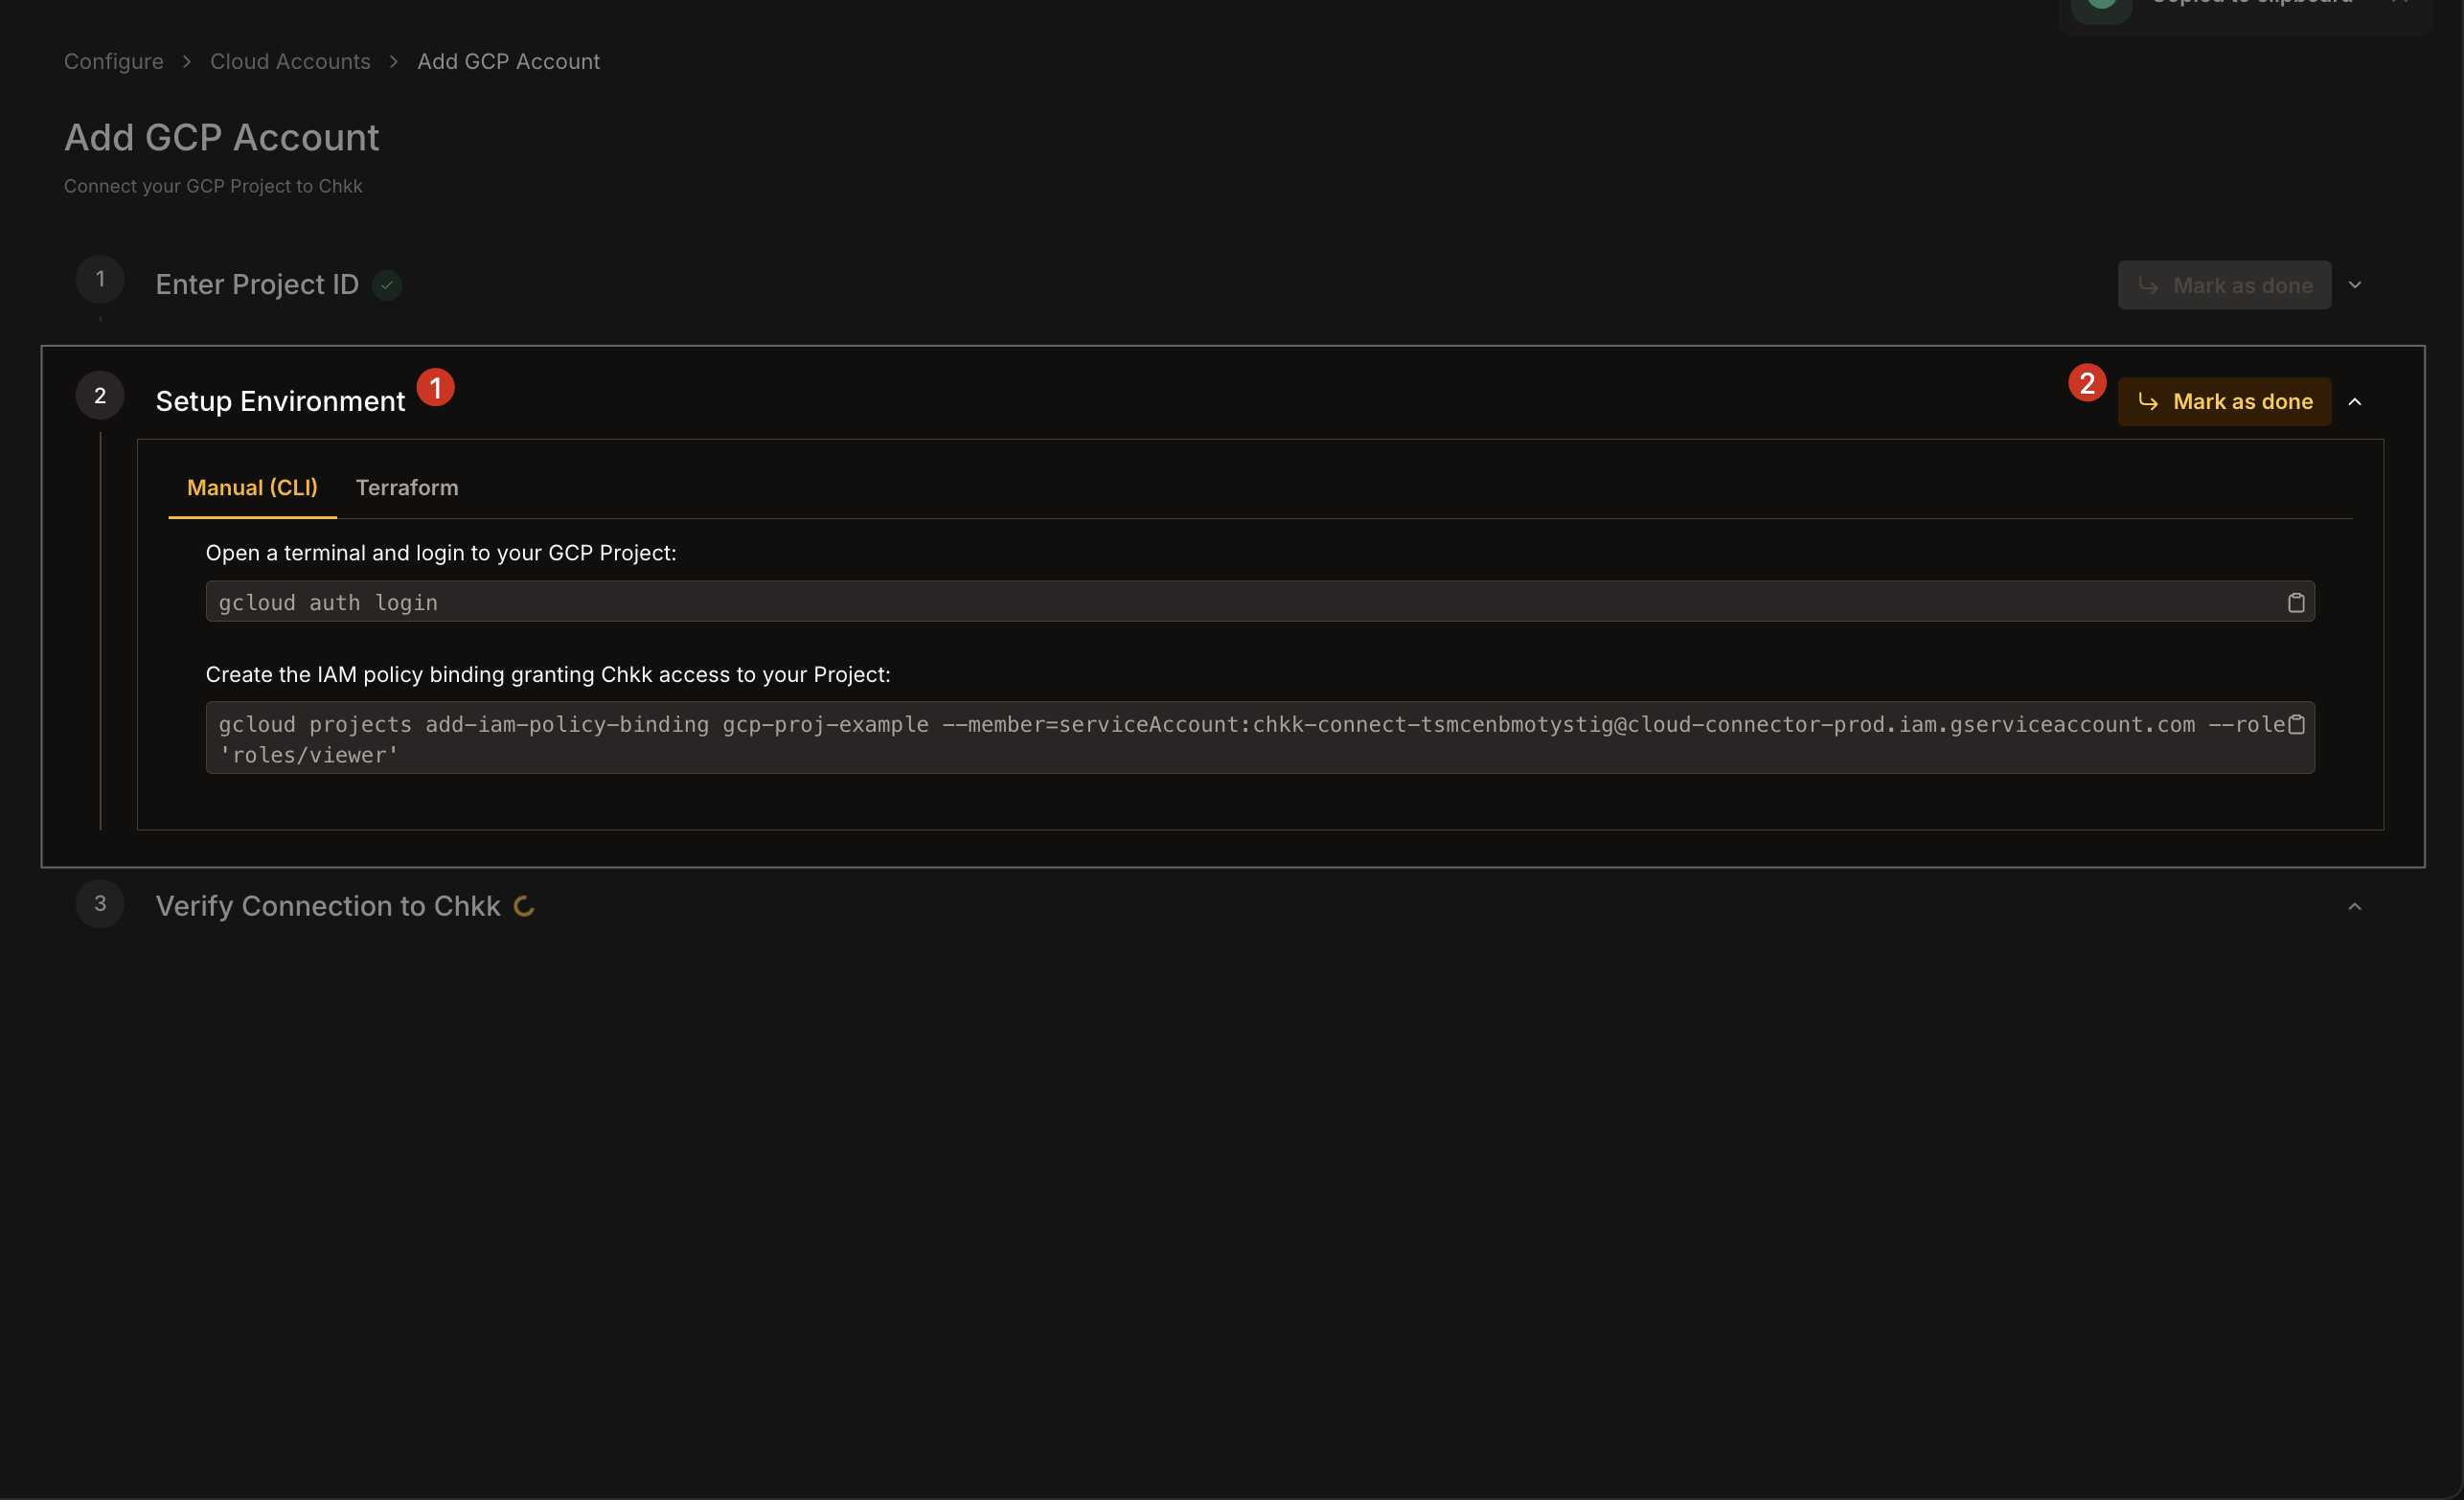
 1. Under **Setup Environment**, choose your preferred method (e.g., **Manual (CLI)** or **Terraform**) to grant the Chkk service account **read-only** (`roles/viewer`) access to your project.
2. Follow the steps mentioned under the selected method.
3. After configuring your IAM policy, click **Mark as done**.
1. Under **Setup Environment**, choose your preferred method (e.g., **Manual (CLI)** or **Terraform**) to grant the Chkk service account **read-only** (`roles/viewer`) access to your project.
2. Follow the steps mentioned under the selected method.
3. After configuring your IAM policy, click **Mark as done**.
 1. Once you finish creating the policy bindings in GCP, Chkk will attempt to connect using the newly granted service account permissions.
2. A success message indicates that Chkk can now retrieve data from your GCP project.
3. If needed, click **Redo** to retry or refresh the connection.
1. Once you finish creating the policy bindings in GCP, Chkk will attempt to connect using the newly granted service account permissions.
2. A success message indicates that Chkk can now retrieve data from your GCP project.
3. If needed, click **Redo** to retry or refresh the connection.
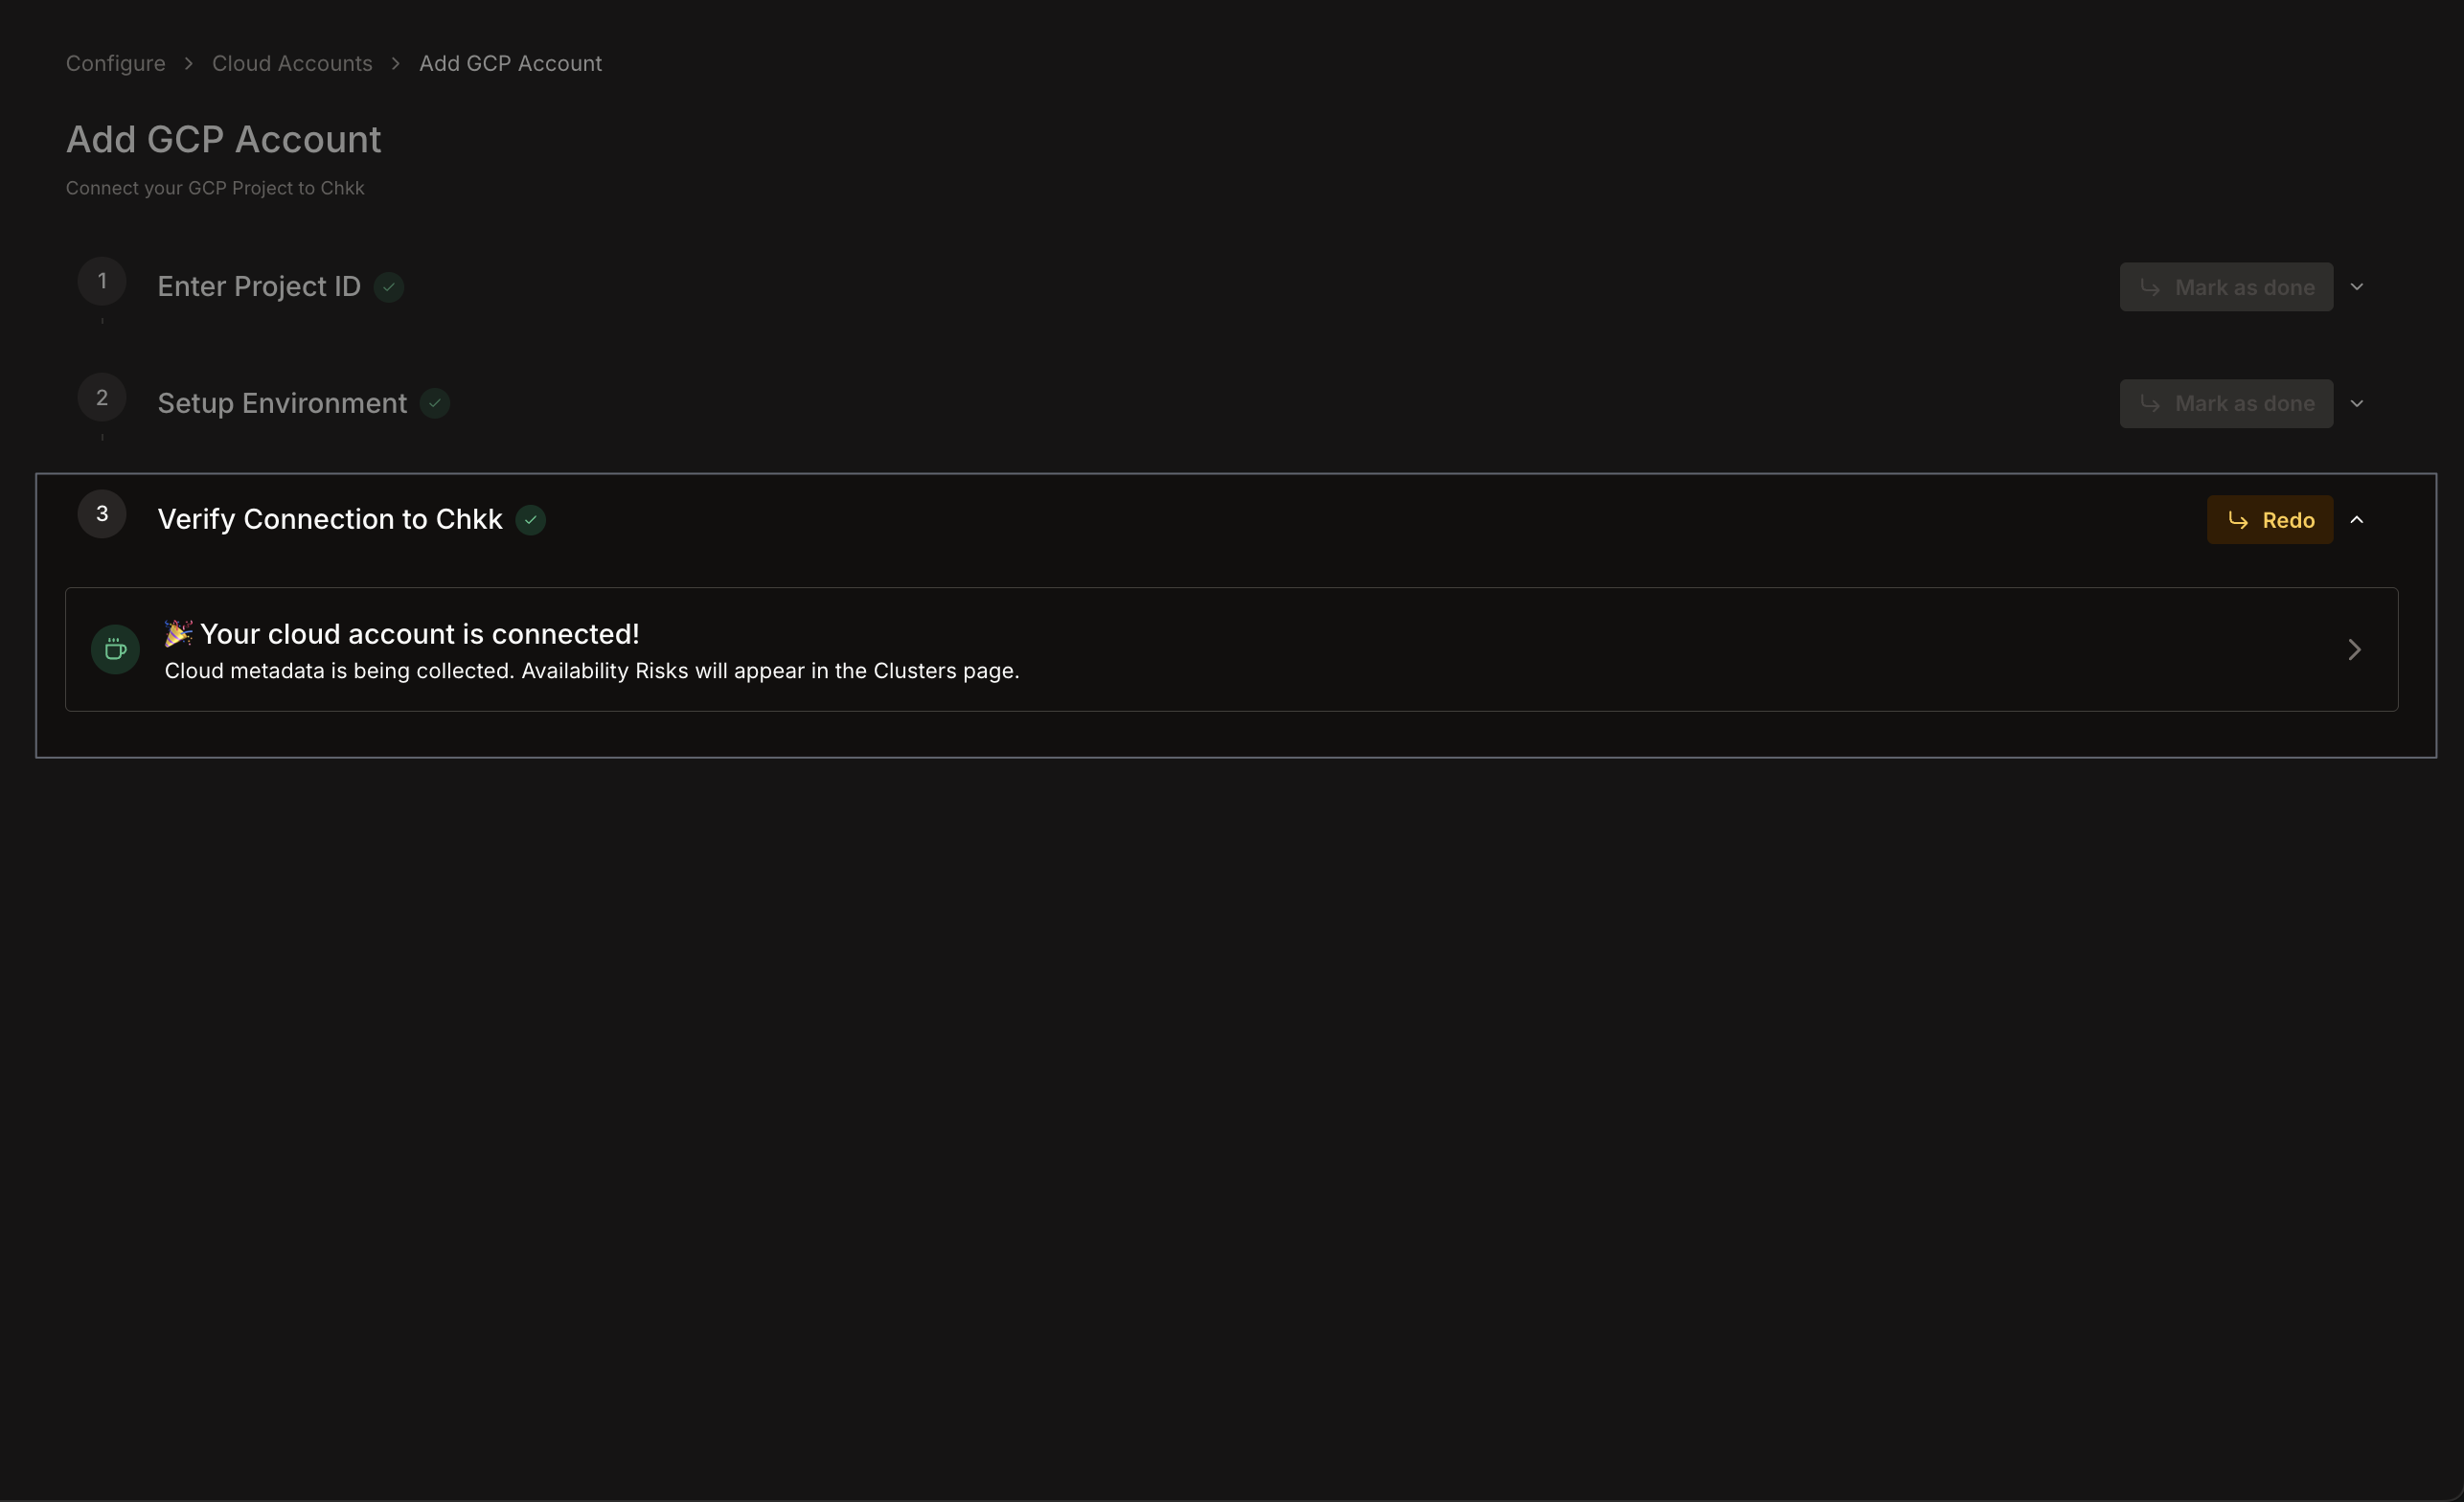 1. A final message confirms that your GCP project is **Connected**.
2. In the **Cloud Accounts** list (under **Configure** -> **Cloud Accounts**), your GCP project appears with a **Connected** status.
1. A final message confirms that your GCP project is **Connected**.
2. In the **Cloud Accounts** list (under **Configure** -> **Cloud Accounts**), your GCP project appears with a **Connected** status.
 1. **Account Name**: Provide a name to reference this Azure account in the Chkk Dashboard (e.g., `production-account`).
2. Click **Mark as done** when finished.
1. **Account Name**: Provide a name to reference this Azure account in the Chkk Dashboard (e.g., `production-account`).
2. Click **Mark as done** when finished.
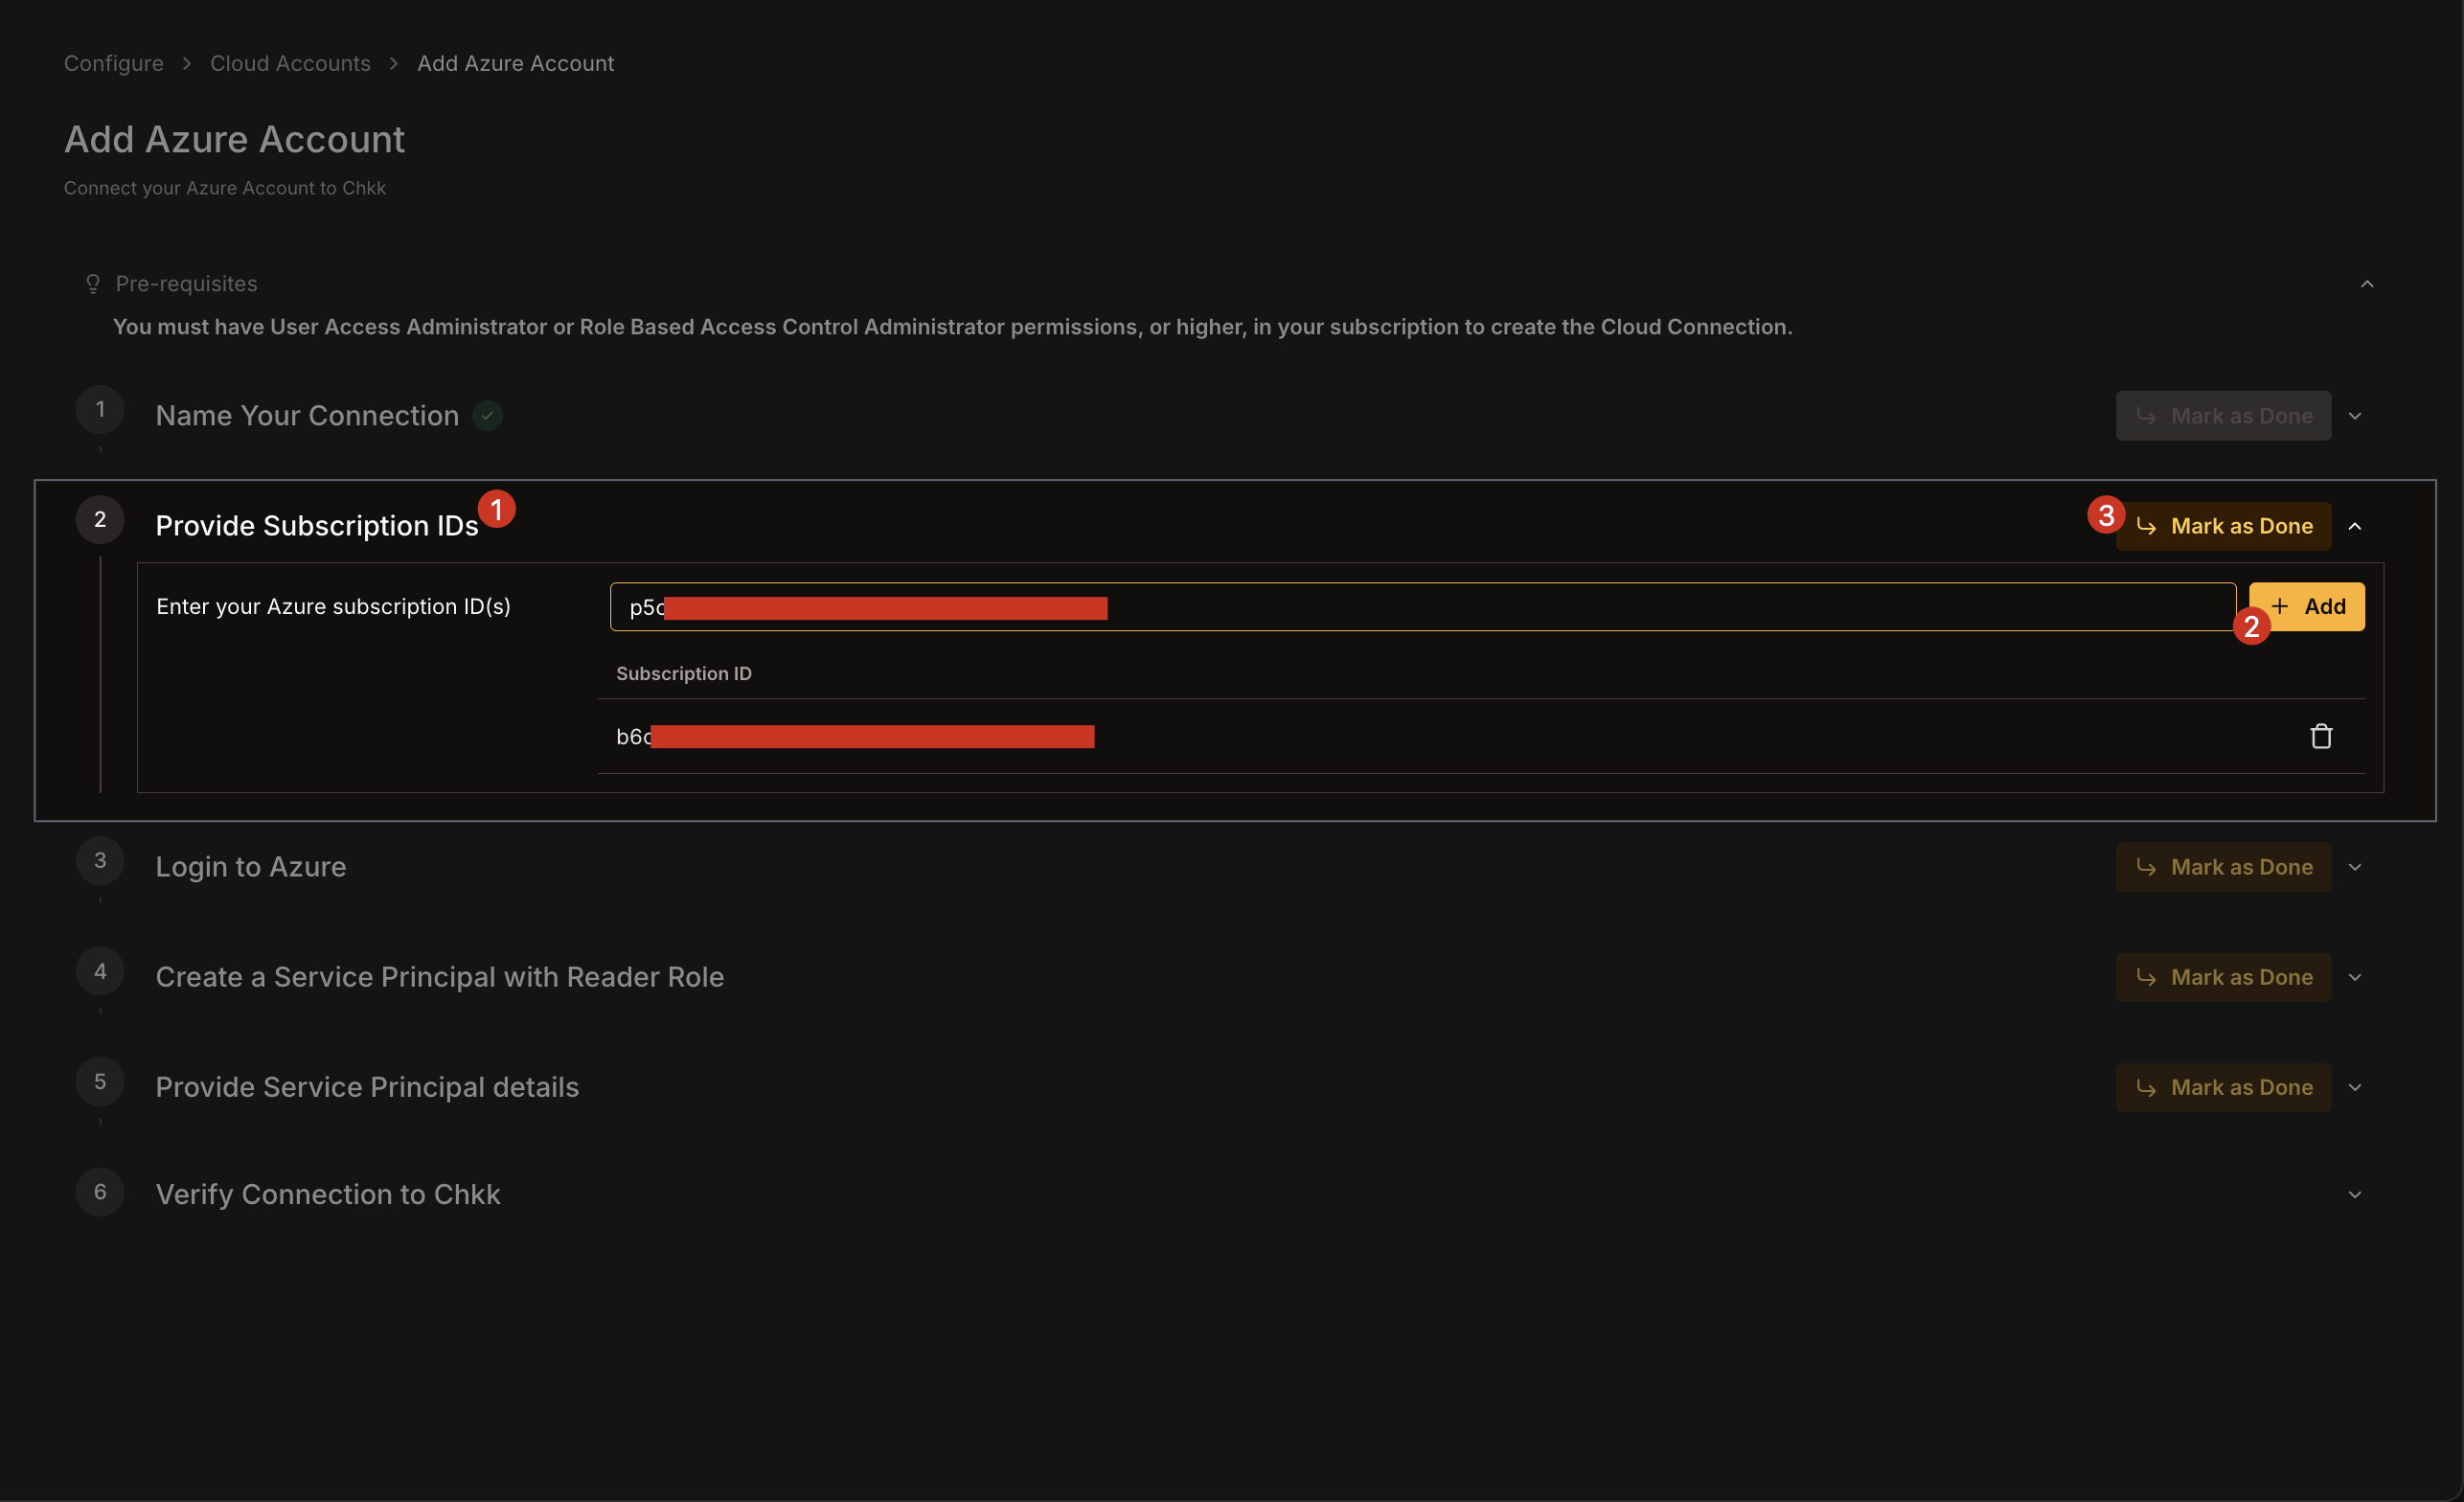
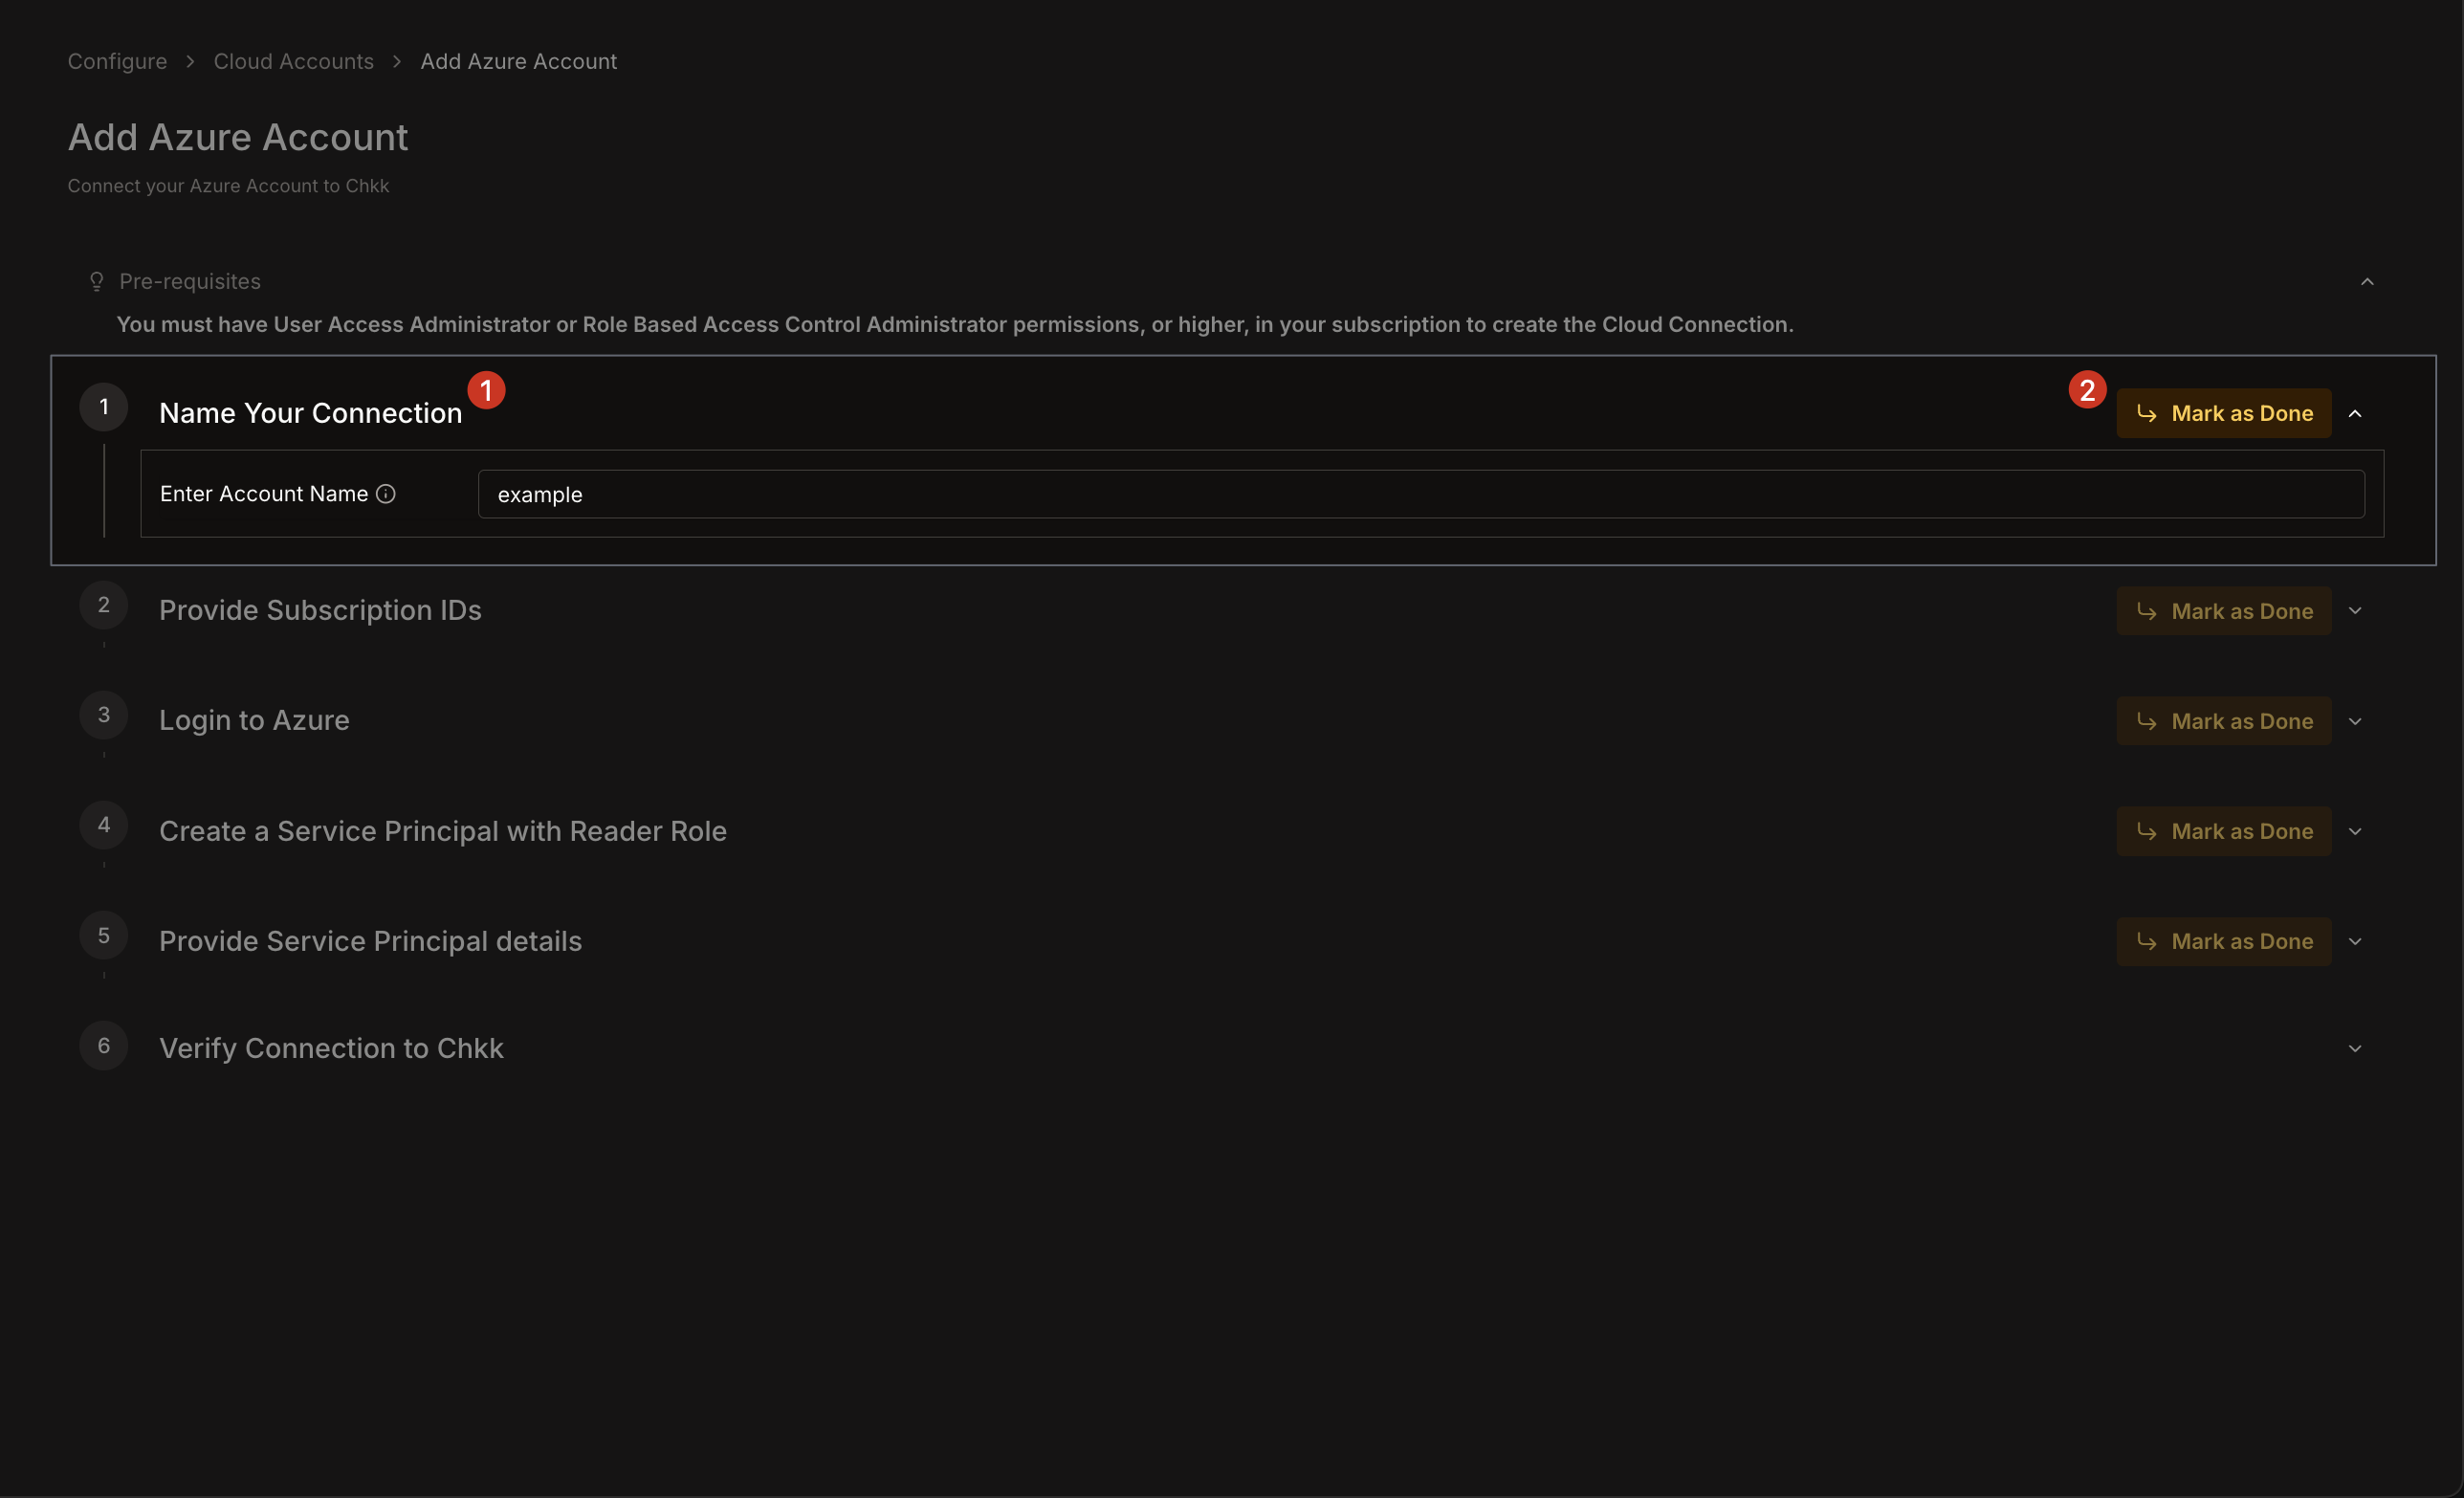 1. **Azure Subscription ID(s)**: Enter one or more Subscription IDs (e.g., `b6cbec...97995d`).
2. Click **Add** to include multiple subscription IDs if needed.
3. Click **Mark as done**.
1. **Azure Subscription ID(s)**: Enter one or more Subscription IDs (e.g., `b6cbec...97995d`).
2. Click **Add** to include multiple subscription IDs if needed.
3. Click **Mark as done**.
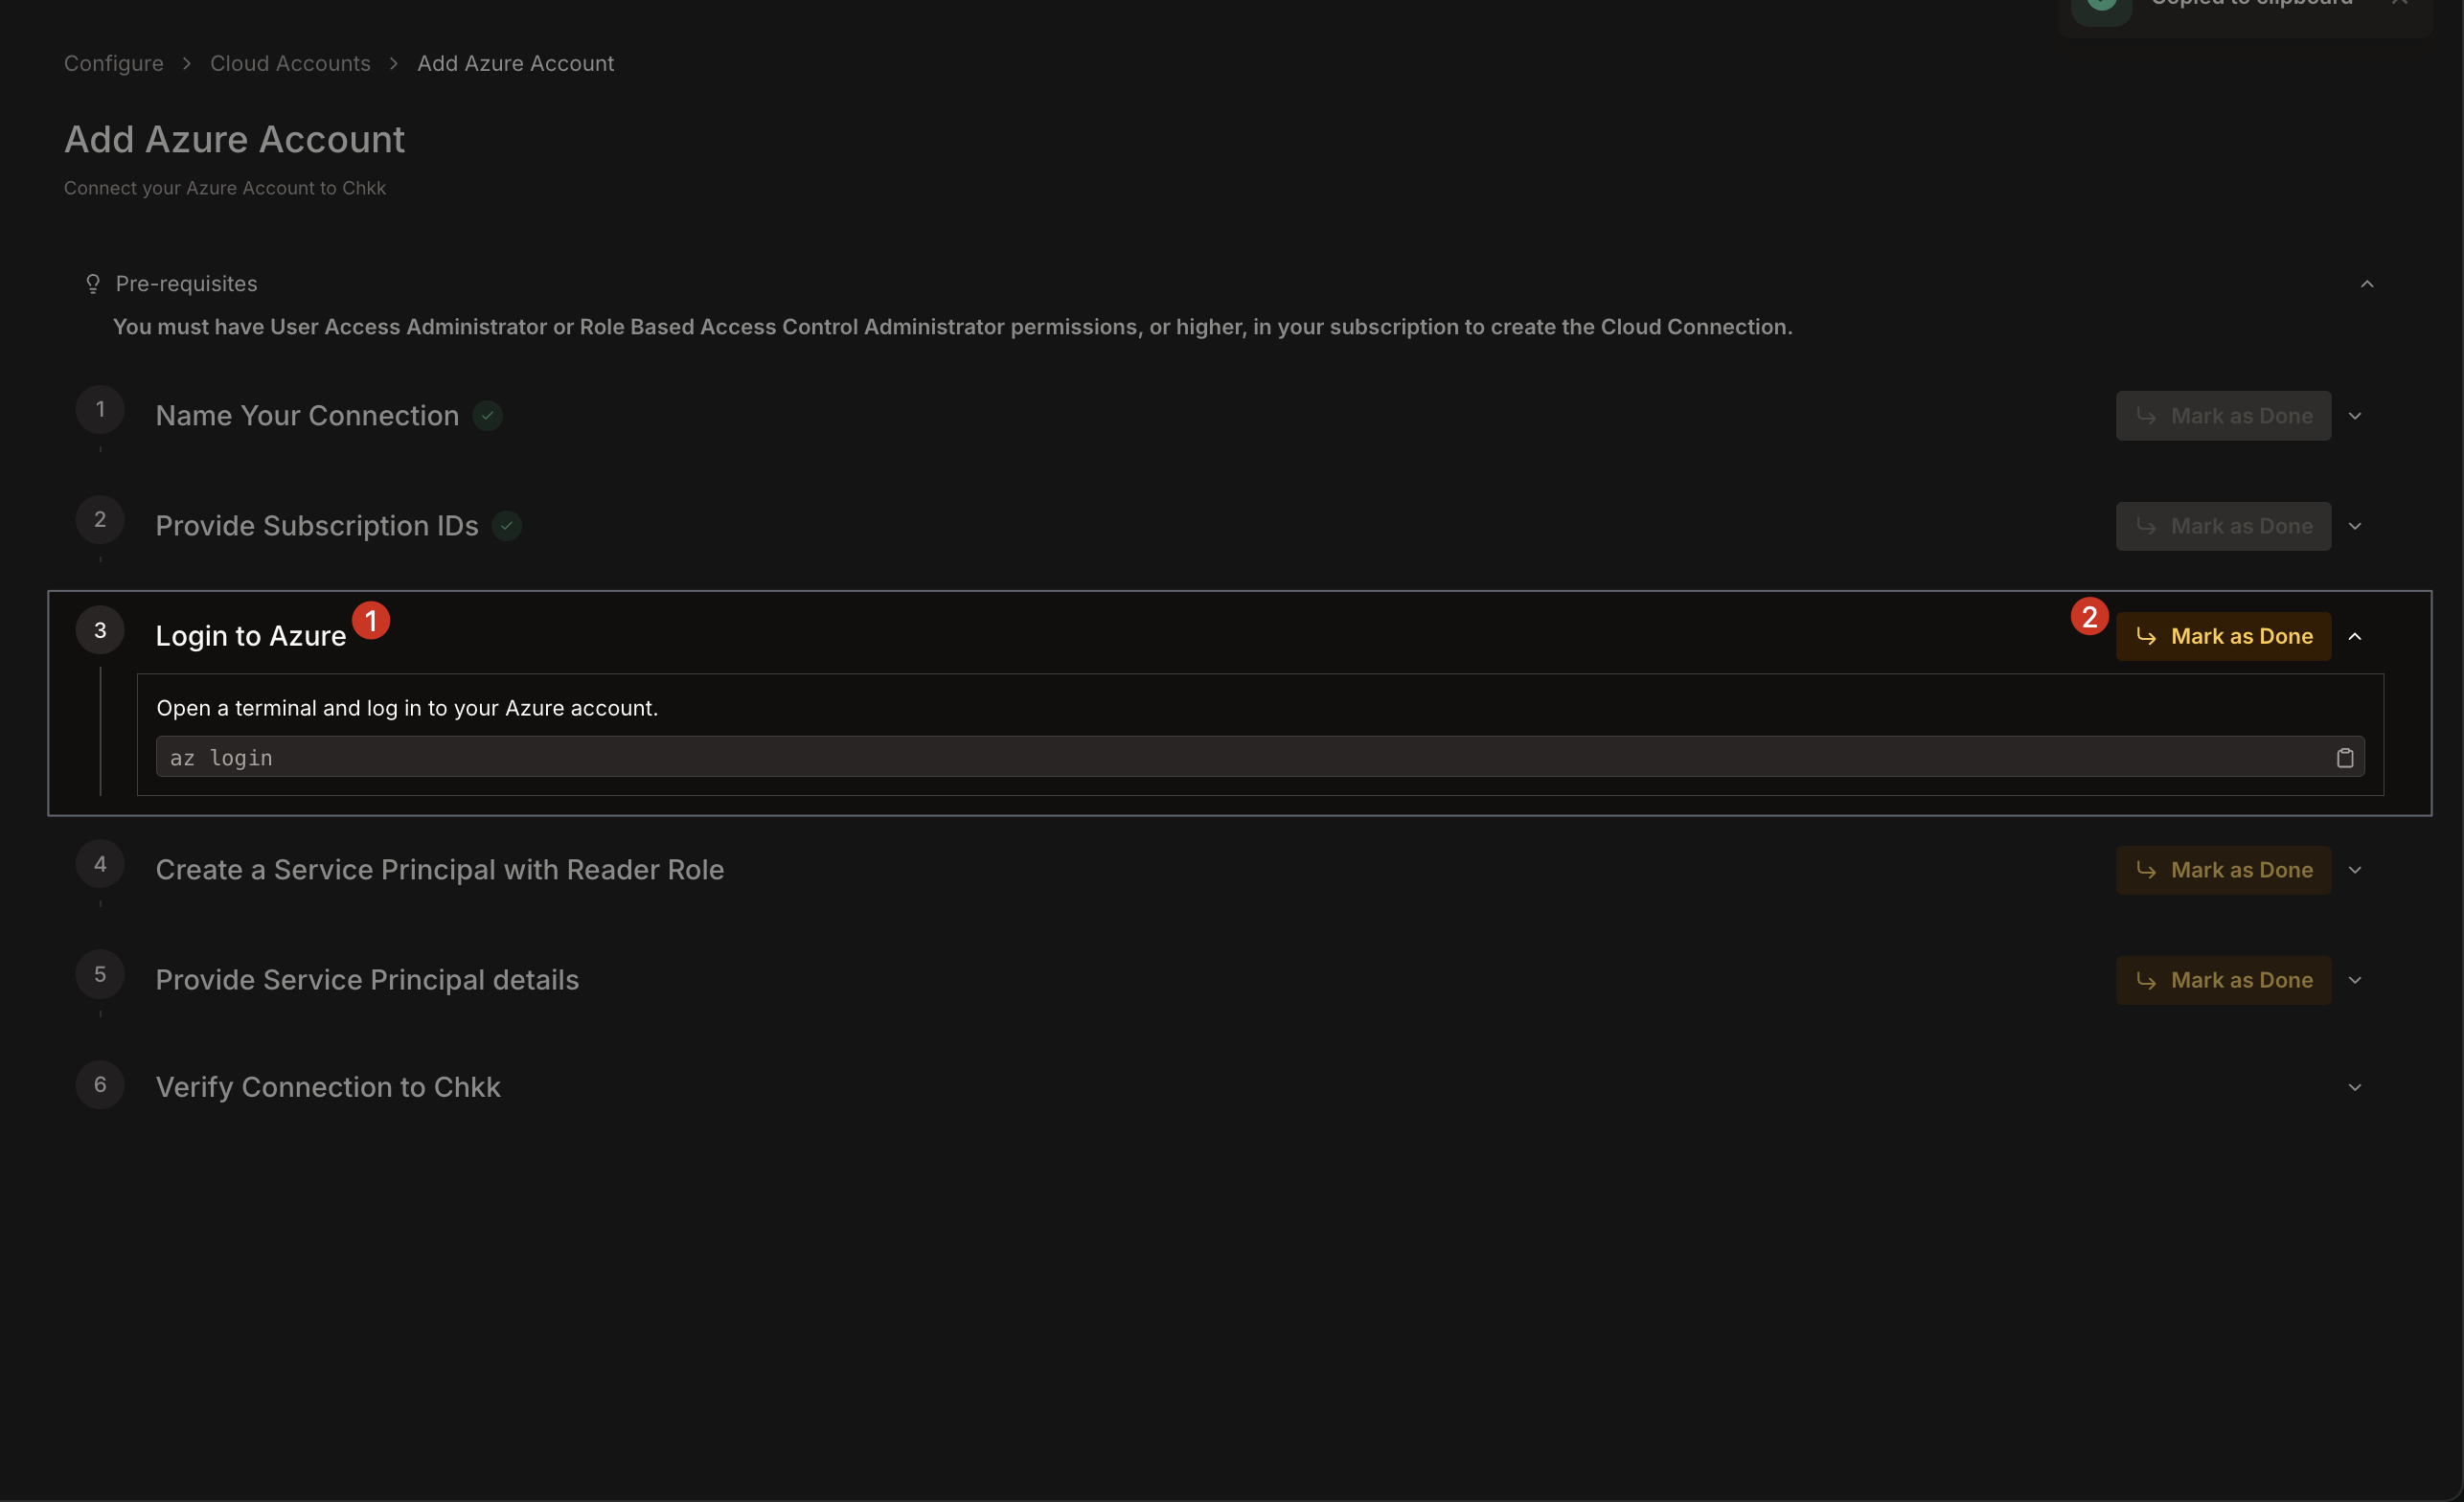
 1. Open a terminal and log in to your Azure account using the CLI.
```bash theme={"dark"}
az login
```
2. Once logged in, click **Mark as done**.
1. Open a terminal and log in to your Azure account using the CLI.
```bash theme={"dark"}
az login
```
2. Once logged in, click **Mark as done**.
 1. Run the following command to create a Service Principal that has the **Reader** role, scoped to your subscription:
```bash theme={"dark"}
az ad sp create-for-rbac \
--display-name "chkk-cloud-connect-example" \
--role Reader \
--scopes /subscriptions/
```
2. **Note the output** of this command—it includes your **tenant**, **appId** (client ID), and **password** (client secret).
3. Click **Mark as done**.
1. Run the following command to create a Service Principal that has the **Reader** role, scoped to your subscription:
```bash theme={"dark"}
az ad sp create-for-rbac \
--display-name "chkk-cloud-connect-example" \
--role Reader \
--scopes /subscriptions/
```
2. **Note the output** of this command—it includes your **tenant**, **appId** (client ID), and **password** (client secret).
3. Click **Mark as done**.
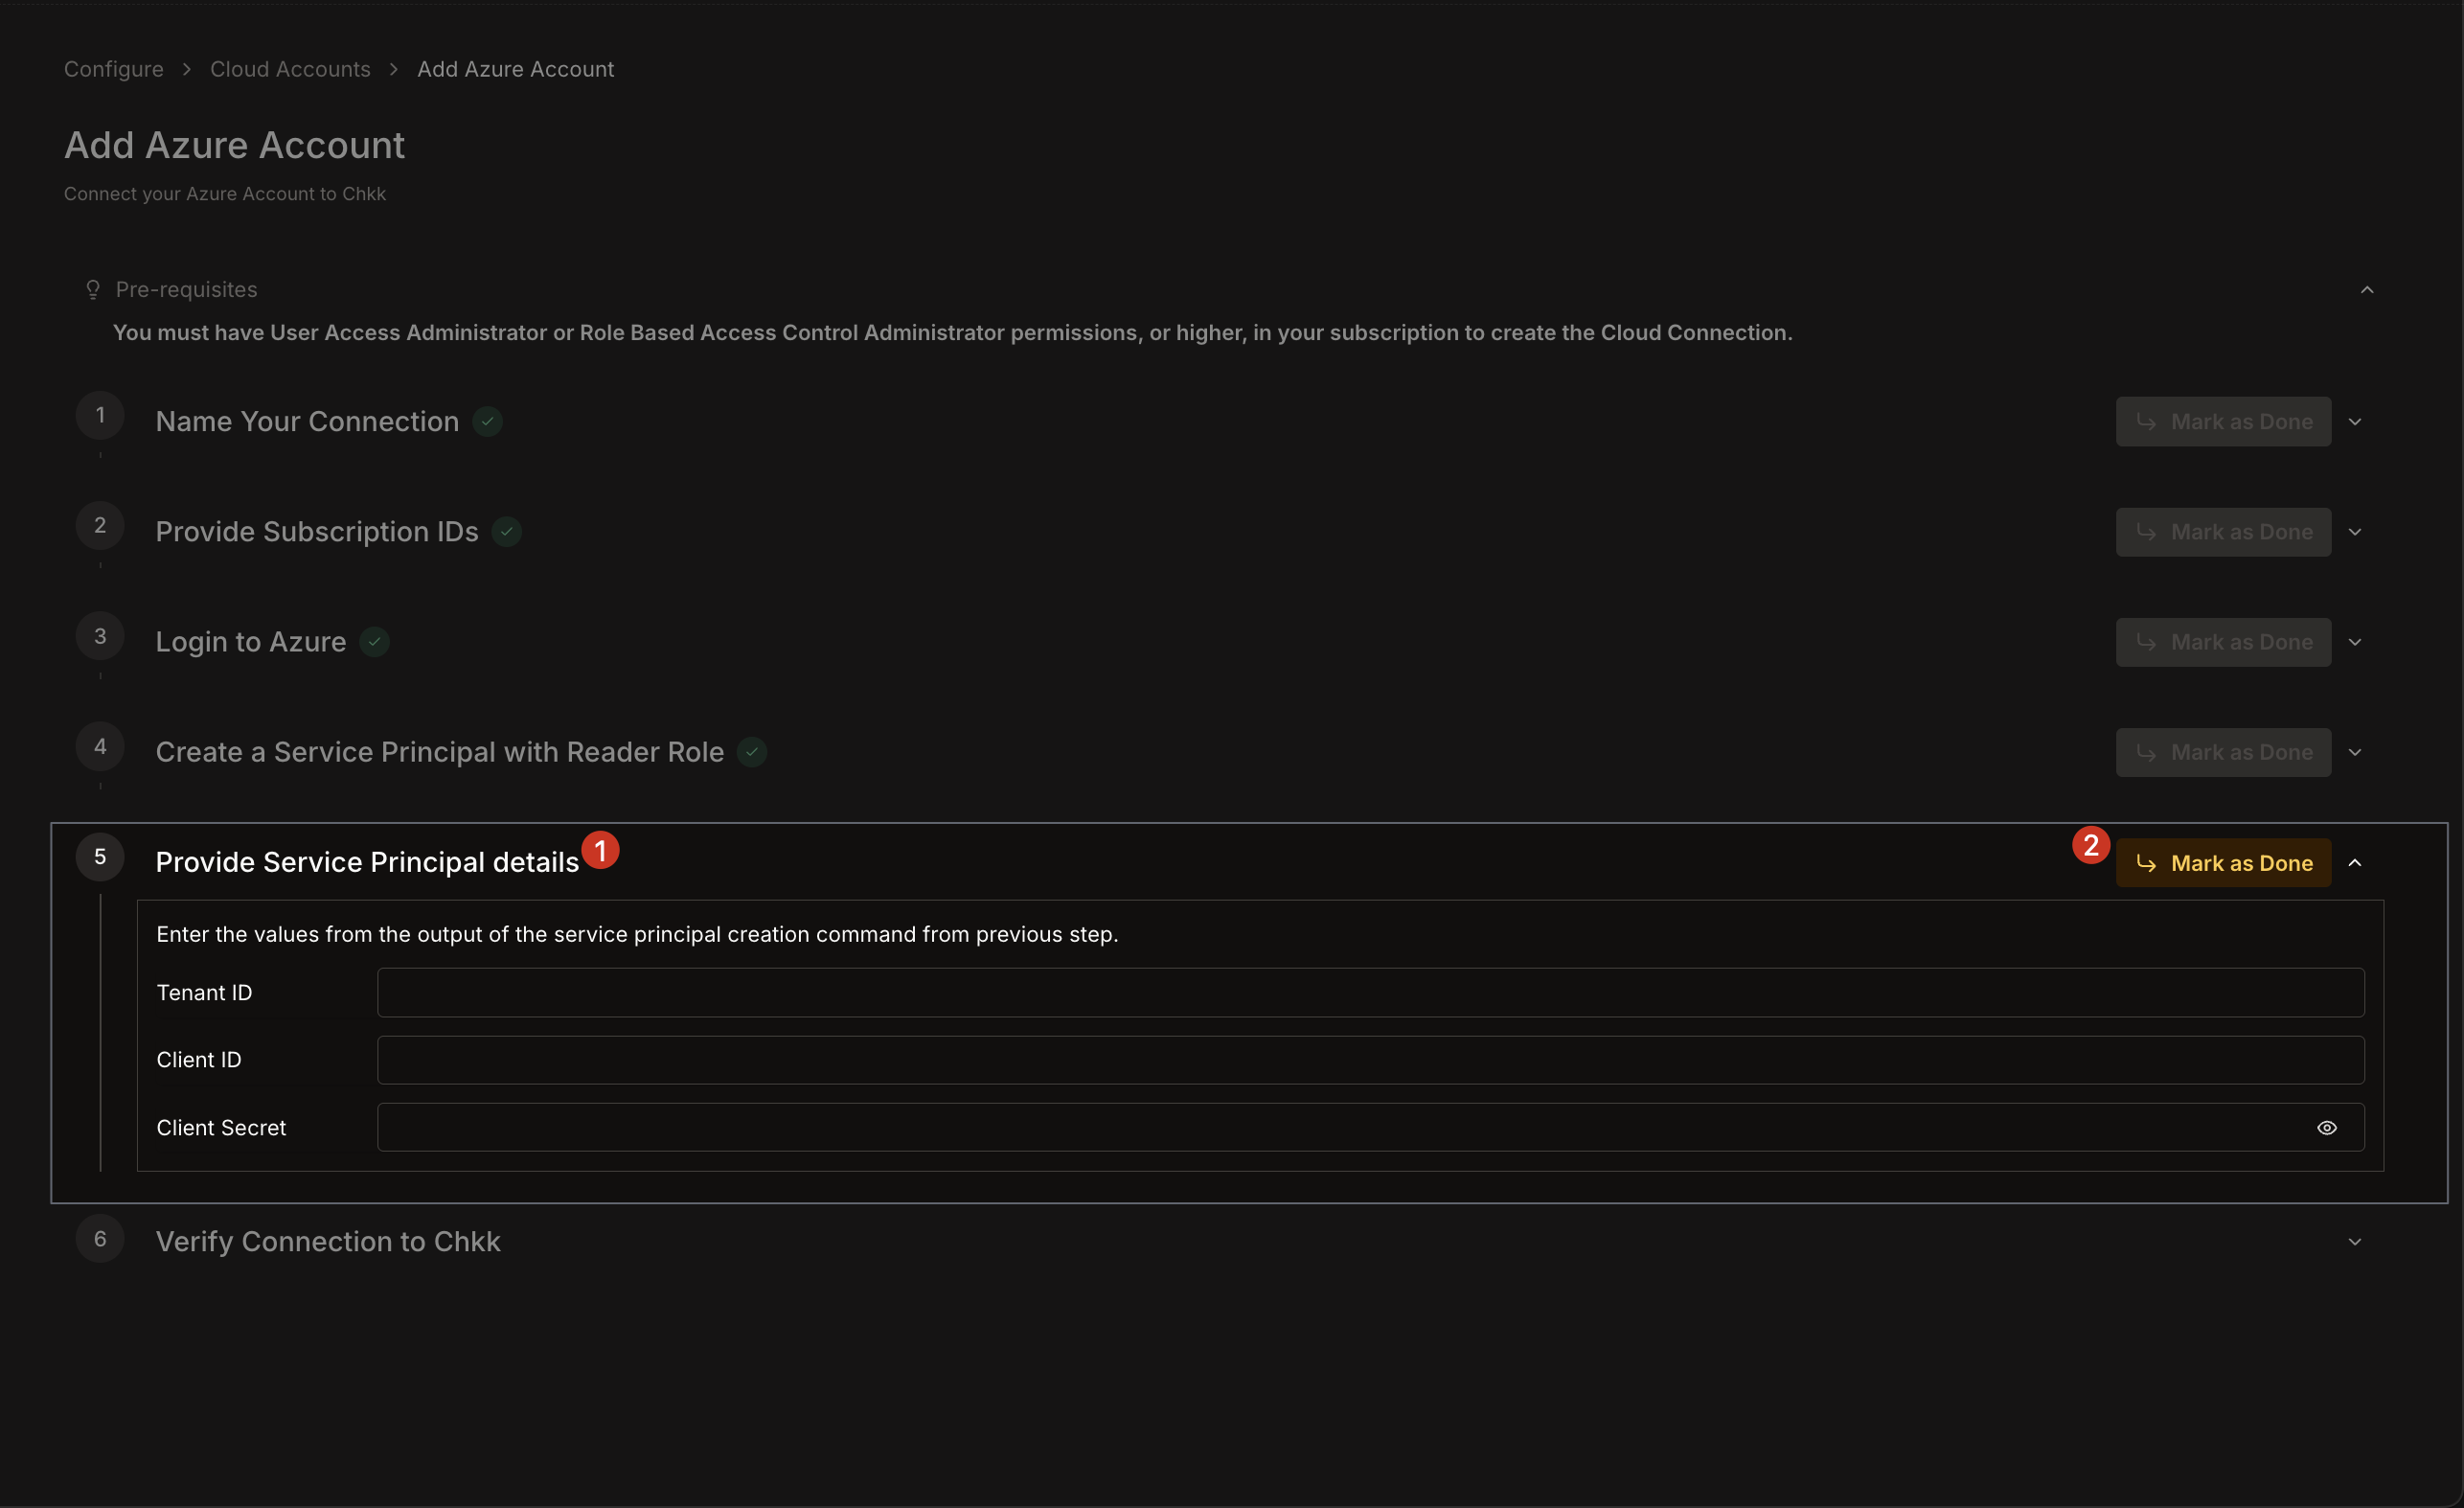
 1. Copy and paste the **Tenant ID**, **Client ID**, and **Client Secret** from the output of the previous command into the respective fields.
2. Click **Mark as done**.
1. Copy and paste the **Tenant ID**, **Client ID**, and **Client Secret** from the output of the previous command into the respective fields.
2. Click **Mark as done**.
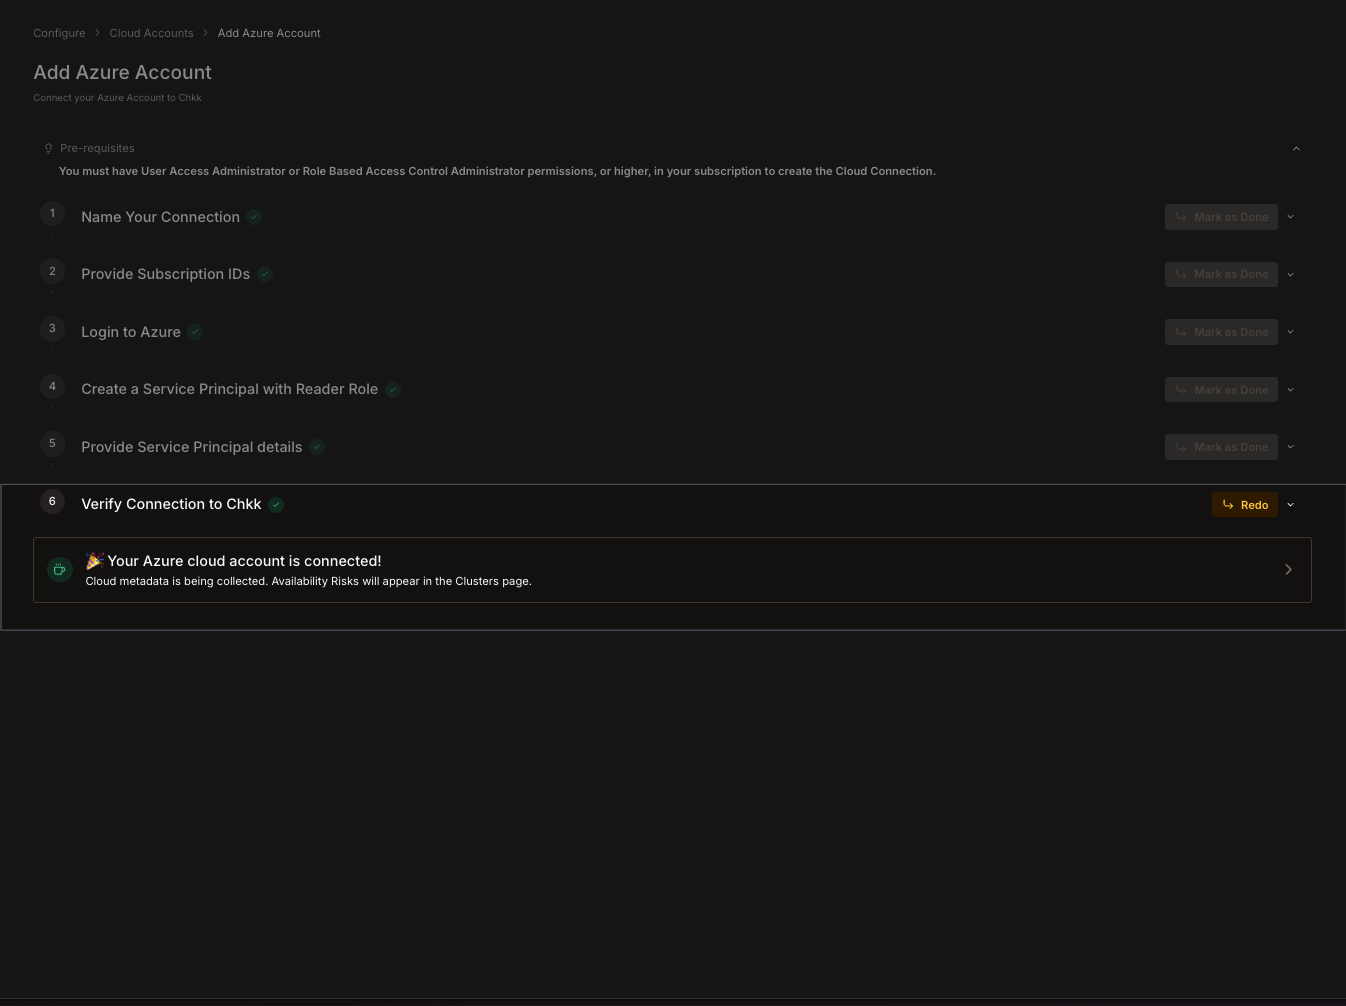
 1. After providing your Service Principal details, Chkk attempts to authenticate with Azure.
2. A success message indicates that your Azure account is now connected.
3. Use the **Redo** button if you need to retry or refresh the connection.
1. After providing your Service Principal details, Chkk attempts to authenticate with Azure.
2. A success message indicates that your Azure account is now connected.
3. Use the **Redo** button if you need to retry or refresh the connection.
 1. Navigate back to **Configure** -> **Cloud Accounts**.
2. Your Azure account appears in the list with a **Connected** status.
1. Navigate back to **Configure** -> **Cloud Accounts**.
2. Your Azure account appears in the list with a **Connected** status.